
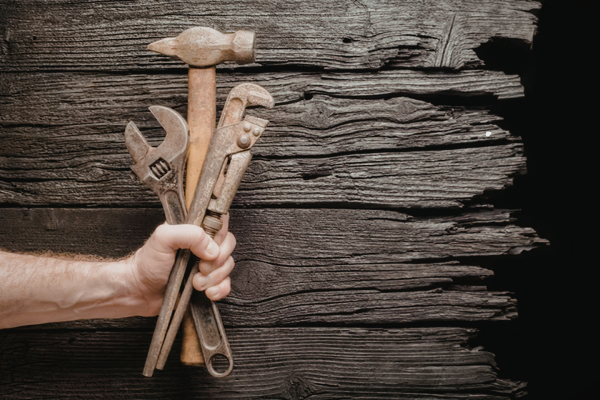
Rust is one of the most common problems affecting metal hand tools. A wrench left in a damp garage, a pair of pliers stored in an unprotected toolbox, or an old screwdriver found in a shed can develop anything from a few orange spots to extensive corrosion.
The good news is that surface rust does not automatically mean a tool has reached the end of its useful life. In many cases, light or moderate corrosion can be removed and the tool can be cleaned, protected, and returned to storage.
However, restoring a rusty tool is not simply a matter of removing every visible trace of corrosion as quickly as possible. Aggressive sanding, grinding, wire wheels, or harsh chemicals can remove the rust while also damaging the original finish or altering the working surfaces of the tool.
The best restoration process begins with an inspection. You need to determine how severe the corrosion is, which parts of the tool are affected, and whether the underlying metal remains sound. From there, use the least aggressive method that is appropriate for the condition of the tool.
This guide focuses primarily on ordinary household hand tools with surface or moderate rust. Tools with serious structural damage, heavily compromised working surfaces, or safety-critical defects may need professional evaluation or replacement rather than restoration.
Surface Rust vs. Serious Corrosion
Before removing anything, determine what kind of rust you are dealing with.
Light surface rust often appears as orange, reddish, or brown discoloration. The affected area may feel slightly rough but the original shape of the metal remains intact.
Moderate rust may produce a thicker crust or small areas of pitting. Some material has already been affected, but the tool may still retain its original dimensions and working surfaces.
Severe corrosion is different. Deep pits, significant loss of material, cracks associated with corrosion, heavily weakened components, or damaged load-bearing areas can make a tool unsafe or unsuitable for restoration.
This distinction matters because removing surface rust and restoring structurally compromised metal are two very different tasks.
A tool with cosmetic corrosion may need only cleaning and rust removal.
A heavily corroded tool may have a fundamental condition problem that no cleaning method can reverse.
Step 1: Inspect the Tool Before Cleaning It
Start with a thorough visual inspection.
Do not begin sanding or applying a chemical product immediately.
Look at the entire tool, including areas that are normally hidden during use.
Check:
- Working ends
- Handles
- Joints
- Threads
- Edges
- Grooves
- Corners
- Areas underneath moving parts
- Internal surfaces
- Signs of cracking
- Areas with deep pitting
For a wrench, examine the jaws and openings carefully.
For pliers, pay particular attention to the pivot and gripping surfaces.
For a screwdriver, inspect both the shaft and working tip.
For a hammer, inspect the head and the connection between the head and handle.
The purpose of this inspection is to establish whether you are dealing primarily with corrosion or with a combination of corrosion and mechanical damage.
Step 2: Remove Dirt and Grease First
Rust removal works better when the metal surface is reasonably clean.
Oil, grease, paint, and accumulated dirt can hide the extent of corrosion and interfere with some rust-removal methods.
Begin by removing loose dirt.
Use a cloth or soft brush to remove dust and debris.
If the tool is greasy, clean the grease before treating the rust. A mild detergent or suitable degreaser may be appropriate depending on the material and finish.
The tool should then be dried before proceeding.
This creates a cleaner surface and makes it easier to determine exactly where the corrosion begins and ends.
Step 3: Protect Yourself and Your Workspace
Rust restoration can involve brushes, debris, cleaning products, and potentially sharp edges.
Use appropriate protective equipment for the method you choose.
Safety glasses are particularly useful when brushing, scraping, or mechanically removing corrosion because small particles can become airborne.
Gloves may also be appropriate, but the correct type depends on the cleaning chemical being used. Chemical-resistant gloves suitable for the specific product are preferable to assuming that any household glove provides adequate protection.
Work in an area with appropriate ventilation whenever a chemical product requires it.
Keep cleaning products away from food, children, pets, and incompatible chemicals.
The manufacturer’s safety instructions for any commercial rust remover or degreaser should always take priority over general advice.
Step 4: Try Mechanical Cleaning First
For light surface rust, mechanical cleaning may be all that is necessary.
Start with a non-aggressive brush or abrasive suitable for the tool’s finish.
A nylon brush can remove loose contamination while creating relatively little risk of surface damage.
For unfinished steel, a more aggressive brush may be appropriate, but it should still be used carefully.
The basic principle is simple:
Remove corrosion without unnecessarily removing sound metal.
That means avoiding the temptation to keep scraping after the visible rust has been reduced.
On a tool with a polished or plated finish, aggressive mechanical cleaning can create scratches that are more permanent than the original rust spots.
Step 5: Use a Plastic Scraper for Thick Deposits
If corrosion has formed a loose, flaky layer, gently breaking away the loose material before using a chemical treatment can make the process easier.
A plastic scraper can be helpful for this purpose.
Work slowly and avoid forcing the scraper into the metal.
The objective is to remove material that is already loose, not to carve corrosion out of the tool.
For narrow areas, a suitable non-metallic pick or small brush may provide better control.
Take particular care around markings, edges, plated finishes, and precision surfaces.
Step 6: Decide Whether a Chemical Rust Remover Is Necessary
Once loose corrosion has been removed, assess what remains.
If only slight discoloration is present, a mechanical cleaning method may be sufficient.
If rust remains firmly attached or has penetrated textured areas, a commercial rust-removal product may be more appropriate.
Different rust removers work through different chemical processes, and they are not universally suitable for every material or finish.
Read the manufacturer’s instructions carefully.
Check:
- Compatible metals
- Recommended contact time
- Required dilution
- Rinsing requirements
- Protective equipment
- Ventilation requirements
- Disposal instructions
Do not assume that leaving a product on the tool longer will produce a better result.
Following the specified process helps control the amount of material being affected.
Step 7: Test the Method on a Small Area
If the tool has a valuable finish, test your selected method before treating the entire surface.
Choose an inconspicuous area.
Apply the method according to the product instructions and observe what happens.
You are looking for more than rust removal.
Check whether the surface:
- Changes color
- Loses its shine
- Becomes cloudy
- Develops stains
- Loses a coating
- Shows unexpected texture changes
If the test produces an undesirable result, stop before treating the rest of the tool.
A small test can prevent an entire tool from being accidentally damaged.
Step 8: Treat the Rust in Manageable Sections
For larger tools, work in small sections rather than covering everything at once.
This allows you to monitor the process and prevents you from losing track of how long a product has been in contact with the surface.
Work methodically.
For example, on a large wrench you might clean one side first, inspect the result, and then move to the opposite side.
On pliers, treat the outer surfaces separately from the pivot area.
This approach also makes it easier to stop if you notice that the method is affecting the finish.
Step 9: Be Careful With Chrome-Plated Tools
Chrome-plated tools deserve special attention.
The chrome layer is not the same thing as bare steel. Aggressive abrasive methods can damage or remove the plating, exposing the underlying metal.
Do not assume that every rust-colored mark on a chrome tool requires aggressive sanding.
Start with gentle cleaning.
If corrosion is primarily surface contamination, a mild treatment may be sufficient.
When corrosion has already penetrated or damaged the plating, complete cosmetic restoration becomes more complicated. Trying to remove every mark yourself may result in more visible damage.
For valuable or high-quality tools, preservation of the remaining finish may be more important than achieving a completely uniform appearance.
Step 10: Pay Attention to Threads and Joints
Rust around moving parts can be more serious than surface discoloration on a flat handle.
Threads can become rough and difficult to move.
Pivots can become stiff.
Adjustable mechanisms can begin to bind.
If a tool has a moving joint, clean it carefully and test its operation afterward.
Do not force a mechanism simply because rust is present.
If movement remains severely restricted after reasonable cleaning, the mechanism may have damage or significant corrosion that requires further assessment.
Cleaning should restore normal function where possible, not encourage you to apply increasing amounts of force.
Step 11: Rinse or Clean Away Residue as Required
If you use a rust-removal chemical, follow its instructions regarding rinsing and residue removal.
Some products require thorough rinsing after treatment. Others are designed to leave a protective layer or require a separate neutralization or cleaning step.
Do not improvise a chemical treatment based on assumptions.
After the rust-removal stage, the surface should be cleaned according to the product’s directions.
This is important because leftover chemical residue can continue affecting the surface or interfere with subsequent protective treatments.
Step 12: Dry the Tool Immediately
After any water-based cleaning or rinsing, dry the tool thoroughly.
Use a clean towel to remove surface moisture.
Then allow the tool to finish drying in a dry and ventilated area when appropriate.
Pay special attention to:
- Joints
- Threads
- Grooves
- Recesses
- Hollow areas
- Areas behind moving components
Bare steel can begin developing surface discoloration again if it is left exposed to moisture after rust removal.
Rust restoration therefore does not end when the orange material disappears.
Drying is part of the restoration process.
Step 13: Protect the Cleaned Metal
Once the tool is clean and completely dry, consider how the exposed metal will be protected.
The appropriate method depends on the tool and its intended use.
Protective products designed for tools and metal surfaces can provide a barrier against moisture and oxygen.
For frequently handled tools, use a product that does not create an unnecessarily heavy or sticky residue.
For long-term storage, a different corrosion-protection approach may be appropriate.
The important point is that rust removal without prevention is often temporary.
If the environmental conditions that caused the original rust remain unchanged, the corrosion can return.
Step 14: Inspect the Result
After restoration, inspect the tool again.
Do not judge the result only by appearance.
Ask whether:
- The rust has been removed sufficiently
- The working surfaces remain intact
- Moving mechanisms operate correctly
- The handle is sound
- No cracks are visible
- Threads remain usable
- The original finish has been preserved as much as reasonably possible
The tool does not have to look brand new.
A restored tool can retain discoloration or small cosmetic imperfections and still be perfectly useful.
Function and structural condition matter more than achieving a flawless appearance.
What About Deep Pitting?
Deep pitting deserves careful consideration.
Rust consumes metal. Once material has been lost, removing the remaining corrosion cannot recreate the original metal.
You can remove the active corrosion and improve the appearance, but you cannot simply clean a deeply pitted area back to its original dimensions.
Whether the tool remains usable depends on where the material has been lost and what role that area plays.
Cosmetic pitting on a non-critical surface is different from severe material loss on a working jaw, cutting edge, load-bearing component, or other critical area.
When in doubt, prioritize safety over appearance.
Should You Sand a Rusty Tool?
Sanding can be appropriate for some unfinished metal tools, especially when corrosion needs mechanical removal.
However, it removes material along with the rust.
The more aggressively you sand, the greater the possibility of changing the tool’s surface geometry or finish.
Avoid using coarse abrasives simply because they remove rust quickly.
For finished, plated, precision, or valuable tools, a less aggressive approach may be preferable.
If sanding is appropriate, use controlled pressure and inspect the surface frequently rather than removing large amounts of material at once.
Should You Use a Wire Wheel?
A wire wheel can remove corrosion quickly, especially from unfinished steel.
But speed comes with trade-offs.
A rotating wire wheel is much more aggressive than hand brushing. It can alter surfaces, remove coatings, create scratches, and produce airborne debris.
It is therefore not a universal solution for household tools.
For a small amount of surface rust on a finished wrench, using a power wire wheel simply because one is available may create more damage than the original corrosion caused.
Choose the least aggressive practical method first.
How to Prevent Rust From Returning
Restoration should end with prevention.
Start by identifying why the tool rusted in the first place.
Common causes include:
- High humidity
- Condensation
- Wet storage
- Incomplete drying
- Exposure to corrosive substances
- A damaged protective finish
- Long-term storage without protection
Keeping tools dry is fundamental.
Store them in an environment where moisture is controlled as much as practical.
Avoid returning damp tools to a closed toolbox.
Periodically inspect tools that are stored in garages, sheds, basements, or other areas with significant humidity.
For corrosion-sensitive metal surfaces, an appropriate protective treatment can provide an additional barrier.
When a Rusty Tool Should Be Replaced
Restoration is not always the right answer.
Consider replacement when corrosion has caused:
- Serious cracking
- Significant loss of material
- Damaged working surfaces
- Severe deformation
- Unreliable mechanisms
- Unsafe handles
- Structural weakness
A cheap tool with extensive structural corrosion may not justify hours of restoration.
A high-quality specialty tool may be worth professional restoration.
The correct decision depends on the tool’s condition, value, role, and safety requirements.
The important thing is not to confuse cosmetic restoration with structural repair.
A Simple Rust Restoration Checklist
For ordinary surface rust, the process can be summarized as:
1. Inspect the tool.
Determine whether the problem is surface corrosion or serious damage.
2. Clean the tool.
Remove dirt, grease, and residue.
3. Remove loose rust.
Use a suitable brush or scraper.
4. Choose a rust-removal method.
Start with the least aggressive suitable approach.
5. Test first.
Check an inconspicuous area when the finish is important.
6. Treat the remaining corrosion.
Follow the instructions for any commercial product used.
7. Clean away residue.
Rinse or wipe as required.
8. Dry completely.
Do not return a damp tool to storage.
9. Protect the metal.
Use an appropriate protective treatment when necessary.
10. Inspect the finished tool.
Check both appearance and mechanical condition.
Final Thoughts
Restoring a rusty hand tool is often possible when the corrosion is primarily superficial, but good restoration is about more than making the metal shiny again.
The first step is understanding the condition of the tool. Surface rust, moderate corrosion, deep pitting, and structural damage require different decisions.
Start with cleaning and inspection. Remove loose corrosion without aggressively attacking sound metal. Use chemical rust removers only when they are appropriate for the tool’s material and finish, and test unfamiliar methods before treating valuable surfaces.
Once the rust has been removed, dry the tool thoroughly and protect it from the conditions that caused the corrosion in the first place.
A successful restoration leaves the tool clean, functional, and stable without unnecessarily sacrificing its original finish or geometry.
In many cases, the best-looking restoration is not the one that removes every microscopic mark. It is the one that removes active corrosion, preserves useful metal, restores normal function, and prevents the same problem from returning.
Related Guides
- How to Clean Hand Tools After Heavy Use Without Damaging the Finish
- How to Clean Greasy Wrenches, Pliers, and Sockets at Home
- How to Remove Dried Paint From Metal Tools Without Scratching Them
- How to Prevent Rust on Hand Tools in a Humid Garage
- How to Store Metal Tools During Long Periods of Humidity
FAQ
Can a rusty hand tool always be restored?
No. Light and moderate surface corrosion can often be treated, but deep pitting, serious material loss, cracks, severe deformation, or structural damage may make replacement or professional evaluation more appropriate.
What should I do before removing rust?
Clean away dirt and grease and inspect the entire tool. Understanding the condition and finish helps you choose a method that removes corrosion without unnecessarily damaging the tool.
Is sanding safe for rusty tools?
Sanding can be appropriate for some unfinished metal surfaces, but it removes material along with the rust. It should be used carefully on tools where surface dimensions or finishes matter.
Should I remove all discoloration after rust removal?
Not necessarily. Some staining or cosmetic discoloration may remain even after active corrosion has been removed. Removing every mark can sometimes require aggressive treatment that damages the original surface.
How can I keep a restored tool from rusting again?
Keep it dry, prevent prolonged exposure to humid conditions, inspect it periodically, and use an appropriate protective treatment when necessary. Storage conditions are just as important as the rust-removal process.
Is deep pitting repairable?
Rust can be removed from a pitted surface, but lost metal cannot simply be restored through cleaning. Whether the tool remains suitable depends on the location and severity of the material loss and the function of the affected area.
