
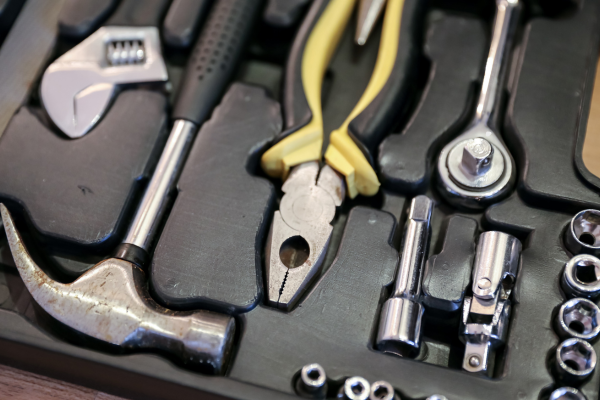
Grease is one of the most common types of contamination found on hand tools. Wrenches, pliers, sockets, ratchets, and similar tools can quickly become coated with oil and grease during automotive work, machinery maintenance, bicycle repairs, or even ordinary household projects.
A greasy tool is not necessarily a damaged tool. In fact, many hand tools remain perfectly functional after years of use. The problem begins when layers of grease collect dust, trap moisture, make moving mechanisms difficult to inspect, or transfer onto hands and other objects.
Cleaning greasy tools at home does not require an elaborate workshop. The important part is using the right sequence. Removing the thickest layer first, choosing an appropriate cleaner, working in manageable sections, protecting moving mechanisms, and drying the tools thoroughly will usually produce much better results than simply soaking everything in a strong chemical.
The method also needs to account for the tool’s finish. A chrome-plated wrench, a black-finished socket, a painted tool, and a tool with rubberized grips should not automatically receive identical treatment.
Why Grease Is So Difficult to Remove
Grease is designed to resist water, which is one reason it works well as a lubricant and protective substance.
This also explains why simply washing a greasy wrench under running water is rarely enough.
When grease mixes with dust, metal particles, soil, and other debris, it can form a thick abrasive layer. That layer can work its way into joints, threads, grooves, and textured surfaces.
There is another problem: grease can hide the actual condition of a tool.
A thick coating may conceal:
- Surface rust
- Cracks
- Worn edges
- Damaged jaws
- Deformed surfaces
- Excessive wear
- Loose components
Cleaning therefore serves two purposes. It removes contamination and gives you an opportunity to inspect the tool.
Before Cleaning, Identify the Tool
Start by looking at the tool itself.
Most ordinary hand tools are made from steel or steel alloys, but they can have different surface treatments. Common examples include chrome plating, polished finishes, black oxide coatings, paint, powder coating, and other protective treatments.
The handle may also contain plastic, rubber, or composite materials.
These differences matter because a degreaser that works well on bare metal may not be appropriate for every finish.
If the manufacturer provides maintenance instructions, those should take priority.
When the finish is unknown, start with a mild method and test the cleaner on a small, inconspicuous section.
A successful cleaning process should remove the grease without:
- Discoloring the surface
- Removing a protective finish
- Softening plastic
- Affecting rubber
- Leaving a harmful residue
What You Need
A simple home cleaning setup can include:
- Disposable paper towels or shop towels
- Microfiber cloths
- A soft nylon brush
- An old toothbrush
- Mild dish detergent
- Warm water
- A small container
- A suitable degreaser
- Dry towels
- Gloves appropriate for the cleaning product
For very greasy tools, having several cloths available is useful. A cloth that is already saturated with grease quickly becomes ineffective.
You may also want a tray or shallow container to keep small parts organized.
Avoid using food preparation surfaces for cleaning greasy tools. A garage workbench, utility sink, or other appropriate workspace is preferable.
Step 1: Remove the Thickest Grease First
Do not begin by immediately adding water.
Instead, use a dry towel to wipe away the thickest layer of grease.
This first pass may seem insignificant, but it prevents you from turning a heavy grease coating into a larger oily mess.
Work from the cleanest sections toward the dirtiest sections.
On a wrench, pay attention to the open or box end and the area around the handle.
On pliers, concentrate on the jaws and pivot joint.
On sockets, inspect the inside opening and the external grooves.
With a ratchet, pay special attention to the head and the mechanism.
Do not press aggressively into moving mechanisms while removing the initial layer. The goal at this stage is simply to remove material that can be wiped away easily.
Step 2: Brush Away Loose Dirt
Once the heavy grease is removed, use a dry soft-bristled brush to loosen particles that remain attached.
A toothbrush works well for small grooves and corners.
Brush around:
- Serrations
- Threads
- Pivots
- Socket walls
- Corners
- Tool markings
- Textured handles
This step is especially useful when the grease has mixed with dust.
Avoid using a wire brush on delicate finishes simply because it removes dirt faster. Mechanical cleaning should be appropriate for the surface being treated.
Step 3: Try Mild Dish Detergent First
For moderate grease, warm water and a small amount of ordinary dish detergent can be a useful first cleaning method.
Apply the solution to a cloth or soft brush instead of automatically immersing the entire tool.
Work over one section at a time.
For an adjustable wrench, for example, you can concentrate on the moving jaw and exposed threads separately from the handle.
For pliers, work around the pivot without flooding the joint.
The objective is to loosen the grease while maintaining control over the amount of water introduced into the tool.
Step 4: Use a Degreaser When Necessary
Heavy grease may require a dedicated degreaser.
Before using one, read the label and confirm that it is suitable for the materials you are cleaning.
Apply a controlled amount rather than flooding the entire tool.
Allow the product to work according to its instructions, then wipe away the loosened grease.
For stubborn areas, a soft brush can help break up the residue.
Do not assume that leaving a chemical on the tool for longer will always produce better results. Different formulations have different recommended contact times, and exceeding those instructions can increase the risk of surface damage.
Chrome-Plated Wrenches Need Extra Care
Chrome-plated tools are common because the finish provides corrosion resistance and a clean appearance.
However, aggressive cleaning can damage the plating.
Avoid attacking stubborn grease with coarse abrasives or aggressive scraping.
A mild cleaner, soft brush, and cloth should generally be the starting point.
If the grease is concentrated around a small area, treat that area rather than exposing the entire tool to a stronger chemical.
When cleaning chrome-plated tools, the goal is not just to remove contamination. It is to preserve the finish that protects and identifies the tool.
How to Clean Grease From Pliers
Pliers present a particular challenge because the pivot can collect grease mixed with dust.
Start by wiping the outside surfaces.
Then use a soft brush to loosen contamination around the joint.
Open and close the pliers gently during inspection. Do not force them if movement is restricted.
If grease is mixed with hard debris inside the joint, continued forcing can push the contamination deeper into the mechanism.
Once the joint has been cleaned and dried, determine whether it actually needs lubrication.
Not every tool benefits from additional lubricant after every cleaning. Excess lubricant can attract dust and turn the joint into another accumulation point.
When lubrication is appropriate, use the product and quantity recommended for that type of mechanism.
How to Clean Sockets
Sockets often look clean from the outside while retaining residue inside.
After removing external grease, inspect the internal opening.
Use a suitable brush to remove accumulated material.
Pay attention to the corners and surfaces where a bolt or nut contacts the socket.
Do not use oversized tools or aggressive objects that can deform the working surfaces.
After cleaning, make sure the socket is completely dry before returning it to a storage case.
Moisture left inside a socket can contribute to corrosion that is difficult to notice until the tool is needed again.
How to Clean an Adjustable Wrench
Adjustable wrenches deserve special attention because the moving jaw and threads can trap contamination.
Begin by removing visible grease.
Then brush the exposed threads gently.
Move the adjustable jaw through its range gradually while inspecting the mechanism.
Do not force a jammed jaw.
If the mechanism remains difficult to move after cleaning, there may be corrosion, damage, or mechanical wear that requires additional attention.
Once the mechanism is clean and dry, follow the manufacturer’s recommendations regarding lubrication.
The objective is smooth, controlled movement rather than a mechanism covered in oil.
Should You Soak Greasy Tools?
Soaking can be convenient, but it is not automatically the best method.
A tool with simple construction and no vulnerable materials may tolerate immersion in an appropriate cleaning solution, but many household tools contain moving mechanisms, cavities, plastic components, or materials that should not be soaked.
Long exposure to water also creates a drying problem.
For routine household maintenance, controlled cleaning is often preferable.
Apply the cleaner where the contamination exists, brush it, wipe it, and then dry the tool.
This minimizes unnecessary exposure.
How to Handle Grease on Rubber or Plastic Handles
Handles often require a different approach from the metal portion of a tool.
Strong solvents can affect certain plastics and rubber compounds.
Start with mild soap and water when compatible with the material.
Do not assume that because a chemical is safe for steel it is safe for every component of the tool.
If a degreaser must be used, check the manufacturer’s compatibility information.
When cleaning a rubberized handle, avoid aggressive scrubbing that can change the surface texture or accelerate wear.
The handle should finish clean without becoming excessively dry, sticky, or damaged.
Drying Is Part of the Cleaning Process
A tool is not finished simply because it looks clean.
After cleaning, remove as much moisture as possible with a dry towel.
Pay particular attention to:
- Pivot joints
- Threads
- Socket interiors
- Grooves
- Recessed markings
- Ratchet mechanisms
Allow the tool to finish drying in a dry, ventilated location.
Do not immediately close wet tools inside a toolbox.
If the tool has exposed carbon steel or another corrosion-sensitive surface, appropriate rust protection may be necessary after cleaning and drying.
Use only a suitable protective product and follow the manufacturer’s instructions.
What You Should Avoid
Several cleaning mistakes are common.
Do not mix cleaning chemicals
Combining products can create dangerous or unpredictable reactions. Use one product at a time and follow its instructions.
Do not use gasoline as a general-purpose cleaner
Household tool maintenance does not justify using highly flammable fuels as improvised degreasers. There are safer products designed for cleaning and degreasing.
Do not use a wire wheel on every tool
A wire wheel can remove material and alter finishes. It is a much more aggressive method than ordinary cleaning.
Do not leave tools wet
Moisture is one of the easiest ways to turn a successful cleaning job into a corrosion problem.
Do not flood moving mechanisms
Excess liquid can enter areas that are difficult to dry.
Do not use more lubricant than necessary
Excess oil attracts dust and can make future cleaning more difficult.
What to Do With Extremely Greasy Tools
If a tool is heavily contaminated, divide the job into stages.
First, remove the bulk grease with dry towels.
Second, brush away loose contamination.
Third, use an appropriate cleaning solution.
Fourth, wipe and repeat where necessary.
Finally, dry and inspect the tool.
Trying to remove a thick grease coating in one pass often wastes cleaning product and makes the workspace unnecessarily messy.
A staged approach gives you more control.
How to Know Whether the Tool Is Clean
A clean tool does not need to look factory-new.
The important questions are:
Is the major grease removed?
Can you see the working surfaces clearly?
Do moving parts operate normally?
Is there hidden corrosion?
Is the tool completely dry?
Is the handle still in good condition?
Is there any damage that requires attention?
If the answer to those questions is satisfactory, the tool has probably received the practical maintenance it needs.
Cosmetic perfection should not be the goal if achieving it would risk damaging the original finish.
A Simple Cleaning Routine for Household Tools
You can keep the process simple by using a basic routine.
After a particularly dirty job, wipe tools before putting them away.
When grease is visible, perform a deeper cleaning rather than allowing several layers to accumulate.
During deeper maintenance, inspect moving components and working surfaces.
Before long-term storage, make sure tools are completely dry.
Periodically inspect the toolbox itself. A dirty or damp storage environment can undo the work you put into cleaning your tools.
The objective is consistency rather than perfection.
Ten minutes of maintenance after several demanding projects can be much easier than restoring a toolbox full of neglected tools later.
Final Thoughts
Cleaning greasy wrenches, pliers, and sockets at home is mostly a matter of using the correct sequence.
Remove heavy contamination before adding water. Start with mild cleaning methods. Use stronger degreasers only when necessary and only after confirming that they are compatible with the tool’s materials and finish.
Treat moving parts carefully, protect plastic and rubber components, and pay particular attention to chrome-plated surfaces.
Most importantly, use the cleaning process as an opportunity to inspect your tools. Grease can hide corrosion, cracks, worn mechanisms, and other problems that are much easier to identify once the surface is clean.
A well-maintained tool does not need to look untouched. It needs to be clean enough to inspect, protected enough to resist deterioration, and mechanically sound enough to perform the job it was designed to do.
Related Guides
- How to Clean Hand Tools After Heavy Use Without Damaging the Finish
- How to Restore a Rusty Hand Tool Step by Step
- How to Remove Dried Paint From Metal Tools Without Scratching Them
- How to Remove Adhesive Residue From Metal Tools
- How to Tell Whether a Dirty Tool Needs Cleaning, Lubrication, or Replacement
FAQ
Can I use dish soap to clean greasy hand tools?
Mild dish soap can work well for light to moderate grease when it is compatible with the tool’s materials. It may not be sufficient for heavy, hardened grease, in which case an appropriate degreaser may be necessary.
Should I soak my wrenches in degreaser?
Not automatically. Soaking exposes the entire tool to the product and can create problems with finishes, plastic components, rubber, and drying. Controlled application is often a better starting point.
How do I clean grease from plier joints?
Remove the outer grease first, then use a soft brush to clean around the pivot. Move the pliers gently while inspecting the joint. If movement remains abnormal after cleaning, the problem may involve wear, corrosion, or damage rather than dirt alone.
How do I clean the inside of sockets?
Remove external grease first, then use a suitable soft brush to clean the inside. Pay attention to residue around the contact surfaces, and make sure the socket is thoroughly dry before storage.
Should I lubricate tools after removing grease?
Only when lubrication is appropriate for the specific mechanism. Some moving tools benefit from a small amount of suitable lubricant, while excessive lubricant can attract dust and create another maintenance problem.
How often should greasy tools be cleaned?
There is no universal schedule. Clean tools whenever significant grease or debris accumulates, after particularly dirty jobs, before long-term storage, and whenever contamination makes inspection or normal operation more difficult.
