
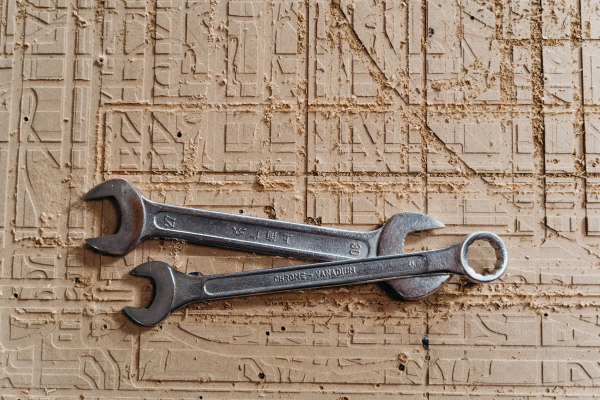
Removing rust from a steel tool is only the first part of corrosion control. Once oxidation has been removed, the exposed steel is often more vulnerable to moisture because the previous layer of rust, paint, oil, plating, or protective coating may no longer be present.
Bare steel can begin developing new surface oxidation when exposed to humidity and oxygen. In a damp garage, shed, workshop, or toolbox, this process can happen surprisingly quickly. For that reason, protecting the metal after rust removal is an important part of proper tool maintenance.
The best protection method depends on the type of steel, the tool’s intended use, the storage environment, and whether the surface is a working area, gripping area, precision surface, or purely structural component.
The objective is not simply to cover the metal with as much product as possible. A good corrosion-protection method creates an appropriate barrier without interfering with the tool’s function, attracting excessive dirt, or making the tool unsafe to handle.
Why Bare Steel Rusts Quickly
Steel contains iron, and iron can react with oxygen and moisture to form iron oxides commonly known as rust.
When rust is removed, the newly exposed metal has no guarantee of remaining protected.
Even if the surface appears completely dry, humidity in the surrounding air can begin interacting with the steel.
This is particularly important after mechanical or chemical rust removal because the process may remove the original protective layer along with the corrosion.
A tool that looked clean immediately after restoration can therefore begin developing small orange or brown spots if it is left unprotected in a humid environment.
Protecting the surface soon after cleaning and drying can significantly reduce this risk.
Clean the Steel Before Applying Protection
Rust removal can leave behind dust, abrasive particles, chemical residue, or loose corrosion products.
These contaminants should be removed before applying a protective product.
Wipe the surface with a clean cloth and use a cleaning method appropriate for the particular tool.
If a chemical rust remover was used, follow the product’s instructions regarding rinsing, neutralization, or cleaning afterward.
Do not apply a corrosion inhibitor over a surface that still contains active cleaning chemicals unless the product instructions specifically allow it.
The steel should be clean and properly prepared before protection is applied.
Dry the Tool Completely
Drying is one of the most important steps in corrosion prevention.
Applying oil or another protective product over trapped moisture may not provide the result you expect.
Water can remain hidden inside:
- Threads
- Joints
- Recesses
- Socket interiors
- Hinges
- Pits
- Seams
- Handle connections
Inspect these areas carefully.
Allow the tool to dry completely before storage.
Avoid using excessive heat to speed up drying unless the manufacturer specifically permits it. High temperatures can damage handles, coatings, seals, adhesives, and other components.
A clean, dry surface is the foundation for effective corrosion protection.
Choose Protection According to the Tool
There is no single corrosion-protection product that is ideal for every tool.
A wrench stored in a toolbox may require different protection from a precision measuring instrument or a cutting tool.
Consider how the tool will be used.
Ask:
- Will the tool be handled frequently?
- Will it be stored for months?
- Will it contact wood or other materials?
- Does it have a precision surface?
- Will it be exposed to moisture?
- Does it have a wooden or plastic handle?
- Could an oily surface create a safety problem?
These questions help determine which type of protection is appropriate.
Light Protective Oils
A suitable light oil can provide useful protection for many bare-steel hand tools.
The oil creates a thin barrier between the steel and moisture in the environment.
This approach can work well for tools such as wrenches, pliers, sockets, screwdrivers, and other metal hand tools when the manufacturer permits it.
The important point is to use a light, controlled amount.
The goal is a thin protective film rather than a tool covered in dripping oil.
Excessive oil can attract dust, sawdust, metal particles, and other workshop debris.
Avoid Excessive Oil
More oil does not automatically mean more protection.
A heavy layer can become sticky and collect contamination.
On moving components, excessive oil may also combine with dust to form an abrasive paste.
On handles, oil can make the tool difficult or unsafe to grip.
On cutting tools, unnecessary oil can interfere with handling and storage.
Apply only the amount required to create an appropriate protective film.
After application, wipe away excess product with a clean cloth.
Corrosion-Protection Sprays
Specialized corrosion-protection sprays are another option for suitable tools.
These products are available in different formulations, and their intended uses vary.
Some are designed for short-term protection, while others are formulated for longer storage.
Read the product label carefully before use.
Make sure the product is compatible with the tool’s materials and intended application.
Avoid spraying blindly into mechanisms, electrical components, or areas where residue could interfere with operation.
Controlled application is generally better than covering the entire tool indiscriminately.
Wax-Based Protection
Wax-based products can provide a thicker protective barrier than a light oil.
They may be useful for tools that will remain in storage for an extended period.
Because wax can create a more substantial coating, it should be kept away from surfaces where precise fit or movement is required.
For long-term storage, however, a suitable wax-based corrosion inhibitor can be useful in environments where moisture is a concern.
Follow the manufacturer’s instructions for application and removal.
Protective Coatings
Some tools may benefit from a more permanent protective coating after rust removal.
Depending on the application, this might involve paint, a compatible primer, plating, or another surface treatment.
Permanent refinishing requires more preparation than applying a temporary corrosion inhibitor.
The surface must be properly cleaned and prepared, and critical working surfaces must be protected from unwanted coating.
Do not apply a thick decorative coating simply because the metal looks unfinished after rust removal.
The tool’s function should determine whether permanent refinishing is appropriate.
Keep Protection Away From Precision Surfaces
Some tool surfaces must remain dimensionally accurate.
Examples include:
- Wrench openings
- Socket interiors
- Drive ends
- Threads
- Measuring surfaces
- Cutting edges
- Clamp contact areas
- Machined mating surfaces
A thick coating on one of these areas can affect fit or performance.
If protection is necessary, use an extremely controlled film when appropriate and remove it before use if the manufacturer recommends doing so.
Never allow corrosion protection to change the dimensions of a precision working surface.
Protect Threads Carefully
Threads are particularly vulnerable to rust because moisture can become trapped between the individual surfaces.
After rust removal, inspect the threads carefully.
A suitable protective product may be appropriate, but avoid filling the threads with excessive material.
If the thread is part of a mechanism that must move freely, excessive oil or wax can attract abrasive debris.
If lubrication is also required, use a product appropriate for the mechanism rather than assuming that every corrosion inhibitor is a suitable lubricant.
Corrosion protection and lubrication are related but are not always the same task.
Treat Moving Parts Differently
Ratchets, pliers, clamps, hinges, and adjustable tools contain moving components that require special attention.
A corrosion inhibitor may protect exposed metal, but excessive product can interfere with movement.
Clean the mechanism first.
Apply only the appropriate amount of lubricant or protective product to the areas recommended by the manufacturer.
Move the mechanism carefully to distribute the product if appropriate.
Then wipe away excess residue.
The mechanism should move smoothly without becoming coated in a thick layer of sticky material.
Protect Cutting Tools Without Creating a Hazard
Chisels, saws, plane blades, scrapers, and other cutting tools often have exposed steel surfaces.
After rust removal, corrosion protection may be appropriate, especially during storage.
However, oily or waxy surfaces can make these tools difficult to handle.
Do not leave a heavy slippery coating on a handle or gripping area.
Before using the cutting tool again, follow the manufacturer’s recommendations for removing any storage coating.
Protecting the steel is important, but safe handling remains the priority.
Consider Wooden Handles
A metal tool may have a wooden handle that should not receive the same treatment as the steel.
Avoid soaking wooden handles with oil or corrosion-protection products intended specifically for metal.
If the handle becomes contaminated during rust removal, clean it using a method appropriate for wood.
Inspect the handle for cracks, looseness, and deterioration.
The connection between the metal tool head and the handle should also be checked.
A protected metal surface does not compensate for an unsafe handle.
Protect Plastic and Rubber Components
Plastic and rubber can react differently to oils, solvents, and protective chemicals.
Some products can cause softening, swelling, discoloration, or deterioration.
When applying a corrosion inhibitor to a tool with non-metal components, keep the product on the appropriate metal surfaces unless compatibility has been confirmed.
If the manufacturer provides material-specific maintenance instructions, follow them.
Avoid using a product simply because it worked well on another tool.
Consider the Storage Environment
The best protection method depends heavily on where the tool will be stored.
A tool kept in a climate-controlled indoor environment may need relatively little corrosion protection.
A tool stored in an unheated shed or humid garage may require more attention.
For long-term storage in a damp environment, consider combining several measures:
- Thorough cleaning
- Complete drying
- Appropriate corrosion protection
- Elevated storage
- Moisture control
- Regular inspection
No single product can completely compensate for a consistently damp environment.
Use a Clean Storage Container
After applying corrosion protection, place the tool in clean storage.
A dirty toolbox can quickly cover the protective film with abrasive dust.
Clean the storage compartment before returning the tool.
Remove old rust particles, sawdust, grease, and metal debris.
If the container is damp, solve that problem before storing newly restored steel tools.
Protecting the tool and maintaining the storage environment should be treated as one maintenance process.
Be Careful With Plastic Bags
Plastic bags can sometimes help protect tools from environmental contamination, but they can also trap moisture.
Never seal a tool inside an airtight bag while it is damp.
If condensation develops inside the bag, the trapped moisture can remain against the steel.
For long-term storage, use a corrosion-control strategy appropriate for the environment and product instructions.
The container should protect the tool without creating a miniature humid environment around it.
Use Moisture Control When Necessary
In humid storage areas, additional moisture control can help.
Moisture absorbers may be useful inside enclosed cabinets, drawers, and toolboxes.
They do not replace fixing leaks or improving the storage environment, but they can provide additional protection.
Check them periodically and replace or recharge them according to their instructions.
Do not allow liquid collected by a moisture absorber to spill onto tools.
Inspect Protected Tools Regularly
Corrosion protection reduces risk but does not eliminate the need for inspection.
Check stored tools periodically for:
- New rust spots
- Discoloration
- Moisture
- Sticky residue
- Flaking coating
- Corrosion inside recesses
- Deteriorating handles
Pay particular attention to tools that previously suffered from deep rust.
If corrosion repeatedly appears in the same location, determine whether moisture is reaching the tool despite the protective coating.
Repeated rust may indicate a storage problem rather than an inadequate product.
What to Do if Rust Returns
If rust appears again after restoration, do not simply add another layer of oil.
First clean the affected area and determine why corrosion returned.
Possible causes include:
- Trapped moisture
- Incomplete drying
- Excessive humidity
- Damaged protective coating
- Contaminated storage
- Salt residue
- Condensation
Remove the new corrosion appropriately, clean and dry the tool again, and correct the underlying storage problem.
A repeated cycle of rust removal without addressing the cause will eventually damage the steel further.
Avoid Mixing Protection Products
Using several different corrosion inhibitors together is not necessarily better.
Different products may have incompatible formulations or may interfere with one another.
If you are changing products, clean the previous residue according to the relevant instructions before applying the new one.
Use one appropriate product consistently rather than creating multiple overlapping layers without a clear reason.
Do Not Use Household Products Without Checking Compatibility
Some household oils or cleaners may appear suitable for metal protection.
However, not every product is designed for long-term corrosion prevention, and some can attract dust or affect other materials.
Before using an unfamiliar product, check its intended purpose and compatibility with the tool.
This is particularly important for precision tools and equipment with mixed materials.
Consider the Intended Use
A tool used every day may not need the same protection as one stored for six months.
Frequent handling naturally removes some protective film.
A tool used in woodworking may also need to remain free of oily residue because oil can transfer to wood.
Automotive tools may tolerate a different maintenance approach.
The ideal protection method is therefore based on how the tool will actually be used.
Protect Tools Before Seasonal Storage
Seasonal storage can expose tools to changing humidity and temperature.
Before placing tools away for several months, clean them thoroughly.
Remove dirt, grease, salt, and other contaminants.
Dry them completely.
Apply suitable corrosion protection.
Inspect the storage area.
Then check the tools periodically rather than waiting until the next season to discover corrosion.
This is particularly important for garden tools, specialized equipment, and tools used only during certain projects.
Keep Protective Products Away From Electrical Components
Some cordless and electronic tools contain metal parts that can corrode, but that does not mean they should be sprayed indiscriminately.
Keep oils, waxes, and corrosion inhibitors away from switches, circuit boards, battery contacts, ventilation openings, and other electrical components unless the manufacturer specifically permits the product.
For power tools, use the manufacturer’s maintenance instructions.
A corrosion-prevention product designed for bare steel is not automatically appropriate for an electronic tool.
Do Not Cover Dirt With Corrosion Protection
Applying oil over a dirty tool is not a substitute for cleaning.
Grease, dust, salt, and metal particles trapped beneath a protective layer can continue causing problems.
Always clean the tool first.
The protective layer should be the final stage of maintenance, not a way to conceal contamination.
This principle is especially important for tools exposed to automotive grease, construction dust, and woodworking debris.
How to Check Whether the Protection Is Working
A simple inspection can tell you whether the storage method is effective.
After several weeks, examine the tool under good lighting.
The surface should remain stable without new rust spots or excessive discoloration.
If the protective film has completely disappeared, determine whether the tool is being handled frequently or whether the product is unsuitable for the storage period.
If rust appears despite protection, investigate humidity and condensation before simply applying more product.
Good corrosion prevention is a system rather than a single application.
Common Mistakes After Rust Removal
Several mistakes can cause freshly restored steel to rust again.
One is putting the tool away while it is still damp.
Another is applying protection before removing chemical residue.
Using excessive oil can attract dust.
Applying coating to precision surfaces can affect tool fit.
Storing restored tools in a humid toolbox can also undo the entire restoration process.
Perhaps the most common mistake is assuming that corrosion protection eliminates the need for inspection.
Even well-protected tools should be checked periodically.
A Practical Protection Routine
A simple post-rust-removal routine can be organized into several stages.
First, remove all corrosion. Make sure loose rust and residue have been addressed.
Second, clean the tool. Remove dust, abrasive particles, and cleaning-product residue.
Third, dry it completely. Pay attention to recesses and hidden areas.
Fourth, inspect the steel. Look for pitting, cracks, or material loss.
Fifth, choose an appropriate protective product. Match it to the tool and storage conditions.
Sixth, apply a thin and controlled layer.
Seventh, wipe away excess product.
Finally, store the tool in a clean, dry environment and inspect it periodically.
This routine is simple enough to become a normal part of tool maintenance.
When Permanent Refinishing Is Better
A corrosion inhibitor is not always the best long-term solution.
If a tool has large areas of exposed steel and will remain in harsh conditions, a durable surface treatment may provide better protection.
Depending on the tool, this could involve painting, powder coating, plating, or another professionally applied finish.
However, permanent refinishing requires careful surface preparation and must not interfere with precision or load-bearing surfaces.
For valuable or specialized tools, professional refinishing may be worth considering.
When Replacement Is Better Than Protection
Rust removal and corrosion protection cannot restore steel that has already been lost.
If a tool has deep pitting, cracks, severe deformation, or significant material loss, applying a protective coating will not restore its original strength.
For high-load tools, replacement may be the safer choice.
This is especially important for sockets, wrenches, ratchets, striking tools, clamps, and other equipment that can experience significant mechanical stress.
Protection should preserve sound tools, not conceal unsafe damage.
Final Thoughts
Protecting bare steel after removing rust is an essential step in successful tool restoration. Removing corrosion without protecting the exposed metal can leave the tool vulnerable to developing new rust soon afterward.
The process begins with proper cleaning and complete drying. Once the steel is clean and dry, choose a corrosion-protection method that matches the tool, its working surfaces, and the environment where it will be stored.
Use protective oils, sprays, waxes, or other suitable products in controlled amounts. Keep protection away from precision surfaces, handles, electrical components, and areas where a slippery coating could create a safety problem.
Most importantly, remember that corrosion prevention involves more than applying a product. Clean storage, moisture control, proper ventilation, and regular inspections are equally important.
A well-maintained steel tool should leave storage clean, dry, protected, and ready for use. By treating rust removal as the beginning of restoration rather than the end, you can greatly reduce the chance of corrosion returning and help preserve the tool for years of continued use.
