
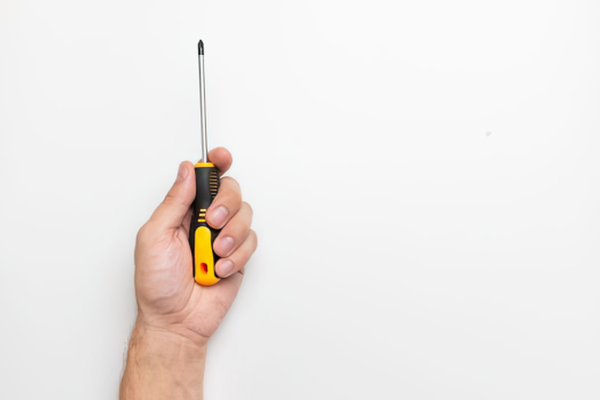
Screwdrivers are among the most frequently used hand tools in a home toolbox. They are used for assembling furniture, tightening cabinet hardware, repairing household items, opening access panels, installing fixtures, and handling countless small repairs. Because they are used so often, they also tend to accumulate dirt, grease, adhesive residue, paint, dust, and moisture.
Cleaning a screwdriver may seem straightforward, but there is more to it than wiping the shaft with a cloth. The tip is a precision working surface, the shaft may have a protective finish, and the handle can be made from plastic, rubber, or composite materials that react differently to cleaning products.
A screwdriver can also look dirty when the real problem is wear. A worn Phillips tip, rounded flat blade, bent shaft, or cracked handle cannot be restored simply by cleaning it.
The best approach is therefore to clean the screwdriver gently while using the process as an opportunity to inspect its condition. This helps preserve the tool and makes it easier to recognize when cleaning is no longer enough.
Why Screwdrivers Need Regular Cleaning
Dirt on a screwdriver may not seem important at first. A thin layer of dust or grease rarely prevents the tool from working immediately.
However, contamination can cause several practical problems.
Grease can make the handle difficult to grip. Dirt can accumulate around the junction between the handle and shaft. Paint and adhesive can interfere with the tip. Moisture can contribute to corrosion, especially on exposed steel.
There is also a safety consideration.
A dirty screwdriver is harder to inspect. Small cracks, damaged tips, corrosion, or deformation can be hidden beneath residue.
Cleaning therefore has two purposes:
Remove unwanted contamination.
Make the condition of the tool easier to evaluate.
A good cleaning routine does not try to make an old screwdriver look brand new. It aims to leave the tool clean, dry, intact, and suitable for its intended use.
Start by Inspecting the Screwdriver
Before applying any cleaner, examine the entire tool.
Look at the:
- Tip
- Shaft
- Handle
- Shaft-to-handle connection
- Edges
- Markings
- Areas around the grip
Check the working tip for signs of wear.
A Phillips screwdriver with a rounded tip may slip out of a screw head more easily. A flat-head screwdriver with a damaged edge may not sit correctly in the slot.
Inspect the shaft for rust, bending, deep scratches, or other damage.
Then examine the handle carefully. Look for cracks, loose sections, swelling, chemical damage, or excessive wear.
If the screwdriver has significant mechanical damage, cleaning should not be treated as a way to return it to service.
Identify the Handle Material
The handle often requires more care than the steel shaft.
Common materials include:
- Hard plastic
- Rubberized plastic
- Thermoplastic materials
- Composite materials
- Wood on some traditional tools
A mild soap solution is generally a safer starting point than a strong solvent.
Do not assume that a product safe for metal is also safe for plastic or rubber.
Some solvents can soften plastics, affect rubber surfaces, remove printed markings, or make certain handles sticky.
When you do not know the material, begin with the mildest practical cleaning method.
What You Need
For normal screwdriver cleaning, a simple setup is usually sufficient.
You may need:
- A microfiber or lint-free cloth
- Warm water
- Mild dish detergent
- A soft toothbrush
- A small container
- Cotton swabs
- A dry towel
- A suitable rust-treatment product if necessary
- An appropriate protective or lubricating product when recommended
You generally do not need aggressive abrasives for routine cleaning.
If a screwdriver requires increasingly aggressive treatment just to remove ordinary dirt, the issue may actually be old paint, corrosion, adhesive residue, or mechanical damage rather than normal cleaning.
Step 1: Remove Loose Dust and Debris
Start with the screwdriver completely dry.
Use a dry cloth to wipe the handle and shaft.
Then use a soft brush to remove dust from the junction between the shaft and handle.
Pay attention to grooves and textured sections of the grip.
This first pass removes loose material without introducing water or chemicals.
It also lets you see which areas actually require more attention.
There is little reason to soak a screwdriver that only has a light layer of dust.
Step 2: Clean the Handle With Mild Soap
For greasy or dirty handles, prepare a small amount of mild dish detergent in warm water.
Dampen a cloth with the solution rather than completely immersing the screwdriver.
Wipe the handle thoroughly.
For textured grips, a soft toothbrush can help reach the small grooves where dirt accumulates.
Do not scrub aggressively.
The goal is to remove oils and debris without changing the texture or finish of the handle.
Once the residue has been removed, wipe the handle with a clean damp cloth if necessary to remove soap residue.
Then dry it thoroughly.
Step 3: Clean the Shaft
The steel shaft can usually be cleaned with the same general approach.
Wipe it with a damp cloth containing mild detergent.
If grease remains, use a cleaner appropriate for the shaft’s finish.
Pay attention to the area immediately above the handle because grease and debris often collect there.
Avoid flooding the connection between the shaft and handle.
Depending on how the screwdriver is constructed, liquid can potentially enter the handle assembly.
Controlled application is therefore preferable to immersion.
Step 4: Clean the Screwdriver Tip Carefully
The tip deserves special attention because this is the part that transfers force to the fastener.
Begin by wiping the tip with a clean cloth.
For dirt trapped in the geometry of the tip, a soft brush can help.
A Phillips tip, for example, has recessed areas where paint and debris can accumulate. A flat tip can develop residue along its edges.
Do not automatically use sandpaper or aggressive abrasives.
The geometry of the tip determines how well it engages with a screw. Removing material unnecessarily can reduce that fit.
For stubborn residue, first determine what the residue actually is.
Paint, adhesive, rust, and hardened dirt may require different treatments.
Step 5: Remove Dried Paint Carefully
Paint is a common problem when screwdrivers are used near decorating or renovation work.
If the paint is still relatively loose, a plastic scraper may help remove it.
For dried paint, choose a method appropriate for both the paint and the screwdriver’s finish.
Avoid using a sharp steel blade aggressively against a precision screwdriver tip.
The objective is to remove the unwanted coating without changing the shape of the working end.
If the paint cannot be removed without damaging the tip, leaving a very small amount of residue may be preferable to removing part of the metal.
A screwdriver’s performance depends more on the condition and geometry of its working end than on achieving a perfectly clean appearance.
Step 6: Deal With Surface Rust
Light surface rust on an exposed screwdriver shaft may be removable with a suitable rust-treatment method.
Start by determining whether the corrosion is superficial or whether there is significant pitting.
For minor corrosion, a relatively gentle mechanical method may be sufficient.
More severe corrosion may require a dedicated rust-removal product.
Follow the manufacturer’s instructions for any chemical product.
Do not aggressively sand the screwdriver tip simply to remove discoloration.
The tip is a working surface, and changing its geometry can affect how it engages with fasteners.
If corrosion has caused deep pitting or significant loss of material at the tip, replacement may be more sensible than restoration.
Step 7: Inspect the Tip for Wear
Cleaning is the perfect time to inspect the tip carefully.
For Phillips screwdrivers, look at the ends of the cross-shaped sections.
A healthy tip should retain its intended geometry.
Signs of wear may include:
- Rounded corners
- Deformed edges
- Visible chipping
- Excessive polishing
- Asymmetry
- Reduced engagement with the screw
For flat-head screwdrivers, inspect the blade edges and thickness.
A damaged flat blade can slip out of the screw slot or damage the fastener.
Cleaning cannot restore metal that has already worn away.
If the working end is significantly damaged, replace the screwdriver rather than relying on it because the rest of the tool looks clean.
Step 8: Inspect the Shaft
Run your eyes along the entire shaft.
Look for:
- Bends
- Deep corrosion
- Cracks
- Unusual discoloration
- Severe scratches
- Evidence of previous misuse
A screwdriver should not be treated as a substitute for a pry bar, chisel, punch, or other tool designed for impact or levering.
If the shaft is visibly bent or damaged, cleaning it does not make it safe for normal use.
A damaged tool should be removed from service rather than returned to the toolbox simply because it has been cleaned.
Step 9: Check the Handle
Grip the screwdriver normally and inspect the handle.
Look for movement between the handle and shaft.
If the shaft appears loose inside the handle, do not assume that cleaning will solve the problem.
A cracked or severely damaged handle can affect control and make the tool uncomfortable or unsafe to use.
Rubberized grips should also be checked for unusual stickiness, swelling, cracking, or deterioration.
Some chemical cleaners can accelerate this type of damage, which is another reason to start with mild cleaning products.
Step 10: Dry the Screwdriver Completely
After cleaning, dry the screwdriver thoroughly.
Use a clean towel to remove visible moisture from the handle and shaft.
Pay attention to the junction between the shaft and handle.
Allow the tool to air-dry fully in a dry area when necessary.
Do not return a wet screwdriver to a closed toolbox.
Even a small amount of trapped moisture can contribute to corrosion over time.
If the screwdriver has exposed carbon steel, appropriate protection may be useful depending on the storage environment.
Should You Lubricate a Screwdriver?
Most ordinary screwdriver shafts do not need to be routinely lubricated.
Adding oil to the entire shaft can make the handle slippery and attract dust.
Lubrication is more relevant to tools with actual moving mechanisms, not a simple screwdriver shaft.
If the screwdriver has a specialized mechanism, such as a ratcheting handle, follow the manufacturer’s maintenance instructions for that mechanism rather than treating the entire tool as one metal component.
What About Dish Soap?
For many ordinary household screwdrivers, mild dish detergent is a practical starting point for removing fingerprints, dust, and light grease.
It is inexpensive, easy to control, and generally less aggressive than many specialized solvents.
However, it is not a universal solution.
It may not remove cured paint, heavy adhesive, severe grease, or rust.
More importantly, the handle material and tool finish still need to be considered.
The purpose of using mild soap first is to solve simple contamination without creating unnecessary chemical exposure.
What You Should Avoid
Several cleaning habits can damage a screwdriver.
Do not grind the tip just to make it look new
Removing metal changes the geometry of the working surface.
Do not soak the entire screwdriver unnecessarily
Liquid can enter the handle or other areas that are difficult to dry.
Do not use unknown solvents on rubberized handles
The solvent may damage the material.
Do not use a wire wheel on a precision tip
A wire wheel can alter the surface and edges.
Do not sharpen a screwdriver like a knife
A screwdriver tip is designed with a specific geometry. General sharpening can make it less effective rather than better.
Do not return a damaged tool to service
Cleaning cannot repair a cracked handle, bent shaft, severely worn tip, or structurally compromised tool.
How to Keep Screwdrivers Cleaner for Longer
Good storage can significantly reduce how often intensive cleaning is necessary.
Keep screwdrivers separated from wet materials.
Avoid throwing them into a toolbox containing loose debris and oil-soaked rags.
Store them in a rack, drawer organizer, case, or other arrangement that keeps the working ends reasonably protected.
If you work on painting projects, keep screwdrivers away from wet coatings.
After a dirty job, wipe the tool before putting it away.
Small maintenance habits are much easier than restoring a heavily contaminated screwdriver later.
A Simple Screwdriver Maintenance Routine
For ordinary household use, the routine can be simple.
After use
Wipe the tip and shaft.
When visibly dirty
Clean the handle and shaft with a mild solution.
During periodic inspection
Check the tip, shaft, and handle for damage.
Before long-term storage
Make sure the screwdriver is completely dry.
When the tip begins slipping
Inspect the screwdriver and the fastener. Do not automatically assume the problem is dirt.
This last point is important.
A screwdriver that slips can be suffering from a worn tip, a damaged screw head, incorrect tool size, or excessive force. Cleaning should be one part of the diagnosis, not the automatic solution.
When Should You Replace a Screwdriver?
Replacement is appropriate when the tool is significantly damaged or no longer reliably performs its intended function.
Consider replacing it if you find:
- A severely rounded tip
- A badly chipped working end
- A bent shaft
- A cracked handle
- A loose shaft
- Deep corrosion
- Significant material loss
A screwdriver is relatively simple compared with many other tools, and trying to preserve a severely damaged one may not be worthwhile.
For inexpensive tools, replacement is often the practical option.
For high-quality or specialty tools, professional repair or manufacturer support may be worth considering.
Final Inspection
After cleaning, hold the screwdriver under good lighting.
Look at the tip from several angles.
Check the shaft for corrosion or deformation.
Inspect the handle for cracks or chemical damage.
Then consider how the tool actually behaves during normal use.
Does the tip engage properly with the correct fastener?
Does the handle remain secure?
Does the shaft remain straight?
Are there any signs that the tool has been damaged beyond simple contamination?
This final inspection is what turns cleaning into maintenance.
Final Thoughts
Cleaning a screwdriver properly is a simple task, but the best results come from treating each part of the tool according to its purpose.
The handle needs protection from inappropriate chemicals. The shaft needs to be cleaned and dried without unnecessary abrasion. Most importantly, the tip needs to retain its original working geometry.
Start with dry cleaning, use mild soap and water when appropriate, and only move to stronger methods when the contamination requires them. Treat paint, rust, adhesive, and grease according to their specific characteristics rather than assuming one cleaning product will solve every problem.
Use the opportunity to inspect the screwdriver after cleaning. If the tip is worn, the shaft is bent, or the handle is damaged, replacing the tool may be more appropriate than trying to restore its appearance.
A well-maintained screwdriver does not need to look perfect. It needs to be clean enough to inspect, dry enough to resist corrosion, and mechanically sound enough to engage a fastener securely.
Related Guides
- How to Clean Hand Tools After Heavy Use Without Damaging the Finish
- How to Remove Dried Paint From Metal Tools Without Scratching Them
- How to Restore a Rusty Hand Tool Step by Step
- How to Tell Whether a Dirty Tool Needs Cleaning, Lubrication, or Replacement
- How to Store Screwdrivers, Pliers, and Wrenches So They Stay Easy to Find
FAQ
Can I clean a screwdriver with soap and water?
For many ordinary screwdrivers, mild soap and water can be suitable for removing dirt and light grease. Avoid unnecessary soaking and dry the tool thoroughly afterward.
How do I clean a rusty screwdriver tip?
First determine whether the corrosion is superficial or has caused material loss. A suitable gentle rust-removal method may work for surface corrosion, but severe pitting or damage can make replacement more appropriate.
Can I use sandpaper on a screwdriver tip?
Sandpaper can remove material and alter the geometry of the working end. It should not be used aggressively on a precision tip simply to improve its appearance.
Why does my screwdriver keep slipping after I clean it?
The problem may not be dirt. A worn screwdriver tip, damaged screw head, incorrect screwdriver size, or excessive force can all cause slipping.
Can I use WD-40 or oil on a screwdriver shaft?
Routine oiling of a simple screwdriver shaft is usually unnecessary. Oil can make the tool slippery and attract dust. Specialized mechanisms should be maintained according to their manufacturer’s recommendations.
When should I replace a screwdriver?
Consider replacement when the tip is severely worn or damaged, the shaft is bent or structurally compromised, the handle is cracked or loose, or corrosion has caused significant material loss.
