
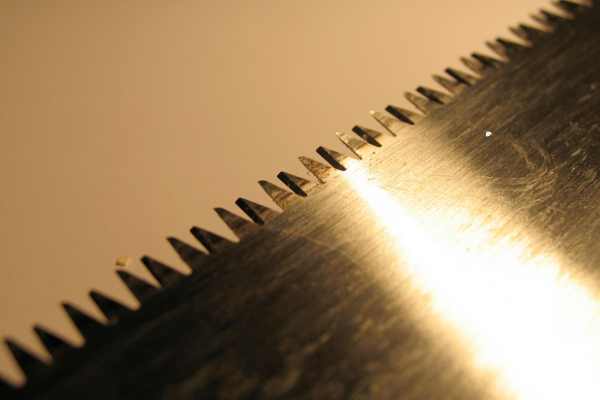
Saw blades and other cutting tools collect a surprisingly wide range of debris during normal use. Wood resin, dust, paint residue, adhesive, dirt, corrosion, and other materials can accumulate on the blade and gradually make cleaning and inspection more difficult.
Keeping a cutting tool clean is an important part of maintenance, but it needs to be approached differently from cleaning an ordinary wrench or screwdriver. A blade has a working edge or teeth that can cause injury even when the tool is not connected to a power source. Some blades also have coatings or carefully manufactured geometries that can be damaged by aggressive cleaning.
The safest approach is to separate cleaning from sharpening and repair. Cleaning removes unwanted material. It does not automatically restore a dull edge, repair a damaged tooth, or make a structurally compromised blade safe to use.
This guide focuses on routine cleaning and inspection of household and workshop cutting tools. Always follow the manufacturer’s instructions for the specific blade or cutting tool, particularly when dealing with power equipment.
Why Cutting Tools Need Cleaning
A cutting tool does not necessarily stop working because it becomes dirty. However, accumulated material can make it harder to inspect and maintain properly.
For example, resin on a saw blade can form a sticky layer around the teeth. Dust can adhere to that residue, creating a thicker buildup over time.
A blade covered with contamination can also make it harder to see:
- Damaged teeth
- Corrosion
- Cracks
- Missing components
- Excessive wear
- Deformed cutting surfaces
Cleaning also helps separate a maintenance problem from an operating problem.
A blade that appears ineffective might simply have residue buildup, but it may also be dull or damaged. Cleaning provides a better opportunity to determine which problem is actually present.
Safety Comes Before Cleaning
Before cleaning any saw blade or cutting tool, make sure it cannot start unexpectedly.
For a powered tool, follow the manufacturer’s procedure for making the equipment safe before maintenance. Disconnect the power source where appropriate, and for cordless equipment, follow the manufacturer’s instructions regarding battery removal or isolation.
Do not rely only on an on/off switch.
For removable blades, follow the manufacturer’s removal procedure and use appropriate protective equipment and handling techniques.
Wear suitable eye protection when brushing or scraping debris.
Cut-resistant gloves may be appropriate for handling certain blades, but they should never replace careful handling. Gloves do not make a sharp edge safe to touch or justify gripping a blade carelessly.
Work slowly and keep fingers away from teeth and cutting edges.
The safest cleaning position is usually one that allows you to control the tool without placing your hands in the path of the cutting surface.
Identify the Type of Cutting Tool
Before selecting a cleaner, determine what you are cleaning.
Common household and workshop cutting tools include:
- Hand saw blades
- Circular saw blades
- Reciprocating saw blades
- Utility knife blades
- Pruning tools
- Shears
- Cutting discs
- Specialized blades
These tools may use different materials and coatings.
A cleaning method that is appropriate for an unfinished steel hand saw may not be suitable for a carbide-tipped blade, coated blade, or cutting accessory with non-metal components.
If the manufacturer provides maintenance instructions, use them as the primary reference.
Identify What Is Stuck to the Blade
Not every residue requires the same treatment.
Common contaminants include:
Wood resin: sticky and often difficult to remove when heavily accumulated.
Fine dust: usually easy to remove when dry but can become difficult when mixed with oil or resin.
Paint: may form a hard coating.
Adhesive: can leave a gummy residue.
Rust: represents corrosion rather than ordinary dirt.
Oil or grease: can attract additional dust and contamination.
Understanding the material makes the cleaning process more controlled.
Instead of immediately reaching for the strongest chemical available, determine what you are actually trying to remove.
Step 1: Remove Loose Dust
For a dry blade, begin by removing loose dust and debris.
A soft brush can help dislodge material from accessible areas.
Work carefully and keep the cutting edge oriented away from your hands and body.
Avoid rapidly brushing across sharp teeth.
The objective is to remove loose contamination, not to scrub the cutting edge aggressively.
Compressed air may be useful in some workshop environments, but it can also send fine particles into the air. Follow appropriate safety practices and the manufacturer’s recommendations when using compressed air.
Step 2: Inspect the Blade Before Wet Cleaning
Once loose material has been removed, inspect the blade.
Look for:
- Cracks
- Missing teeth
- Damaged teeth
- Excessive corrosion
- Bent sections
- Loose components
- Unusual wear
- Damage to the body of the blade
This inspection can change the entire cleaning decision.
A damaged blade should not be treated as a normal dirty blade.
Cleaning should never be used to justify returning a structurally compromised cutting tool to service.
If you find cracks, significant deformation, or serious damage, stop the cleaning process and determine whether replacement or qualified professional assessment is appropriate.
Step 3: Use the Least Aggressive Suitable Cleaning Method
For ordinary residue, begin with a method that is compatible with the blade’s material and finish.
A mild cleaning solution may be sufficient for some contaminants.
Use a cloth or soft brush where practical.
Do not assume that soaking the entire blade is necessary.
Controlled cleaning reduces exposure to water and chemicals and makes drying easier.
When using a commercial cleaning product, read the label and confirm that the product is appropriate for the material.
Some blades have protective coatings that can be affected by aggressive chemicals.
Cleaning Resin From Saw Blades
Resin is especially common on blades used with certain types of wood.
The longer resin remains on the blade, the more difficult it may become to remove.
Start by trying to loosen the residue using a suitable cleaner recommended for the blade material.
A soft brush can then help lift the softened material.
Avoid scraping aggressively across the teeth.
Work around the geometry of the blade rather than treating the tooth tips as if they were ordinary flat metal.
If a commercial blade cleaner is used, follow its instructions regarding contact time, rinsing, ventilation, and protective equipment.
There is no advantage to leaving a product on the blade indefinitely.
Cleaning Paint From Cutting Tools
Paint residue can be more complicated because hardened paint may strongly adhere to metal.
Start by determining whether the paint is fresh or fully cured.
Loose paint can often be removed more gently than hardened coating.
Use a compatible method and avoid altering the cutting geometry.
This is especially important for blades with precision-ground edges or coatings.
A sharp metal scraper may remove paint quickly, but it can also scratch surfaces or damage coatings.
A plastic scraper or other less aggressive method can be a better starting point when appropriate.
Cleaning Rust From Cutting Tools
Rust should be treated differently from ordinary contamination.
Surface rust can sometimes be removed using a suitable rust-removal process, depending on the tool’s construction and finish.
However, corrosion on a cutting tool deserves careful inspection.
Rust that has produced deep pitting, weakened the blade, damaged teeth, or affected a critical connection should not simply be polished away and ignored.
Removing visible corrosion does not restore metal that has already been lost.
For blades with extensive corrosion, replacement may be safer than attempting aggressive restoration.
Be Careful With Coated and Carbide-Tipped Blades
Some cutting tools use coatings or carbide components designed for particular applications.
The cleaning method needs to preserve these materials.
Avoid assuming that a strong abrasive or aggressive chemical is harmless simply because the tool is made for demanding work.
If the blade manufacturer’s maintenance instructions specify a particular cleaning method, follow them.
When you cannot verify compatibility, start with a conservative approach or consult the manufacturer.
Never Confuse Cleaning With Sharpening
This distinction is extremely important.
A dirty blade can appear dull because material is covering the cutting surfaces.
But a clean blade can still be genuinely dull.
Cleaning removes contamination.
Sharpening changes or restores the cutting edge according to the design of the tool.
Do not reshape teeth simply because the blade does not cut as expected after cleaning.
The correct sharpening method depends on the blade type and manufacturer’s specifications.
For some specialized blades, replacement or professional sharpening is more appropriate than attempting to reshape the cutting edge without the required equipment and knowledge.
How to Clean Hand Saws
A traditional hand saw can often be maintained with a simple sequence.
First, remove loose dust.
Then clean the blade using a method appropriate for its finish.
Pay particular attention to the areas between teeth.
Do not drag your fingers along the tooth line.
After cleaning, dry the blade thoroughly.
Inspect the teeth for bending, missing sections, and excessive wear.
If the saw uses a wooden handle, keep water exposure controlled and avoid soaking the handle.
The cleaning process should preserve both the blade and the handle.
How to Clean Circular Saw Blades
Circular saw blades require additional caution because the teeth can be extremely sharp.
The blade should be made safe according to the tool manufacturer’s instructions before cleaning.
Once safely removed or isolated as appropriate, inspect the blade.
Look for resin, dust, corrosion, damaged teeth, and missing components.
Use a suitable cleaner and controlled brushing method.
Do not grind or aggressively reshape the teeth during routine cleaning.
Afterward, make sure the blade is fully dry before returning it to storage.
If the blade is designed for a particular cutting application, preserve its original tooth geometry and configuration.
How to Clean Reciprocating Saw Blades
Reciprocating blades are often inexpensive enough that replacement is more practical than extensive restoration.
For reusable or specialty blades, cleaning can still be useful.
Remove the blade safely according to the equipment manufacturer’s instructions.
Brush away loose debris.
Clean remaining material using an appropriate method for the blade.
Inspect the teeth and body for damage.
If the blade is bent, cracked, excessively worn, or otherwise compromised, replacement is generally more appropriate than trying to restore it.
Cleaning Cutting Shears
Household shears, pruning tools, and scissors also benefit from cleaning.
Remove visible debris from the blades.
Pay attention to the pivot area.
Use a suitable cloth or brush to clean residue from the cutting surfaces.
For tools used with plants, sap and plant residue can become particularly sticky.
After cleaning, dry the blades thoroughly.
If the tool’s design calls for lubrication at the pivot, use the appropriate product sparingly.
Do not apply lubricant to the cutting edges unless the manufacturer specifically recommends it.
Drying Is Essential
Moisture left on a metal cutting tool can create corrosion.
After cleaning, remove visible water with a dry cloth.
Pay attention to areas between teeth, around pivots, and in small recesses.
Allow the tool to dry completely before storage.
If appropriate for the material, a corrosion-protection product may be used after drying.
Again, follow the manufacturer’s recommendations.
The protective product should not interfere with the tool’s intended cutting performance.
What You Should Not Do
Several cleaning approaches can create unnecessary risks.
Do not clean a powered blade while the equipment can start
Always follow the manufacturer’s safe maintenance procedure.
Do not hold a sharp edge casually
Handle blades by safe areas and keep cutting edges away from your body.
Do not use aggressive abrasives without considering the blade geometry
Removing material can change the cutting tool.
Do not use unknown chemicals
A cleaner that works on bare steel may damage coatings or other materials.
Do not return a damaged blade to service simply because it looks cleaner
Structural condition matters more than appearance.
Do not sharpen without understanding the blade design
Incorrect sharpening can alter performance and create an unsafe or ineffective tool.
How to Store Clean Cutting Tools
Storage is part of maintenance.
Keep blades in a dry environment and protect the cutting edges from unnecessary contact with other tools.
Avoid allowing sharp edges to rub against metal surfaces.
For removable saw blades, use appropriate protective packaging or storage designed for the blade.
Keep blades away from unnecessary humidity.
If several cutting tools are stored together, prevent them from contacting each other in ways that could damage the edges or create handling hazards.
A clean blade can deteriorate quickly if it is returned to a damp, disorganized storage area.
How Often Should Cutting Tools Be Cleaned?
There is no universal cleaning interval.
Cleaning frequency depends on:
- Material being cut
- Amount of residue produced
- Frequency of use
- Storage conditions
- Blade material
- Manufacturer recommendations
A blade used heavily with resin-producing materials may require more frequent cleaning than one used occasionally for light household work.
The best rule is to inspect the tool regularly and clean it when contamination begins to interfere with inspection, operation, or maintenance.
Waiting until the residue becomes a thick, hardened layer usually makes the job more difficult.
A Practical Cleaning Routine
A simple routine can be:
Before storage: remove loose debris.
After heavy use: inspect the blade.
When residue builds up: perform a deeper cleaning.
After wet cleaning: dry completely.
During inspection: look for rust, cracks, missing teeth, and deformation.
Before use: confirm that the blade remains in suitable condition for its intended application.
This takes less effort than allowing months of contamination to accumulate.
When Replacement Is Better Than Cleaning
One of the most important maintenance decisions is knowing when to stop restoring.
Replacement may make more sense when:
- Teeth are missing
- The blade is cracked
- The blade is significantly bent
- Corrosion has caused serious pitting
- The cutting surface has deteriorated beyond practical restoration
- The blade has been damaged by improper use
- The manufacturer recommends replacement
A low-cost blade with extensive damage may not justify restoration.
A specialty blade may justify professional evaluation.
The goal should always be a reliable and appropriate cutting tool, not simply an attractive-looking one.
Final Thoughts
Cleaning saw blades and cutting tools safely requires more care than cleaning an ordinary metal hand tool. The cutting edge itself is a safety consideration, while the blade’s material, coating, tooth geometry, and condition all influence the appropriate cleaning method.
Start by making the equipment safe, then identify the blade and the type of contamination. Remove loose debris first and use the least aggressive method capable of addressing the problem.
Treat resin, paint, grease, and rust as different problems. Follow manufacturer instructions for specialized cleaners and never assume that a powerful chemical or abrasive is automatically the best solution.
After cleaning, dry the tool completely and inspect it carefully. Look for damaged teeth, cracks, corrosion, deformation, and other defects.
Most importantly, remember that cleaning does not repair a damaged cutting tool and does not automatically restore a dull edge. When structural condition is questionable, replacement or qualified assessment is often the safer decision.
A good maintenance routine is ultimately about preserving the tool while making sure you know exactly what condition it is in before it goes back into service.
Related Guides
- How to Clean Hand Tools After Heavy Use Without Damaging the Finish
- How to Remove Dried Paint From Metal Tools Without Scratching Them
- How to Restore a Rusty Hand Tool Step by Step
- How to Prevent Rust on Hand Tools in a Humid Garage
- How to Tell Whether a Dirty Tool Needs Cleaning, Lubrication, or Replacement
FAQ
Can I clean a saw blade with soap and water?
Some blades can tolerate mild soap and water, but the correct method depends on the blade material and manufacturer’s instructions. Avoid unnecessary soaking and dry the blade completely afterward.
How do I remove resin from a saw blade?
Use a cleaner appropriate for the blade and resin involved, following the product instructions. After the residue softens, use a suitable soft brush or controlled cleaning method rather than aggressively scraping the teeth.
Can I use a wire brush on a saw blade?
A wire brush may be too aggressive for some blade finishes and can alter or damage surfaces. Choose a less aggressive method first and follow the manufacturer’s maintenance recommendations.
Does cleaning sharpen a saw blade?
No. Cleaning removes contamination, while sharpening changes or restores the cutting edge. A blade can be clean and still be dull.
When should I replace a rusty saw blade?
Replacement should be considered when corrosion has caused significant pitting, damaged or missing teeth, cracks, deformation, or other structural problems. Removing surface rust cannot restore metal that has already been lost.
How should I store a clean saw blade?
Keep it dry, protect the cutting edge from unnecessary contact, and use appropriate storage or protective packaging. Follow the manufacturer’s recommendations for the specific blade.
