
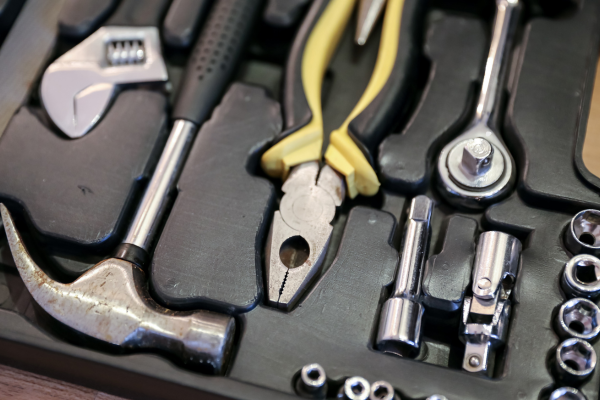
A well-organized toolbox is more than a convenient place to keep tools. The way screwdrivers, pliers, and wrenches are stored can affect how quickly they can be found, how easily they can be inspected, and how much unnecessary wear they receive between uses.
Throwing all your hand tools into a single drawer may seem harmless when the toolbox is small. Over time, however, tools can become buried beneath one another, working ends can strike against other metal objects, and dirty or damp equipment can contaminate tools that were previously clean.
Good organization does not require an expensive professional tool chest. Even a basic household toolbox can be arranged more effectively with simple dividers, trays, racks, or dedicated sections.
The goal is not to create a perfect workshop display. It is to create a storage system that makes tools easy to identify, protects their working surfaces, limits contamination, and allows you to notice damage or corrosion before it becomes a larger problem.
This guide explains how to organize screwdrivers, pliers, and wrenches in a way that balances accessibility, protection, and practical maintenance.
Why Tool Organization Matters
It is easy to think of organization as purely a convenience issue.
In reality, storage affects tool condition.
When tools are piled together, several problems can occur.
Heavy wrenches can land on screwdriver tips.
Pliers can become buried underneath greasy tools.
Wrenches with surface rust can remain unnoticed.
Screwdriver handles can become scratched.
Small tools can be difficult to remove without disturbing everything around them.
A poorly organized drawer can also encourage another habit: putting tools away without cleaning them first because there is no clear place to return them.
Good organization reduces these problems.
It gives every commonly used tool a predictable location and makes maintenance easier to perform consistently.
Start by Taking Everything Out
Before reorganizing a crowded toolbox drawer, remove everything.
Place the tools on a clean, dry surface.
This gives you an opportunity to inspect each item individually.
Separate the tools into broad groups:
- Screwdrivers
- Pliers
- Wrenches
- Sockets
- Measuring tools
- Cutting tools
- Specialty equipment
- Accessories
Do not worry about creating the perfect organization immediately.
The first objective is simply to understand what you have.
You may find duplicate tools, damaged equipment, rarely used items, or tools that belong somewhere else.
Clean Before Organizing
Do not reorganize a dirty toolbox and immediately put dirty tools back into it.
Use the opportunity to clean obvious contamination.
Remove:
- Grease
- Dust
- Metal particles
- Paint
- Adhesive residue
- Soil
- Moisture
A tool does not need to be polished to be stored.
The important point is to remove contamination that could spread to nearby tools or hide damage.
Make sure tools are completely dry before returning them to enclosed storage.
Inspect Tools for Damage
Organization is an ideal time for a quick condition check.
Look for:
- Cracked handles
- Bent shafts
- Worn screwdriver tips
- Damaged plier jaws
- Excessive pivot looseness
- Rust
- Damaged wrench jaws
- Deformed tools
A tool that is clearly damaged should not simply be returned to the drawer because there is space for it.
Separate tools that require repair, replacement, or further inspection.
This prevents a storage system from becoming a place where damaged tools disappear until the next emergency repair.
Give Each Tool Type Its Own Zone
One of the simplest organizational principles is grouping similar tools together.
For example:
Screwdrivers together
Pliers together
Wrenches together
Measuring tools together
Cutting tools together
This reduces search time.
It also makes maintenance easier because each category has slightly different storage requirements.
Screwdrivers benefit from tip protection.
Pliers need space around their pivot and handles.
Wrenches benefit from clear size organization.
Grouping therefore helps both convenience and preservation.
How to Store Screwdrivers
Screwdrivers are easiest to manage when their handles and tips are visible.
A dedicated screwdriver rack is one option.
A drawer organizer with vertical or horizontal compartments is another.
The ideal arrangement depends on the toolbox and available space.
The key characteristics are:
- Tips are protected
- Handles remain visible
- Tools do not become buried
- Different sizes can be identified quickly
- Working ends do not repeatedly strike other tools
Avoid placing several screwdrivers loosely at the bottom of a drawer beneath heavy equipment.
The handles can become scratched and the tips may contact hard surfaces.
Store Screwdrivers With Tips Protected
The screwdriver tip is a working surface.
Repeated impacts can accelerate wear.
For this reason, do not organize screwdrivers in a way that causes the tips to repeatedly hit the metal floor of a drawer.
Dedicated holders are useful because they keep the working ends controlled.
If you prefer drawer storage, use compartments that prevent tools from sliding freely.
The goal is not to protect every screwdriver as if it were delicate laboratory equipment.
It is simply to reduce unnecessary contact and impact.
Organize Screwdrivers by Drive Type
Grouping screwdrivers by type makes selection much easier.
You might keep:
Phillips
Slotted
Torx
Pozidriv
Hex
and specialty drivers in separate sections.
The exact arrangement depends on what you use most often.
This also reduces the temptation to grab an almost-correct screwdriver simply because it is nearby.
Using the right drive type is an important part of preserving the tip.
Organize Screwdrivers by Size
Within each drive type, arrange screwdrivers from smaller to larger sizes when practical.
You do not need to create a complicated measurement system.
A simple visual order is enough.
For example, smaller Phillips screwdrivers can occupy one section and larger ones another.
The benefit is speed.
When a fastener requires a particular driver, you can identify the appropriate tool without searching through a pile.
Keep Precision Screwdrivers Separate
Small precision drivers should not necessarily share the same storage space as heavy household screwdrivers.
Their smaller shafts and tips may be more vulnerable to damage.
A compact organizer, dedicated case, or separate compartment can protect them from being buried beneath heavier tools.
If you regularly work with electronics, appliances, or small mechanical assemblies, keeping precision tools organized separately can also prevent accidental use of a larger screwdriver on a small fastener.
How to Store Pliers
Pliers are easier to organize when the handles and jaws can remain reasonably unobstructed.
A deep pile of tools can place unnecessary pressure on the handles.
Instead, use:
- Drawer compartments
- Side-by-side storage
- Vertical holders
- Dedicated tool racks
The exact solution is less important than ensuring that the pliers can be removed without disturbing an entire drawer.
Keep an eye on the pivot.
If pliers are stored next to heavily contaminated tools, grease and dirt can migrate into the joint.
Clean the pivot before long-term storage.
Group Pliers by Function
A useful system is to organize pliers by purpose.
For example:
Combination pliers
Long-nose pliers
Diagonal cutters
Slip-joint pliers
Locking pliers
Specialty pliers
This makes the toolbox easier to navigate.
It also helps you notice duplicates.
If you have several pairs that perform almost identical functions, you can decide whether all are necessary.
Protect Pliers From Heavy Tools
Pliers are durable, but they do not benefit from having heavy tools repeatedly dropped on them.
Avoid storing them underneath:
- Large hammers
- Heavy wrenches
- Metal components
- Large sockets
If the toolbox is crowded, dedicate a separate section to heavier equipment.
This protects the handles and reduces unnecessary impacts.
Store Wrenches in a Logical Order
Wrenches are particularly easy to organize because their sizes provide a natural sorting system.
Arrange them from smaller to larger when practical.
If you use both metric and imperial sets, keep the systems clearly separated.
For example:
Metric
8 mm
10 mm
12 mm
13 mm
14 mm
17 mm
and:
Imperial
1/4 in
5/16 in
3/8 in
7/16 in
1/2 in
The exact sizes will depend on your collection.
The important thing is that the arrangement makes it immediately obvious which wrench you are reaching for.
Why Size Organization Saves Tool Wear
When wrenches are randomly piled together, it is tempting to pull out the first one that looks approximately correct.
That can lead to using an incorrect size.
A poor fit can damage the fastener and place unnecessary stress on the wrench.
Organized size ranges make the correct tool easier to select.
In that sense, organization indirectly protects both the tool and the fastener.
Store Wrenches So the Working Ends Do Not Constantly Collide
Wrenches can be stored in racks, clips, trays, or drawer organizers.
The important principle is to reduce uncontrolled movement.
Loose wrenches sliding around inside a drawer will repeatedly hit one another.
This may not cause serious damage immediately, but it contributes to scratches, noise, and unnecessary wear.
A wrench organizer can make the entire collection easier to inspect and retrieve.
Organize Combination and Specialty Wrenches Separately
If you have:
- Combination wrenches
- Open-end wrenches
- Box-end wrenches
- Adjustable wrenches
- Ratcheting wrenches
- Specialty wrenches
consider separate sections.
This is particularly useful if you use the toolbox frequently.
It prevents the drawer from becoming a single mass of similar-looking tools.
Think About Frequency of Use
Not every tool needs to occupy prime storage space.
Frequently used tools should be easiest to access.
Occasionally used tools can be stored farther back or in less convenient compartments.
Rarely used specialty tools can be kept in separate cases or drawers.
This simple principle can dramatically improve day-to-day organization.
A toolbox should reflect how you actually work rather than simply how a catalog displays tools.
Create a “First Reach” Area
Most people have a small group of tools they use repeatedly.
For example:
- Phillips screwdriver
- Slotted screwdriver
- Combination pliers
- Adjustable wrench
- Tape measure
Keep these particularly easy to reach.
This reduces the amount of rummaging required for ordinary repairs.
It also lowers the chance that commonly used tools will be tossed randomly into the toolbox after a quick job.
Use Drawer Dividers
Dividers are one of the simplest ways to improve organization.
They create physical boundaries between categories and prevent tools from sliding into one another.
Useful divider sections can include:
Screwdrivers
Pliers
Wrenches
Measuring tools
Utility tools
Choose dividers that fit the toolbox and do not interfere with drawer movement.
You do not need a custom foam system to achieve useful organization.
Basic compartments can provide a large improvement.
Foam Organizers Can Be Useful
Foam inserts can hold tools in specific positions.
This can be useful for valuable or frequently used tool sets.
However, foam has one maintenance consideration: it can hide moisture and dirt underneath tools.
Inspect the surface beneath foam inserts periodically.
If an insert becomes wet, allow it to dry completely before closing the toolbox.
Do not assume that foam automatically protects against humidity.
Magnetic Storage
Magnetic tool holders can be useful for some metal hand tools.
They can keep screwdrivers, pliers, and other tools accessible.
However, magnetic storage is not ideal for every situation.
Consider:
- Tool weight
- Magnet strength
- Installation security
- Risk of dropping tools
- Storage location
- Exposure to moisture
The storage system should be secure enough that tools do not fall unexpectedly.
Pegboards and Open Storage
A pegboard or wall-mounted rack can be very effective for frequently used tools.
The biggest advantage is visibility.
You can see immediately whether a screwdriver, wrench, or pair of pliers is missing.
Open storage also makes inspection easy.
The trade-off is that tools are more exposed to dust and environmental humidity than tools stored in closed cabinets.
For a relatively dry workshop, that may be perfectly acceptable.
For a humid garage, a closed storage system may provide better environmental protection.
Do Not Store Wet Tools
Organization cannot compensate for moisture.
Before returning a tool to its dedicated location, make sure it is dry.
This is especially important after:
- Outdoor work
- Washing
- Rain exposure
- Plumbing work
- Cleaning with water
- Humid conditions
Allow the tool to dry completely before closing the drawer.
A single wet tool can increase the moisture inside a confined storage space.
Separate Dirty and Clean Tools
If some tools are consistently exposed to:
- Grease
- Paint
- Soil
- Adhesive
- Metal shavings
consider storing them separately from cleaner household tools.
This reduces contamination.
It also allows you to clean heavily used tools without repeatedly contaminating the rest of the collection.
Separate does not have to mean a second toolbox.
Different drawers or compartments are often enough.
Use Labels When They Actually Help
Labels are useful for storage categories.
For example:
PHILLIPS
SLOTTED
PLIERS
METRIC WRENCHES
IMPERIAL WRENCHES
They are particularly helpful in large tool collections or shared workshops.
Avoid covering individual tools with unnecessary labels or adhesive if the label itself could create residue or obscure important markings.
Label the storage location rather than the tool whenever practical.
Keep Heavy Tools in Lower Drawers
If your toolbox has multiple drawers, heavier tools are often better placed in lower sections.
This can help with overall cabinet stability depending on the cabinet’s design and manufacturer’s recommendations.
The exact arrangement should follow the toolbox manufacturer’s guidance.
The organizational principle is simple: keep the storage system balanced and avoid putting excessive weight into a small upper drawer.
Protect Precision and Measuring Tools
Tape measures, calipers, gauges, and other measuring equipment should not be buried beneath heavy tools.
Their surfaces and mechanisms can be damaged by repeated impact.
Keep measuring tools in dedicated compartments.
This also helps protect measurement markings and makes them easy to inspect.
A tape measure hidden beneath wrenches can easily become scratched, bent, or contaminated.
Store Cutting Tools Separately
Knives, saws, blades, chisels, and other sharp tools deserve dedicated storage.
They should not be allowed to slide freely through a drawer where they can damage other tools or create a handling hazard.
Use suitable sheaths, cases, racks, or compartments.
This is both an organization issue and a safety issue.
Keep cutting edges controlled.
Keep Chemical Products Out of Tool Drawers
Avoid storing bottles of chemicals, cleaners, or other liquids directly alongside hand tools unless the storage arrangement is designed for them.
A leaking container can contaminate an entire drawer.
Some chemicals can also affect tool finishes, plastics, rubber, and protective coatings.
Store chemical products according to their labels and safety requirements.
A clean toolbox should not double as an unstructured chemical cabinet.
What About Small Hardware?
Screws, nuts, washers, and other small parts can quickly destroy an otherwise organized drawer.
Use small containers or organizers.
Keep them separate from precision hand tools.
Loose hardware can become trapped inside tool mechanisms and can also scratch finished surfaces.
Good organization of small components helps protect the tools around them.
Create a Maintenance Section
If space allows, consider keeping a small area for tools that need attention.
For example:
Needs Cleaning
Needs Rust Treatment
Needs Repair
This prevents questionable tools from going back into the normal storage area.
You do not need a large section.
Even a small tray can be useful.
Once maintenance is completed, return the tool to its regular location.
Remove Tools You Never Use
A toolbox can become harder to manage simply because it contains too much equipment.
During reorganization, ask:
Have I used this tool recently?
Do I have duplicates?
Is it damaged?
Does it serve a unique purpose?
Would storing it elsewhere make more sense?
Tools that are rarely used do not necessarily need to be discarded.
They may simply belong in secondary storage.
Reducing unnecessary crowding makes the main toolbox much easier to maintain.
How to Keep the System Consistent
The most effective organization system is one you actually use.
After finishing a job, return each tool to its designated location.
Do not create a rule that is so complicated you will ignore it.
A simple system is often better:
Screwdrivers here.
Pliers here.
Wrenches here.
Frequently used tools at the front.
Specialty tools elsewhere.
Consistency is more valuable than complexity.
A Five-Minute End-of-Project Reset
At the end of a project, spend a few minutes resetting the toolbox.
Step 1
Remove tools from the work area.
Step 2
Wipe visible dirt and moisture.
Step 3
Inspect for obvious damage.
Step 4
Return each tool to its designated location.
Step 5
Remove loose debris from the toolbox.
Step 6
Close the storage system only after everything is dry.
This small habit prevents organizational problems from accumulating.
How Organization Helps With Rust Prevention
Good storage makes corrosion easier to detect.
When tools are organized, you can see exposed metal surfaces.
A rusty wrench is less likely to remain buried for months.
A damp drawer is easier to notice.
A damaged coating is easier to identify.
This is one reason organization and rust prevention work together.
You are not just arranging tools.
You are making maintenance visible.
How Organization Helps With Tool Longevity
A well-organized toolbox reduces unnecessary physical contact.
Screwdriver tips are less likely to strike heavy tools.
Pliers are less likely to be crushed underneath wrenches.
Measuring tools are less likely to be bent.
Cutting edges are less likely to contact unrelated equipment.
The benefit is not dramatic after one day.
It becomes noticeable over years of repeated use.
Common Storage Mistakes
Throwing everything into one drawer
This makes tools difficult to find and inspect.
Storing heavy tools over precision equipment
Repeated impacts can cause damage.
Leaving wet tools in closed storage
This increases corrosion risk.
Mixing metric and imperial wrenches without organization
This slows selection and increases the chance of choosing the wrong size.
Storing sharp tools loose
This can damage other equipment and create a handling hazard.
Overfilling drawers
Crowded storage makes maintenance difficult.
Keeping dirty and clean tools together
Contamination spreads more easily.
Creating an organization system that is too complicated
If tools are difficult to return, the system will quickly break down.
A Practical Storage Layout
A basic household toolbox could be organized like this:
Top or easiest-access area
Frequently used screwdrivers, pliers, and adjustable wrench.
First main drawer
Screwdrivers grouped by type and size.
Second main drawer
Pliers grouped by function.
Third main drawer
Metric and imperial wrenches separated and ordered by size.
Separate section
Measuring tools.
Separate section
Cutting tools and accessories.
Lower storage
Heavier specialty tools, organized according to the toolbox manufacturer’s weight recommendations.
This is only an example.
The best arrangement is the one that matches your actual work.
Final Thoughts
Storing screwdrivers, pliers, and wrenches properly is not about creating a picture-perfect toolbox. It is about making maintenance easier and reducing unnecessary damage.
Group similar tools together.
Give screwdrivers enough separation that their tips are protected.
Keep pliers easy to access and inspect around their pivots.
Arrange wrenches logically by measurement system and size.
Separate heavy equipment from precision tools.
Keep wet and heavily contaminated tools out of clean storage until they have been properly cleaned and dried.
Most importantly, create a system that you can maintain after every project.
A toolbox that looks organized on the first day but becomes chaotic after a week is not a successful system.
A simple arrangement that remains consistent over months is much more valuable.
Organization also contributes to maintenance in ways that are easy to overlook. When every tool has a visible location, rust becomes easier to spot, damaged equipment is harder to ignore, and cleaning becomes easier to perform.
The best toolbox is not necessarily the one containing the most tools.
It is the one in which the right tool is easy to find, easy to inspect, and stored in a way that helps preserve its condition.
Related Guides
- How to Maintain Screwdrivers So They Last Longer
- How to Maintain Pliers and Keep Their Joints Moving Smoothly
- How to Maintain an Adjustable Wrench
- How to Maintain a Tape Measure So It Stays Accurate and Reliable
- How to Tell Whether a Dirty Tool Needs Cleaning, Lubrication, or Replacement
FAQ
What is the best way to store screwdrivers?
A dedicated rack, organizer, tray, or compartment that keeps the tips protected and the handles visible is a good option. The exact system depends on the toolbox and the number of screwdrivers you have.
Should screwdrivers be stored tip-up or tip-down?
Either arrangement can work when the storage system securely holds the tools and prevents the tips from unnecessary contact. Choose the orientation that provides the best protection and accessibility for your toolbox.
How should I organize metric and imperial wrenches?
Keep the two measurement systems clearly separated and arrange each group by size. This makes selection faster and reduces the chance of using an incorrect wrench.
Should pliers be stored open or closed?
There is no universal requirement. Store them in whatever position fits the organizer without placing unnecessary stress on the handles or pivot. The more important issue is keeping the tool accessible and protecting it from impacts.
Should expensive tools be stored in foam?
Foam organizers can protect tools and keep them in fixed positions, but inspect underneath them periodically because foam can conceal dirt or moisture. Always keep the storage environment dry.
Can I store all my hand tools in one drawer?
You can, but a crowded drawer makes tools harder to find, inspect, and protect. Dividers or separate compartments are generally more practical.
Should I store dirty tools separately?
Yes, separating heavily contaminated tools can reduce the spread of grease, paint, soil, and other residues to cleaner tools.
How can organization help prevent rust?
Organized storage makes it easier to keep tools dry, remove contamination, inspect exposed surfaces, and notice early corrosion. It also reduces the chance that damp or dirty tools remain buried and forgotten.
Where should heavy tools go in a toolbox?
Follow the toolbox manufacturer’s guidance regarding drawer capacity and weight distribution. In many cabinets, heavier equipment is better placed in lower storage areas to help maintain stability.
How often should I reorganize my toolbox?
There is no fixed schedule. Perform a deeper reorganization when drawers become crowded, tools are difficult to find, or contamination accumulates. Small resets after each project can prevent the need for major reorganization.
