
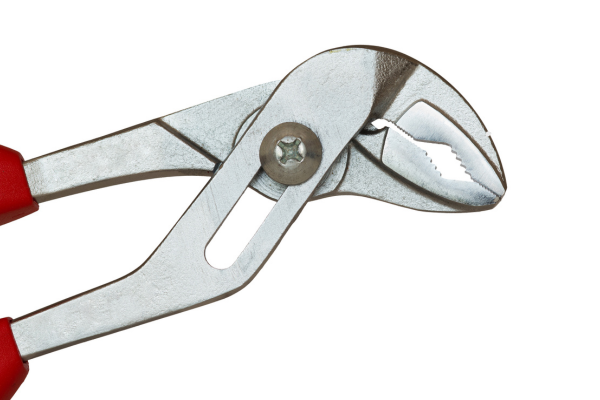
Moving parts are often the first areas of a hand tool to become difficult to maintain. Hinges, plier pivots, adjustable-wrench mechanisms, clamps, folding tools, and other joints can collect dust, grease, metal particles, paint, and fine debris during normal use.
At first, the problem may appear minor. A pair of pliers may feel slightly stiffer than usual, an adjustable wrench may become harder to open, or a folding tool may stop moving as smoothly as it once did. It is tempting to solve the problem by applying more lubricant.
That is not always the right answer.
When dirt has accumulated inside a joint, adding oil can turn the contamination into a thicker paste that attracts even more debris. In some cases, the problem is not dirt at all, but corrosion, mechanical wear, deformation, or internal damage.
The better approach is to inspect the mechanism first, remove accessible contamination carefully, clean the joint without forcing debris deeper into it, and then determine whether lubrication is actually necessary.
This guide explains how to clean common hand-tool joints while minimizing the risk of damaging the mechanism.
Why Tool Joints Collect So Much Dirt
Moving joints naturally create small spaces where contamination can accumulate.
A pair of pliers has a pivot where the two halves rotate against each other. An adjustable wrench has threads and a moving jaw. A folding tool has multiple pivot points. A clamp can contain threaded or sliding mechanisms.
During use, these areas are exposed to:
- Dust
- Metal particles
- Wood debris
- Grease
- Oil
- Paint
- Adhesive residue
- Moisture
- General workshop dirt
The problem becomes worse when lubricant is already present.
Oil and grease can capture fine particles and hold them against the mechanism. A joint that looks dirty may therefore contain a mixture of lubricant and abrasive material rather than simple dust.
Cleaning the joint can remove that contamination and provide a much clearer view of the mechanism.
First Determine Why the Joint Is Stiff
Before cleaning, try to understand the symptom.
A stiff joint can have several causes.
Dirt or debris
The mechanism may simply be contaminated.
Dried grease
Old lubricant can become sticky and collect additional material.
Corrosion
Rust can restrict movement and damage contact surfaces.
Mechanical wear
A worn pivot or thread can create looseness, roughness, or unusual resistance.
Deformation
The tool may have been bent or subjected to force beyond its intended use.
Damage inside the mechanism
A broken component or damaged thread may require repair or replacement.
Cleaning is appropriate when contamination is the likely cause.
It is not a substitute for repairing a damaged mechanism.
Inspect the Tool Before Cleaning
Start by examining the entire tool.
Look at the joint from different angles.
Check for:
- Visible dirt
- Hardened grease
- Rust
- Cracks
- Deformation
- Loose components
- Damaged threads
- Missing fasteners
- Unusual gaps
Then move the mechanism gently through its normal range.
Do not force it.
Pay attention to the sensation.
A joint that moves smoothly but feels slightly dirty may need cleaning.
A joint that catches at one specific point could have a damaged or deformed component.
A joint that has excessive side-to-side movement may have wear rather than contamination.
These distinctions matter because applying cleaning products to a mechanically damaged tool will not solve the underlying problem.
What You Need
You can handle many routine joint-cleaning jobs with a small set of materials:
- Soft-bristled brush
- Old toothbrush
- Microfiber cloth
- Cotton swabs
- Mild dish detergent
- Warm water
- Plastic pick or wooden toothpick
- Appropriate degreaser when necessary
- Suitable lubricant if the mechanism requires it
- Dry towels
A small tray can also be useful when cleaning tools with removable fasteners or small components.
Avoid using sharp metal objects as general-purpose picks.
A steel needle may reach a narrow opening, but it can scratch surfaces, damage seals, or push contamination farther into the mechanism.
Start with non-metallic tools whenever practical.
Step 1: Remove Loose Dirt While the Tool Is Dry
Before adding water or cleaner, remove what you can mechanically.
Use a dry brush around the joint.
Work around:
- Pivot points
- Threads
- Grooves
- Seams
- Moving jaws
- Hinge edges
For pliers, open the handles only as far as necessary to expose accessible areas.
For an adjustable wrench, inspect the moving jaw and exposed thread.
For a folding tool, clean around each visible pivot.
The objective is to remove loose contamination before it mixes with liquid and becomes harder to handle.
Step 2: Brush the Joint Carefully
Once loose debris has been removed, use a soft brush to loosen material that remains.
An old toothbrush is useful because its bristles can reach small spaces without being as aggressive as a metal brush.
Work slowly.
If the joint is heavily contaminated, stop periodically and wipe away the material that has been loosened.
Otherwise, you may simply move the dirt from one part of the joint to another.
Do not use excessive pressure.
A joint does not become cleaner simply because it is being scrubbed harder.
Step 3: Use a Mild Cleaning Solution
For ordinary dirt, mild dish detergent and warm water can be an effective starting point.
Apply the solution to a cloth or brush rather than soaking the entire tool.
This is especially important for tools with enclosed mechanisms.
Work around the contaminated area and remove loosened residue gradually.
For joints that can safely be moved during cleaning, gently operate the mechanism through its normal range while inspecting it.
Do not force a stiff mechanism.
The purpose of movement is to expose accessible surfaces, not to use the joint’s own force to break through contamination.
Step 4: Keep Water Under Control
Water can help clean a dirty joint, but it also introduces a drying problem.
Avoid flooding the mechanism.
Liquid can remain trapped in:
- Pivot holes
- Threads
- Seams
- Bushings
- Bearings
- Enclosed mechanisms
- Tool handles
For a simple pair of pliers, controlled moisture may be relatively straightforward to manage.
For a complicated folding tool or specialized mechanism, the manufacturer’s instructions should take priority.
When a tool cannot be dried reliably, use a cleaning method that introduces less moisture when appropriate.
Step 5: Remove Grease Before Adding More Lubricant
One of the most common mistakes in joint maintenance is applying fresh oil to a dirty mechanism.
If the existing lubricant has collected dust and metal particles, adding more can make the contamination worse.
First determine whether the joint actually needs lubrication.
If the existing grease is visibly contaminated, remove as much of the old residue as practical before considering fresh lubricant.
Use an appropriate degreasing product if necessary and compatible with the tool’s materials.
The cleaner should be applied in a controlled manner rather than flooding the entire mechanism.
After degreasing, remove the residue and dry the joint thoroughly.
How to Clean Pliers at the Pivot
Pliers are among the easiest tools to diagnose because their pivot is visible.
Start by wiping the outside surfaces.
Then brush around the pivot.
Open and close the pliers gently several times to expose different areas.
Avoid forcing the handles when movement is restricted.
If dirt becomes visible around the pivot, continue cleaning in small stages.
Once the joint is clean, inspect it for corrosion and excessive play.
A clean pivot that still feels rough may indicate wear or damage rather than contamination.
How to Clean an Adjustable Wrench
The adjustment mechanism deserves special attention because the moving jaw and screw thread can collect dirt.
First remove external grease and loose debris.
Use a soft brush around the exposed threads.
Move the jaw gradually rather than turning the mechanism aggressively.
As the jaw moves, additional areas of the thread become accessible for inspection.
If residue remains in the thread, a suitable cleaning method can be applied carefully.
Avoid forcing the jaw if it binds.
A thread that is mechanically damaged can become worse when excessive force is applied.
After cleaning and drying, follow the manufacturer’s maintenance recommendations regarding lubrication.
How to Clean Hinges
Simple hinges can collect dust and old lubricant around their moving surfaces.
Brush away loose debris first.
Then use a cloth or appropriate cleaning solution to remove accessible contamination.
Do not flood the hinge unnecessarily.
After cleaning, operate the hinge through its normal range.
If it remains stiff, determine whether lubrication is recommended for that particular hinge.
Some hinges should remain relatively dry, while others are designed to operate with lubrication.
The manufacturer’s recommendation should determine the maintenance method whenever possible.
How to Clean Folding Tool Joints
Folding tools require special care because contamination can enter narrow spaces around several components.
Do not attempt to clean every internal area by inserting sharp objects.
Instead:
- Remove loose debris from accessible surfaces.
- Brush around pivot areas.
- Clean visible residue with a controlled amount of suitable cleaner.
- Wipe away loosened contamination.
- Dry thoroughly.
- Inspect the mechanism before applying any lubricant.
If the tool has a locking mechanism, inspect that mechanism independently.
A locking system that does not operate correctly should not be treated as a simple lubrication problem.
Dealing With Rust Inside a Joint
Rust changes the problem.
A small amount of surface corrosion may be treatable, but rust inside a moving joint can damage the surfaces that need to remain smooth.
Inspect the affected area carefully.
Do not assume that simply adding oil will stop active corrosion.
If a suitable rust-removal treatment is required, determine whether it is compatible with the tool and mechanism first.
Some joints contain materials that should not be exposed to aggressive chemicals.
After rust treatment, follow the product instructions carefully and dry the mechanism completely.
If corrosion has caused deep pitting, severe stiffness, or structural damage, replacement or professional assessment may be more appropriate.
What About Compressed Air?
Compressed air can help remove loose dust and debris from accessible joints, but it should be used carefully.
Air can move particles rapidly and send them toward your eyes or into the surrounding environment.
It can also force contamination deeper into some mechanisms.
Use appropriate eye protection and ventilation when necessary.
For ordinary household maintenance, a soft brush and controlled cleaning method are often sufficient.
Compressed air is a tool for removing loose material, not a substitute for cleaning hardened grease or corrosion.
Should You Use a Wire Brush?
A wire brush can be too aggressive for many precision or finished mechanisms.
It may scratch plated surfaces, damage coatings, and remove more material than necessary.
For routine joint cleaning, start with nylon or another soft brush.
A more aggressive tool should only be used when the surface and maintenance situation justify it.
The objective is to clean the mechanism while preserving its geometry and finish.
When Should You Lubricate the Joint?
Not every joint needs frequent lubrication.
Some mechanisms are designed to operate with minimal lubrication.
Others require a specific lubricant.
If lubrication is appropriate, use the product recommended for the tool whenever possible.
Apply a small amount rather than flooding the mechanism.
Then operate the joint normally and wipe away excess residue.
Excess lubricant can attract:
- Dust
- Sand
- Metal particles
- Wood debris
- Fibers
A joint covered in oil is not necessarily a well-maintained joint.
The ideal amount is enough to support the mechanism without creating an unnecessary contamination trap.
How to Tell if Lubrication Is Actually Needed
After cleaning and drying, test the mechanism again.
Ask:
Does it move smoothly?
Does it remain excessively stiff?
Does it make unusual noises?
Is there visible corrosion?
Is there excessive looseness?
If the mechanism operates smoothly without lubricant, additional lubrication may not provide a meaningful benefit.
If the manufacturer recommends routine lubrication, follow that guidance even when the joint appears to operate normally.
The correct maintenance procedure depends on the design of the tool.
What You Should Avoid
Do not force a seized joint
Excessive force can damage the mechanism or the tool itself.
Do not add oil to a dirty joint without cleaning it
Oil can trap more debris.
Do not flood enclosed mechanisms
Excess liquid can remain trapped.
Do not use strong solvents without checking compatibility
They may affect plastic, rubber, coatings, seals, or lubricants.
Do not insert sharp objects into narrow mechanisms
They can scratch, deform, or damage internal components.
Do not use a tool that is mechanically compromised
Cleaning cannot repair a cracked, bent, or severely damaged mechanism.
Drying After Cleaning
Drying deserves as much attention as the cleaning process.
Use a clean towel to remove moisture from accessible areas.
Then allow the tool to dry completely in a suitable environment.
Move accessible joints gently during drying if doing so is safe and consistent with the manufacturer’s instructions.
This can help expose surfaces that would otherwise remain damp.
Do not immediately close a wet tool inside a toolbox.
Trapped moisture is particularly problematic for steel joints and can cause corrosion to return.
Inspect the Joint After Cleaning
Once the tool is clean and dry, inspect it again.
Look for:
- Remaining dirt
- Rust
- Pitting
- Cracks
- Loose fasteners
- Excessive movement
- Deformation
- Damaged threads
Then operate the mechanism normally.
The joint should behave consistently throughout its range.
If it catches, locks unexpectedly, or develops unusual movement, stop and investigate rather than simply applying more lubricant.
When Cleaning Is Not Enough
Some joint problems cannot be solved through cleaning.
Consider professional service or replacement when:
- The pivot is severely worn
- A thread is damaged
- A component is cracked
- Corrosion has removed substantial metal
- A locking mechanism fails
- A handle is structurally compromised
- The tool cannot move through its intended range
The right maintenance decision is not always to save the existing tool.
Sometimes replacing a low-cost, heavily damaged tool is safer and more economical than trying to restore it.
How to Prevent Dirt From Returning
Once the joint is clean, prevention is easier than repeated restoration.
Keep tools reasonably clean after dirty jobs.
Do not store wet tools.
Avoid unnecessary exposure to paint, adhesive, and abrasive dust.
Keep the toolbox itself clean.
If lubrication is required, do not use excessive amounts.
Store tools in a way that prevents them from becoming buried under loose debris.
These simple habits reduce the amount of contamination that reaches moving joints.
A Practical Joint-Cleaning Routine
For commonly used tools, a simple routine works well.
After a dirty project
Wipe the tool and remove visible debris.
During normal inspection
Check moving joints for stiffness, rust, and unusual movement.
When contamination appears
Brush and clean the joint before adding more lubricant.
After wet cleaning
Dry the mechanism completely.
During periodic maintenance
Check for wear, corrosion, and mechanical damage.
This approach prevents a small buildup problem from becoming a seized mechanism.
Final Thoughts
Dirt inside a hinge, plier pivot, or adjustable mechanism is a maintenance problem worth addressing early.
The temptation is often to reach for oil when a joint becomes stiff. In many cases, however, the better first step is inspection and cleaning. Lubricant can make a dirty mechanism appear smoother temporarily while also trapping more contamination inside it.
Start with dry brushing and controlled cleaning. Use mild solutions where appropriate, keep water away from areas that are difficult to dry, and use stronger degreasers only when necessary and compatible with the tool.
After cleaning, dry the joint thoroughly and test its movement.
If the mechanism still behaves abnormally, investigate the possibility of corrosion, wear, deformation, or mechanical damage rather than continuing to add lubricant.
Good tool maintenance is not about making every mechanism move as freely as possible. It is about keeping the mechanism clean, appropriately lubricated when required, protected from corrosion, and mechanically sound.
A clean joint is easier to inspect and maintain, and early attention can prevent a relatively small contamination problem from becoming a damaged or unusable tool.
Related Guides
- How to Clean Hand Tools After Heavy Use Without Damaging the Finish
- How to Clean Greasy Wrenches, Pliers, and Sockets at Home
- How to Restore a Rusty Hand Tool Step by Step
- How to Prevent Rust on Hand Tools in a Humid Garage
- How to Tell Whether a Dirty Tool Needs Cleaning, Lubrication, or Replacement
FAQ
How do I clean a dirty plier pivot?
Start by removing loose debris with a soft brush. Clean accessible contamination with an appropriate mild cleaning solution, dry the pivot thoroughly, and then determine whether lubrication is necessary.
Should I oil a stiff tool joint?
Not automatically. A stiff joint may be dirty, corroded, worn, or damaged. Clean and inspect it first, then follow the manufacturer’s recommendation regarding lubrication.
Can I use WD-40 to clean a tool joint?
Products such as WD-40 can have different formulations and intended uses, so follow the specific product’s instructions rather than treating every version as a universal lubricant or cleaner. Check compatibility with the tool before use.
Why does my adjustable wrench remain stiff after cleaning?
Possible causes include corrosion, damaged threads, mechanical wear, deformation, or an issue with the adjustment mechanism. If normal cleaning does not restore smooth movement, avoid forcing it.
Can I use a wire brush on a tool hinge?
A wire brush may be unnecessarily aggressive for many hinges and can damage finishes. Start with a nylon or soft-bristled brush unless the manufacturer recommends a more abrasive method.
How do I prevent dirt from building up in tool joints?
Keep tools reasonably clean after use, avoid excessive lubricant, store tools in a clean and dry toolbox, and remove grease and debris before they have an opportunity to accumulate inside moving mechanisms.
