
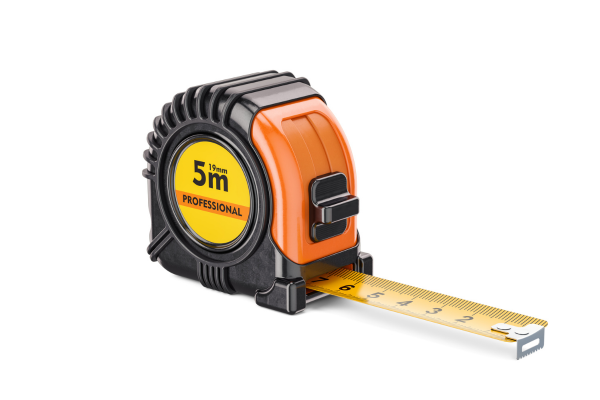
A tape measure is one of the most frequently used measuring tools in a household toolbox. It is simple enough to operate within seconds, yet small problems with the blade, markings, hook, lock, or winding mechanism can make it frustrating to use.
Unlike a wrench or pair of pliers, a tape measure also has another important characteristic: its usefulness depends on readable and trustworthy measurements. A dirty blade can be cleaned, but worn or damaged markings may affect the accuracy of the information you are trying to record. A bent hook can create inconsistent measurements. A damaged winding mechanism can make the blade retract unpredictably.
Good maintenance does not require taking the tape measure apart. In fact, disassembling a spring-loaded tape measure without the manufacturer’s procedure can create unnecessary risks and make the tool difficult to reassemble correctly.
For most household users, the best maintenance routine is much simpler: keep the blade reasonably clean, remove moisture, inspect the hook and markings, check the lock, avoid abusing the blade, and store the tape measure where it will not be repeatedly damaged.
This guide explains how to maintain a tape measure, identify common problems, and recognize when cleaning is enough and when the tool should be replaced.
Why Tape Measure Maintenance Matters
A tape measure contains several components that work together.
The blade needs to extend smoothly.
The markings need to remain readable.
The hook needs to maintain its intended position.
The locking mechanism needs to hold the blade when engaged.
The spring and internal winding system need to retract the blade consistently.
The housing needs to protect those components from damage.
A problem in any of these areas can affect the usefulness of the tool.
For example, a slightly dirty blade may still measure correctly.
A blade with damaged markings may not.
A small amount of surface corrosion may be cosmetic.
A badly corroded blade can become rough, weakened, or difficult to retract.
Maintenance is therefore about preserving both physical condition and measuring reliability.
Start With a Visual Inspection
Before cleaning the tape measure, inspect it carefully.
Extend enough of the blade to examine the exposed surface.
Look for:
- Dirt
- Dust
- Paint
- Adhesive
- Oil
- Rust
- Scratches
- Cracks
- Bent sections
- Damaged markings
Inspect the hook at the end of the blade.
Look at the housing for cracks or significant impact damage.
Then check the lock mechanism.
A quick inspection can reveal whether the tape measure simply needs cleaning or whether there is a more serious problem.
Do not pull the blade to its maximum length just for inspection unless necessary. Extending it enough to examine the important areas is usually sufficient.
Clean the Blade Before Applying Anything Strong
A tape measure blade can collect more dirt than it appears to have.
Dust from wood, drywall, soil, metal particles, paint, and other materials can stick to its surface.
Start with dry cleaning.
Use a clean cloth to wipe both accessible surfaces of the blade.
If loose particles are present, remove them with a soft cloth or brush.
Avoid aggressive scraping.
The markings printed or stamped onto the blade are more important than achieving a perfectly polished surface.
Cleaning should preserve the measurement markings rather than remove them.
Use Mild Soap for Heavier Dirt
When dry cleaning is not enough, a mild cleaning solution can help with ordinary dirt.
Dampen a cloth rather than soaking the entire tape measure.
Wipe the exposed blade carefully.
Avoid unnecessarily introducing water into the housing.
Once the dirt has been removed, wipe away remaining soap residue with a clean damp cloth when appropriate and dry the blade thoroughly.
Do not immediately retract a wet blade into the housing.
That can introduce moisture into an enclosed area where it is difficult to dry.
Never Ignore the Blade Hook
The hook at the end of the tape measure is easy to overlook because it is small.
But it plays an important role.
The hook allows the blade to catch against an edge and can move slightly relative to the blade on many tape measures. That movement is part of the design and helps account for different measuring positions.
Do not bend or straighten the hook simply because it moves.
Instead, inspect it for:
- Excessive deformation
- Loose or missing fasteners
- Significant corrosion
- Damaged edges
- Unusual movement
- Physical damage
If the hook has been seriously bent or damaged, measurements may become inconsistent.
A dirty blade can be cleaned.
A structurally damaged hook may require replacement of the tape measure.
Do Not Try to Eliminate Normal Hook Movement
One common mistake is assuming that the tape hook should never move.
On many tape measures, the end hook is intentionally designed to move slightly.
This compensates for the thickness of the hook during inside and outside measurements.
If the hook movement is part of the original design and remains controlled, do not try to lock it rigidly into position.
What matters is whether the hook is functioning as intended.
If the movement becomes excessive or the attachment hardware is damaged, investigate the problem.
Keep the Lock Mechanism Clean
The blade lock is a relatively simple mechanism, but dirt can interfere with it.
Use a soft cloth or brush to remove dust around the lock.
If the lock becomes difficult to operate, inspect the mechanism for visible contamination.
Do not flood the housing with cleaning fluid.
Liquid can enter the internal mechanism and create problems that are more difficult to fix.
If a specialized tape measure has a manufacturer’s maintenance procedure for the lock, follow it.
The lock should engage and release consistently without requiring excessive force.
Check How the Blade Retracts
After cleaning and drying the visible blade, test the retraction.
Keep your hands clear of the path of the returning blade.
Do not allow the tape to snap violently back into the housing.
A controlled retraction helps protect both the tool and the user’s hands.
Listen for unusual noises.
Pay attention to whether the blade:
- Retracts smoothly
- Hesitates
- Stops unexpectedly
- Retracts unevenly
- Becomes difficult near certain positions
A problem that appears only when the blade is at a certain length may indicate damage or contamination inside the mechanism.
Do not open the housing simply because the spring does not feel perfect.
Internal tape-measure springs can store significant energy, and disassembly should be left to procedures specifically supported by the manufacturer or qualified service personnel.
Inspect the Blade for Bending
A tape measure blade needs to extend and retract predictably.
Inspect it for permanent bends or sharp kinks.
Small cosmetic marks are not necessarily serious.
A major deformation, however, can affect how the blade extends and how its markings align with the object being measured.
Do not deliberately flatten a badly bent blade by forcing it against a hard surface.
That can create additional damage.
If the blade has a significant permanent deformation, replacement may be more sensible than attempting to reshape it.
Protect the Measurement Markings
The printed or stamped markings are among the most important parts of a tape measure.
Once they become difficult to read, the tool becomes less useful even if the blade itself remains mechanically sound.
Avoid:
- Abrasive pads
- Aggressive scraping
- Coarse wire brushes
- Strong solvents that may affect printing
- Excessive polishing
When cleaning a dirty blade, prioritize preserving the markings.
A little discoloration is usually less important than removing part of a measurement line.
Paint on a Tape Measure Blade
Paint contamination is common when tape measures are used during renovation work.
Fresh paint is easier to remove before it cures.
Wipe it away carefully when practical.
For dried paint, choose a method that is compatible with the blade finish and markings.
Do not assume that a strong paint remover is appropriate.
A solvent powerful enough to soften paint may also affect printed measurements.
If the paint cannot be removed without damaging the markings, it may be better to leave a small amount of residue than to sacrifice the measurement scale.
Adhesive Residue on the Blade
Tape measures can also collect adhesive from labels, masking tape, duct tape, or construction materials.
Start with gentle mechanical removal.
A plastic scraper can help with some residues while reducing the risk of scratching the blade.
If a chemical adhesive remover is necessary, confirm that it is compatible with the blade’s coating and markings.
Test a small area first when appropriate.
After removal, clean away any remaining chemical residue and dry the blade before retracting it.
Oil and Grease on the Tape Measure
Oil can make a tape measure unpleasant to handle and can transfer residue to hands and materials.
It can also attract dust.
Wipe away the bulk contamination with a dry cloth first.
Then use an appropriate cleaning method for the blade and housing materials.
Avoid saturating the blade with oil as a form of general maintenance.
A typical measuring blade does not need to be visibly oily to function properly.
If a specific part of the internal mechanism requires lubrication, follow the manufacturer’s maintenance instructions rather than applying oil through the housing.
Rust on a Tape Measure Blade
Light surface rust can sometimes be addressed, but special care is necessary because the blade contains measurement markings.
Aggressive sanding can remove rust and markings at the same time.
Before choosing a rust-removal method, determine whether the corrosion is superficial or whether the blade has suffered significant deterioration.
If corrosion is deep, widespread, or causing the blade to become rough or structurally compromised, replacement may be more practical.
A tape measure is not a good candidate for aggressive metal restoration when doing so would destroy the scale you depend on for measurements.
Keep Moisture Out of the Housing
Moisture is particularly undesirable inside a tape measure because the housing is relatively difficult to dry.
After using the tool outdoors or in wet conditions, allow the exposed blade to dry thoroughly before storing it.
Do not intentionally rinse the entire tape measure unless the manufacturer specifically states that the tool is designed for such cleaning.
Many ordinary tape measures are not waterproof.
Even when the blade can tolerate water, the housing and internal spring mechanism may not.
Do Not Wash the Whole Tape Measure Under Running Water
This may seem like an easy way to remove dirt.
It can also introduce moisture into the housing.
Water can reach:
- Spring mechanisms
- Blade guides
- Lock components
- Bearings or pivots in specialized models
- Internal surfaces
Once inside, that moisture may remain trapped.
A damp internal mechanism can eventually contribute to corrosion or inconsistent operation.
Controlled cleaning is usually safer.
Protect the Blade Guide
The opening where the blade enters the housing helps guide the blade during extension and retraction.
Dirt can accumulate around this area.
Inspect it periodically.
Remove loose debris with a soft brush or cloth.
Avoid inserting sharp objects deeply into the opening.
If contamination is firmly trapped inside, follow the manufacturer’s maintenance instructions rather than attempting to dismantle the housing.
The blade should move through the guide without unusual resistance.
Do Not Force a Stuck Blade
A tape measure that suddenly stops should not be treated like a jammed drawer.
Pulling harder can damage the blade or internal spring.
If the blade becomes stuck:
- Stop applying force.
- Inspect the exposed section.
- Check whether the lock is engaged.
- Look for visible debris or a kink.
- Retract the blade gently if possible.
- Consult the manufacturer’s instructions if the problem persists.
If the internal mechanism is damaged, replacement is often more practical than attempting an improvised repair.
Avoid Slamming the Blade Back Into the Housing
A tape measure is designed to retract, but it does not need to retract violently.
Allowing the blade to slam back into the case repeatedly can increase wear on:
- The blade hook
- The blade end
- The opening
- The internal spring mechanism
- The housing
Control the retraction with your hand when practical.
This is particularly useful on larger tape measures with strong return springs.
The goal is not to stop the blade completely before every retraction. It is simply to avoid unnecessary impact.
Protect the Hook During Storage
The hook is one of the most exposed parts of the tape measure.
Avoid storing the tool where the hook can repeatedly strike hard metal surfaces.
Do not throw the tape measure into a toolbox underneath heavy tools.
A strong impact can deform the hook or housing.
A dedicated compartment or organizer can reduce unnecessary damage.
Store the Tape Measure in a Dry Location
A tape measure does not need complicated storage.
Keep it:
- Dry
- Protected from unnecessary impacts
- Away from standing water
- Easy to access
- Away from corrosive substances
If the tool is stored in a humid garage, inspect the blade periodically.
For particularly humid environments, environmental moisture control matters more than repeatedly applying protective products.
Do Not Wrap the Blade in Thick Oil for Storage
Heavy oil is usually unnecessary for ordinary tape-measure storage.
It can attract dust and contaminate the blade markings.
A clean, dry tape measure stored in a suitable environment is generally easier to use than one covered in excessive oil.
If corrosion protection is appropriate for a particular model, follow the manufacturer’s recommendations.
Check the Accuracy of the Tape Measure
One important aspect of tape-measure maintenance is recognizing that mechanical condition and measuring accuracy are related but not identical.
A tape measure can look clean and still produce inconsistent measurements if the hook or blade has been damaged.
If measurement accuracy is important, compare the tape with a trusted reference when appropriate.
You can check repeated measurements against a known dimension.
The goal is not to assume that a tape measure must be laboratory-calibrated for ordinary household work.
It is simply useful to recognize when a tool may no longer be giving consistent results.
Check the First Measurement Mark
The beginning of the scale deserves particular attention.
Look at the zero reference and the hook.
If the hook is damaged or the first markings are worn, measurements can become difficult to interpret.
Do not repaint or redraw measurement markings yourself.
A homemade mark may look correct but could introduce an error.
If the measurement scale is significantly damaged, replacement is generally more reliable.
What If the Tape Measure Has a Loose Hook?
First determine whether the movement is intentional.
Some movement is part of the design.
Excessive movement, visible damage, loose hardware, or a hook that no longer sits consistently can be a problem.
Do not simply bend the hook back into place without understanding why it moved.
The attachment may have been damaged.
For an inexpensive tape measure, replacement may be the simplest solution.
For a high-quality professional tool, manufacturer service may be worthwhile.
Protect the Housing From Impact
The plastic or metal housing protects the internal mechanism.
Repeated drops can cause:
- Cracks
- Distortion
- Lock problems
- Blade-guide damage
- Internal spring issues
A tape measure is designed to tolerate normal workshop use, but that does not mean impact damage should be ignored.
After a significant fall, inspect the housing and test the blade.
If the case is cracked or the mechanism behaves differently, investigate before relying on the tool for important measurements.
Cleaning Different Housing Materials
Tape measures may use plastic, rubberized materials, metal, or combinations of these.
For general dirt, a mild cleaning solution and cloth may be suitable when compatible with the material.
Avoid aggressive solvents.
A solvent can change the appearance or texture of rubberized surfaces and may affect printed labels.
The housing does not need to be polished.
It needs to remain intact and easy to handle.
Protect the Tape From Corrosive Contamination
A tape measure used around:
- Salt
- Fertilizer
- Chemicals
- Wet concrete
- Cleaning products
- Other corrosive materials
may require more frequent cleaning.
Remove contamination promptly and dry the tool.
Do not assume that because the tape measure is inexpensive it can simply be ignored.
Repeated exposure can damage the blade and housing.
When Lubrication Is Appropriate
Most household tape measures should not be opened and lubricated as part of routine maintenance.
The internal winding system is generally not something that needs user intervention unless the manufacturer specifically provides instructions.
If the blade mechanism becomes noisy or stiff, cleaning the accessible components and inspecting the tool may be appropriate.
Do not inject random lubricants into the housing.
A product that is unsuitable for the internal materials can make the mechanism worse.
When a Tape Measure Should Be Replaced
Replacement may be appropriate when:
- Measurement markings are seriously damaged
- The blade is badly bent
- The hook is structurally compromised
- The blade has significant corrosion
- The housing is severely cracked
- The lock no longer functions properly
- The blade retracts unpredictably
- The tool produces inconsistent measurements
- The internal mechanism is damaged
A small cosmetic scratch is not enough to justify replacement.
The decision should focus on reliability.
A Five-Minute Tape Measure Maintenance Routine
For ordinary household use, routine maintenance can be simple.
Step 1
Extend part of the blade.
Step 2
Wipe away dust and dirt.
Step 3
Inspect the measurement markings.
Step 4
Check the hook for damage.
Step 5
Test the lock.
Step 6
Allow the blade to retract under control.
Step 7
Check for unusual resistance or noise.
Step 8
Store the tape measure somewhere dry and protected.
This routine takes very little time and can reveal problems early.
A Deeper Periodic Inspection
For a tape measure used frequently, perform a more thorough inspection periodically.
Extend more of the blade and inspect it section by section.
Look for:
- Corrosion
- Permanent bends
- Deep scratches
- Damaged markings
- Paint
- Adhesive
- Oil
- Deformation near the hook
Inspect the housing and locking mechanism.
If the tool has suffered a hard fall or other unusual event, pay additional attention to the case and blade guide.
The purpose is not to turn maintenance into a major project.
It is to notice changes before they interfere with measurements.
Common Tape Measure Maintenance Mistakes
Scrubbing the markings aggressively
This can remove useful measurement information.
Using strong solvents without checking compatibility
They may damage coatings, labels, plastics, or printed markings.
Washing the entire tape measure
Water can enter the housing.
Slamming the blade back into the case
Repeated impact creates unnecessary wear.
Forcing a stuck blade
This can damage the internal mechanism.
Bending the hook to “fix” normal movement
Some hook movement is intentional.
Oiling the entire blade
Excess oil attracts dust and contaminates the measuring surface.
Ignoring accuracy problems
A tape measure that looks clean may still have a damaged hook or blade.
Final Thoughts
Maintaining a tape measure is mostly about preserving the parts that make it useful: the blade, markings, hook, lock, housing, and internal winding mechanism.
The best maintenance routine is also relatively simple.
Keep the blade clean without aggressively scrubbing its markings. Remove paint, adhesive, grease, and other contamination using methods appropriate for the blade’s finish. Keep moisture away from the housing and allow the blade to dry completely before retracting it after wet exposure.
Inspect the hook carefully, but remember that some movement is intentional on many tape measures. Do not try to eliminate designed movement by bending or locking the hook unnecessarily.
Avoid forcing a stuck blade, flooding the housing with cleaning products, or opening a spring-loaded mechanism without an appropriate manufacturer procedure.
Most importantly, remember that a tape measure has to do more than look clean. Its markings need to remain readable, its hook needs to function properly, the blade needs to extend and retract predictably, and measurements need to remain consistent enough for the work being performed.
When damage affects the measurement scale, blade geometry, hook, locking mechanism, or internal operation, replacement may be more sensible than an improvised repair.
A clean and properly stored tape measure can remain useful for years. The goal is not perfection. It is preserving reliable measurement performance while preventing dirt, moisture, and avoidable impacts from gradually turning a simple tool into an unreliable one.
Related Guides
- How to Maintain Screwdrivers So They Last Longer
- How to Maintain Pliers and Keep Their Joints Moving Smoothly
- How to Maintain an Adjustable Wrench
- How to Care for a Hammer So the Handle and Head Stay in Good Condition
- How to Tell Whether a Dirty Tool Needs Cleaning, Lubrication, or Replacement
FAQ
How do I clean a tape measure blade?
Start by wiping loose dirt away with a clean cloth. For heavier contamination, a mild cleaning solution may be appropriate if it is compatible with the blade and markings. Dry the blade thoroughly before retracting it.
Can I wash my entire tape measure with water?
It is generally better to avoid washing the entire housing unless the manufacturer specifically states that the model can tolerate that treatment. Water can enter the internal spring and locking mechanisms.
Why does the hook on my tape measure move?
Many tape measures use a movable end hook by design. The movement can help account for the hook’s thickness when making different types of measurements. Excessive or abnormal movement is a different issue and may indicate damage.
How can I remove dried paint from a tape measure?
Use the least aggressive method that can remove the contamination without damaging the measurement markings or blade finish. A plastic scraper may help with some residues. Test any chemical product before using it broadly.
Should I oil the blade?
Routine oiling is generally unnecessary. A visibly oily blade can attract dust and make the tool harder to handle. Use corrosion protection only when appropriate for the tool and storage conditions.
Why is my tape measure retracting slowly?
Possible causes include contamination around the blade guide, a damaged blade, internal mechanism wear, or another mechanical problem. Clean accessible areas first and avoid forcing or dismantling the spring mechanism.
Can I straighten a bent tape measure blade?
A small deformation may not always prevent use, but forcing a badly bent blade flat can cause additional damage. If the blade has a significant permanent bend, replacement is often more reliable.
How do I know if my tape measure is still accurate?
Inspect the hook, blade, and markings and compare repeated measurements against a trusted reference when appropriate. If the hook is damaged or measurements are inconsistent, the tool may need replacement.
How do I protect a tape measure in a humid garage?
Keep it clean and dry, avoid storing it while wet, control excessive environmental humidity when possible, and inspect the blade regularly for early corrosion.
When should I replace a tape measure?
Consider replacement when the measurement markings are seriously damaged, the blade is badly bent or corroded, the hook is compromised, the locking mechanism fails, the housing is severely damaged, or measurements are no longer reliable.
