
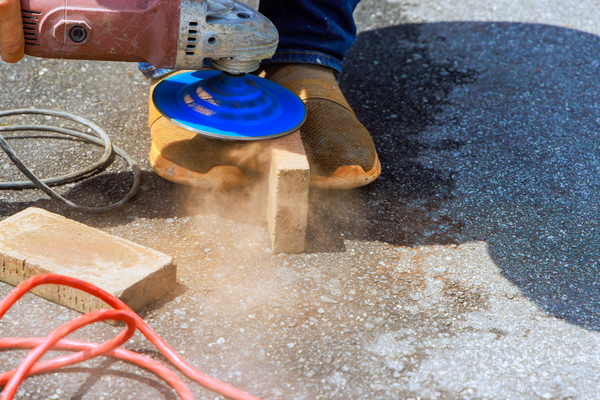
Dust is one of the most persistent enemies of power tools. A drill used for woodworking, a sander working on painted surfaces, a circular saw cutting boards, or a grinder used on metal can produce enough particles to cover the outside of the tool within minutes.
The visible dust is usually easy to deal with. The more important problem is what happens to particles that reach ventilation openings, switches, accessory holders, and other areas around the housing.
Power tools need airflow and contain mechanical and electrical components that can be affected by contamination. Dust mixed with grease can become difficult to remove, while fine particles can accumulate gradually over repeated projects.
Preventing dust buildup is therefore more effective than repeatedly trying to perform aggressive cleaning.
The good news is that you do not need to keep every power tool sealed away during use. A combination of dust control at the source, appropriate operating habits, sensible storage, regular external cleaning, and attention to ventilation openings can substantially reduce unnecessary contamination.
This guide explains practical ways to keep dust from building up inside power tools while avoiding cleaning methods that can accidentally push debris farther into the housing.
Why Dust Gets Inside Power Tools
Power tools often contain ventilation openings because their motors and other components can generate heat during operation.
As air moves through or around a tool, airborne particles can potentially reach the interior.
The amount of contamination depends on several factors:
- Type of material being cut or drilled
- Amount of dust produced
- Tool design
- Ventilation arrangement
- Work environment
- Frequency of use
- Dust-collection practices
- Cleaning habits
Fine dust is particularly difficult because it can remain suspended in the air longer and travel farther than larger particles.
A tool used occasionally in a clean environment may accumulate very little internal contamination.
A tool used daily around fine woodworking dust can experience a very different situation.
The Best Time to Control Dust Is Before It Reaches the Tool
Cleaning is important, but prevention begins at the workpiece.
If you can reduce the amount of dust entering the air, you reduce the amount available to reach your power tool.
Depending on the job, this can involve appropriate:
- Dust extraction
- Vacuum systems
- Dust-collection attachments
- Work-area cleanup
- Cutting and drilling practices
- Personal protective equipment
The exact setup depends on the material and tool.
The important principle is simple:
Controlling dust at the source is generally better than trying to remove it after it has spread throughout the workshop.
Understand the Type of Dust You Are Producing
Different projects produce different particles.
Woodworking can produce fine wood dust.
Drywall work can produce gypsum-based dust.
Masonry drilling can release very fine mineral particles.
Metalworking can generate abrasive particles and chips.
Sanding painted surfaces can produce dust containing material from the coating as well as the underlying surface.
These differences matter for both the tool and the work environment.
A cleaning method suitable for ordinary sawdust may not be appropriate after grinding metal.
More importantly, some dust-producing activities require additional respiratory and other safety precautions appropriate to the material being worked.
Tool maintenance should never be separated completely from safe dust management.
Position the Tool Away From the Main Dust Stream
A small change in work position can reduce contamination.
When practical, position the tool so that dust generated by the work does not flow directly toward its ventilation openings.
This is not always possible, particularly with handheld equipment.
However, avoiding unnecessary exposure can still help.
For example, a dust-collection system attached near the cutting or drilling point can capture particles before they travel around the tool.
The objective is not to eliminate every particle.
It is to reduce the amount of airborne material reaching the housing.
Use Dust Extraction When the Tool Supports It
Some power tools are designed to work with dust-extraction systems.
Examples can include:
- Sanders
- Circular saws
- Routers
- Certain drills
- Oscillating tools
- Specialty cutting equipment
When the manufacturer provides a dust-extraction connection, using an appropriate system can significantly reduce loose material around the work area.
Use attachments and adapters that are compatible with the specific tool.
A poorly fitted connection may leak dust or interfere with normal operation.
The manufacturer’s instructions should determine which accessories are appropriate.
Keep the Work Area Clean
Dust that has already settled can become airborne again.
Every movement around a dusty workbench can disturb settled particles.
That means workshop cleanup is also a form of power-tool maintenance.
Remove accumulated dust from:
- Work surfaces
- Tool cases
- Shelves
- Floors
- Storage areas
Do so using a method appropriate for the material.
A vacuum can often collect dust without simply redistributing it.
Avoid creating a large airborne cloud of fine particles just to make a surface look clean.
Clean the Tool After Dusty Work
Even when dust collection is used, some contamination will remain.
After a dusty project, remove the battery or disconnect the tool from its power source according to the manufacturer’s procedure.
Then inspect the exterior.
Look around:
- Vents
- Switches
- Battery compartment
- Chuck
- Accessory holder
- Housing seams
- Handles
Remove loose dust using a soft brush or suitable vacuuming method.
The earlier you remove the contamination, the less opportunity it has to migrate deeper into the tool or become compacted with other residues.
Avoid Blowing Dust Deeper Into the Housing
One of the most common cleaning mistakes is using high-pressure compressed air indiscriminately.
The tool may look dramatically cleaner afterward.
The problem is that the dust may have been moved from the exterior into the interior.
Strong airflow can push particles through ventilation openings and around internal components.
If compressed air is appropriate for your specific tool and cleaning procedure, use it carefully and according to the manufacturer’s guidance.
Do not assume that maximum pressure is the best cleaning method.
Use a Soft Brush for Ventilation Openings
A soft-bristled brush can remove loose dust around ventilation openings without forcing it deeply into the tool.
Brush outward rather than pushing particles through the openings.
Combine the brush with suitable vacuum collection when practical.
Do not insert the brush deep into the housing.
The goal is to clean the accessible surface around the vents, not dismantle or disturb internal components.
Use a Vacuum Carefully
A suitable vacuum can collect loose dust rather than redistributing it.
Place the nozzle near the contaminated area without pressing aggressively against delicate surfaces.
A brush attachment can make the process easier.
This method can be particularly useful for:
- Ventilation openings
- Battery compartments
- Tool cases
- Work surfaces
- Accessory storage
The exact approach should be adapted to the tool manufacturer’s recommendations.
Keep Battery Contacts Free of Debris
Battery-powered tools have another contamination point: the battery interface.
Remove the battery and inspect the compartment after dusty work.
Look for:
- Dust
- Fine debris
- Corrosion
- Foreign objects
- Damaged contacts
Use a gentle dry-cleaning method for loose particles.
Avoid applying random liquids, oils, or abrasive materials to electrical contacts.
If a contact appears bent, burned, severely corroded, or otherwise damaged, consult the manufacturer’s service guidance rather than attempting an improvised repair.
Clean Around the Trigger Without Flooding It
Triggers and switches can accumulate dust because they are exposed to the user’s hand and the surrounding work environment.
Use a soft brush or suitable dry-cleaning method to remove visible debris.
Avoid spraying cleaner directly into the trigger mechanism.
Do not insert sharp objects into gaps.
A switch that becomes sticky, inconsistent, or unusually difficult to operate should be investigated rather than treated as a simple dust problem.
Pay Attention to the Chuck and Accessory Holder
On drills and impact drivers, the chuck can collect fine particles.
After dusty work, inspect the outside of the chuck and remove loose contamination.
Check whether it opens and closes normally.
Do not force a contaminated or damaged mechanism.
For other cordless tools, inspect the accessory holder or attachment mechanism.
Dust accumulation around these areas can interfere with installation and removal of accessories.
Keep them clean without introducing unnecessary liquid.
Sanding Tools Need Extra Attention
Sanders can produce particularly large quantities of fine dust.
Because the tool works directly in a dust-producing operation, careful dust management is important.
Use the designed dust-collection system when available.
Keep the collection container or bag maintained according to the manufacturer’s instructions.
After sanding, clean the exterior of the tool and inspect ventilation openings.
Do not assume that a dust-extraction attachment captures every particle.
A small amount of residual contamination is normal, but excessive buildup deserves attention.
Circular Saws and Similar Tools
Cutting tools can produce substantial amounts of sawdust or other debris.
Use appropriate collection equipment when supported.
Keep the work area clean.
After use, inspect the housing and vents.
Do not direct uncontrolled high-pressure air into the motor housing simply to remove visible dust.
Inspect the blade and guard separately.
Contamination around moving or protective components should be removed using methods appropriate to the tool.
Routers and High-Dust Applications
Routers can generate a significant amount of fine material, especially when used on wood.
Dust management should begin at the workpiece.
Use compatible extraction equipment when available.
After the project, remove the battery or disconnect power as appropriate.
Clean the exterior.
Inspect vents and controls.
Pay attention to the base and adjustment areas where dust can accumulate.
Avoid forcing dust into the housing through aggressive blowing.
If the tool shows abnormal operation after heavy contamination, professional inspection may be appropriate.
Masonry Dust Requires Special Care
Masonry and concrete work can produce very fine particles.
These can spread widely and settle on both tools and nearby surfaces.
After masonry drilling or cutting, remove the tool from the dusty area when safe and practical before performing its external cleaning.
Use an appropriate dust-control method.
Do not simply blast the tool with high-pressure air while standing in the middle of the dust cloud.
The method should protect both the equipment and the person performing the cleaning.
If significant dust appears to have entered the tool, follow the manufacturer’s service recommendations.
Metalworking Produces Different Debris
Metal drilling, grinding, and cutting can produce sharp chips as well as fine particulate matter.
Do not wipe loose metal fragments away with bare hands.
Use an appropriate collection method.
Inspect ventilation areas carefully.
Metal particles can also become trapped in oily residues.
Clean the exterior appropriately before storing the tool.
If visible metal debris has entered deep inside the housing, professional cleaning may be more appropriate than repeatedly blowing or brushing it.
Keep Oil and Dust From Becoming a Paste
Dust is particularly difficult to remove when mixed with grease or oil.
A dry layer of wood dust may be easy to brush away.
Dust combined with oily residue can become sticky and compacted.
This can happen around:
- Moving mechanisms
- Chucks
- Adjustment controls
- Ventilation openings
- Housing seams
Do not respond by adding more lubricant.
Clean the contamination first.
If a mechanism requires lubrication, apply the appropriate product afterward and only in the necessary amount.
Avoid Over-Lubricating Power Tools
Lubrication requirements vary significantly between tools.
Some mechanical components require lubrication.
Others are designed with sealed or maintenance-free components.
Applying oil to areas that were not designed to receive it can attract dust and create additional contamination.
Follow manufacturer instructions.
When lubrication is appropriate, use the correct product and amount.
The goal is to support the mechanism, not create a wet surface for dust to adhere to.
Do Not Use Household Cleaners Without Checking Compatibility
Power-tool housings can contain several materials.
A single tool might combine:
- Plastic
- Rubber
- Metal
- Paint
- Labels
- Coatings
A household solvent that removes grease effectively may also damage plastic or rubber.
Before using a chemical cleaner, verify that it is appropriate for the tool’s materials.
For ordinary dust, chemical cleaning is often unnecessary.
A dry cloth, soft brush, or suitable vacuum may be sufficient.
Keep Tool Cases Clean
A clean tool can become dirty again immediately if the storage case contains a thick layer of dust.
Vacuum loose debris from the case.
Clean accessible surfaces appropriately.
Inspect foam inserts and compartments.
Pay particular attention to the area where the tool sits.
Dust accumulated beneath the tool can be redistributed whenever the case is moved.
A clean case forms part of the dust-prevention system.
Protect Tools During Particularly Dusty Projects
There may be times when an additional barrier is useful.
For example, during an exceptionally dusty task, a tool may be temporarily protected in a way that does not interfere with ventilation or operation.
Any protective covering must never obstruct cooling openings or create unsafe operating conditions.
Do not wrap an operating power tool in plastic simply to keep it clean.
The tool needs appropriate airflow and access to controls.
Protection should never compromise normal operation.
Store Tools Away From Active Dust Sources
The best time to protect a power tool is before storage.
Do not leave it on a workbench while sweeping or sanding nearby.
Move cleaned equipment away from active dust-generation areas.
Store the tool in a suitable case or cabinet once it is clean and dry.
This reduces the amount of settled dust that can reach the tool between projects.
Keep Different Workshop Activities Separated
If possible, separate especially dusty work from cleaner equipment.
For example, a woodworking station can generate very different airborne material from a general repair bench.
A designated area for sanding or cutting can reduce the amount of dust reaching nearby tool storage.
The physical arrangement of a workshop can therefore have a meaningful effect on tool maintenance.
Clean the Workshop Vacuum Too
Dust-control equipment only works effectively when maintained.
A clogged filter or full collection container can reduce performance depending on the vacuum or extraction system.
Follow the manufacturer’s maintenance instructions.
Inspect filters, bags, hoses, and collection systems as appropriate.
A neglected dust-extraction system can result in more airborne dust and therefore more contamination reaching your tools.
Watch for Reduced Airflow
If a power tool’s ventilation openings become visibly clogged, clean the accessible area.
If airflow appears abnormal despite external cleaning, the problem may be deeper.
Do not automatically insert objects into the vents.
Do not remove housing components unless you have an appropriate manufacturer-supported procedure.
Restricted airflow can contribute to heat buildup, but overheating can have many causes.
If a tool repeatedly runs unusually hot, investigate the cause rather than assuming that dust is the only explanation.
Recognize Signs of Internal Contamination
External dust does not prove that a tool is contaminated internally.
However, certain symptoms can justify further attention.
Watch for:
- Unusual noise
- Reduced performance
- Excessive heat
- Burning smell
- Intermittent operation
- Trigger problems
- Visible arcing
- Changes in normal airflow
These symptoms can have multiple causes.
Do not try to solve them by repeatedly blowing air into the housing.
A qualified service procedure may be necessary.
Do Not Open the Tool Just to Clean It
Many power-tool housings contain electrical and mechanical assemblies that are not intended for casual disassembly.
Opening the housing can:
- Complicate reassembly
- Damage seals
- Expose sensitive components
- Create electrical hazards
- Void applicable service arrangements
- Introduce new contamination
If the manufacturer provides a specific procedure for internal cleaning, follow it.
Otherwise, leave internal service to an appropriately qualified technician when necessary.
How Often Should You Clean a Power Tool?
Cleaning frequency depends on the environment and how the tool is used.
A cordless drill used occasionally for household projects may need only light cleaning after each dusty job.
A sander used daily in a workshop may need attention after every project.
A tool exposed to masonry dust may require immediate cleaning.
The best schedule is condition-based.
Clean the tool when contamination becomes noticeable or when the type of work creates significant dust.
Do not wait until the housing is covered in a thick layer.
A Simple Five-Minute Dust-Control Routine
After a dusty project:
Step 1
Remove the battery or disconnect the tool from its power source according to the manufacturer’s procedure.
Step 2
Move the tool away from the active dust-generating area.
Step 3
Remove loose dust with a soft brush or suitable vacuum.
Step 4
Clean around ventilation openings.
Step 5
Inspect the battery compartment or power connection.
Step 6
Check the trigger, switches, and accessory holder.
Step 7
Inspect the case and accessories.
Step 8
Make sure everything is dry before storage.
This routine takes little time and prevents contamination from accumulating project after project.
A Better Workshop Dust Routine
For frequent power-tool use, expand the process.
Before work: check dust collection and tool vents.
During work: use appropriate extraction.
After work: remove loose contamination.
Before storage: inspect the tool and clean the case.
Periodically: inspect the tool for signs of internal contamination or abnormal operation.
This approach combines prevention and maintenance.
Common Mistakes
Using maximum-pressure compressed air
It can force dust farther into the tool.
Cleaning the tool while it is still powered
The battery or other power source should be handled according to the manufacturer’s safety procedure.
Spraying cleaner into vents
Liquid can enter the housing.
Ignoring the battery compartment
Dust and debris can accumulate around contacts.
Over-lubricating mechanisms
Oil can turn dust into sticky contamination.
Leaving tools beside active sanding or cutting
Settled dust can quickly recontaminate clean equipment.
Ignoring the case
A dusty storage case can immediately contaminate the tool again.
Opening the housing unnecessarily
Internal cleaning requires a different level of knowledge and care.
How to Tell Whether Your Dust-Control Routine Is Working
Look at the tool after several projects.
Has the amount of dust around the vents decreased?
Is the exterior easier to clean?
Are the cases staying cleaner?
Are accessories accumulating less contamination?
Does the tool remain free of visible buildup?
These observations are more useful than assuming that one particular cleaning method is always best.
A good routine should reduce the amount of contamination over time.
Final Thoughts
Keeping dust from building up inside power tools begins before the tool becomes dirty.
The most effective strategy is to reduce dust at its source. Use appropriate extraction and collection systems when available, keep the work area under control, and position the tool so that it is not unnecessarily exposed to the main dust stream.
After each dusty project, remove the battery or disconnect the tool according to the manufacturer’s procedure. Clean loose dust from the exterior with a soft brush or suitable vacuum, paying particular attention to ventilation openings, switches, battery compartments, and accessory holders.
Avoid indiscriminate use of high-pressure compressed air. Blowing a tool aggressively may simply move contamination deeper inside the housing.
Likewise, avoid spraying liquids into vents, flooding electrical components, or applying excessive lubricant.
A clean tool should also go into a clean storage case. Otherwise, dust from the case can immediately undo the work.
Pay attention to unusual symptoms such as overheating, burning smells, abnormal noise, intermittent operation, or visible electrical problems. These signs should not automatically be treated as ordinary dust buildup.
Most importantly, do not open a power tool simply because you want to remove dust more thoroughly. Internal cleaning is different from routine external maintenance and may require manufacturer-specific procedures or qualified service.
The best dust-management system is one that becomes part of your normal workflow.
Control the dust. Clean the tool. Keep the vents clear. Store it clean. Inspect it regularly.
Those habits can reduce unnecessary contamination and help keep your power tools ready for the next project.
Related Guides
- How to Clean a Cordless Drill After Working in Dust
- How to Store Cordless Power Tools Between Projects
- Why Power Tools Overheat and What You Should Check First
- How to Care for Power Tool Batteries During Long-Term Storage
- How to Protect Power Tools From Humidity in a Garage
FAQ
What is the best way to keep dust out of a power tool?
The most effective approach is to reduce dust at the source using appropriate collection or extraction, then clean the tool after use. Keeping the work area and storage case clean also reduces recontamination.
Can compressed air damage a power tool?
High-pressure compressed air can force dust deeper into a tool and create airborne particles. If compressed air is appropriate for the specific equipment, use it carefully and according to the manufacturer’s recommendations.
Should I spray cleaner into the ventilation openings?
It is generally better not to. Liquid can enter the housing through the vents and reach electrical or mechanical components. For ordinary dust, dry cleaning with a suitable brush or vacuum is usually preferable.
How do I clean dust from a cordless drill?
Remove the battery according to the manufacturer’s procedure, then remove loose dust using a soft brush or suitable vacuum. Clean the housing, vents, chuck, battery compartment, and storage case without flooding the tool with liquid.
Can dust cause a power tool to overheat?
Heavy contamination can contribute to restricted airflow in some tools, but overheating can have several causes. If a tool becomes unusually hot or behaves abnormally, investigate the issue rather than assuming dust is the only cause.
Should I clean the inside of my power tool myself?
Routine external cleaning is usually the appropriate starting point. Do not open the housing unless the manufacturer provides a suitable procedure or you have the necessary qualifications and knowledge to service the equipment safely.
How often should I clean power tools?
Clean them after dusty projects and whenever visible contamination accumulates. Tools used frequently in high-dust environments generally need more frequent attention than equipment used occasionally in clean conditions.
Does a tool case protect against dust?
A closed case can reduce exposure to airborne dust, but the case itself can collect contamination. Clean the case regularly and make sure the tool is clean before putting it inside.
Should I lubricate a dusty power tool?
Do not lubricate a tool simply because it has accumulated dust. Lubricate only components that require it and follow the manufacturer’s recommendations. Excess oil can trap dust and create additional buildup.
What does burning smell from a dusty power tool mean?
A burning smell can have several causes and should not automatically be attributed to dust. Stop using the tool and follow the manufacturer’s troubleshooting or service guidance, particularly if the smell is accompanied by heat, smoke, abnormal noise, or intermittent operation.
