
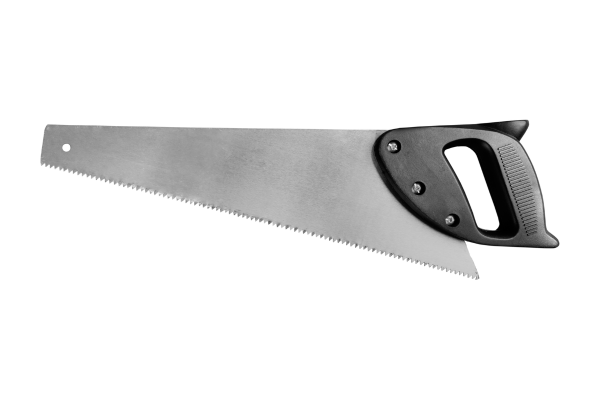
A manual handsaw can remain useful for many years when its blade, teeth, handle, and storage environment receive appropriate care. Unlike many powered cutting tools, a hand saw has a relatively simple construction, which makes routine maintenance accessible to most homeowners.
That simplicity can sometimes lead to neglect. A saw may be placed in a garage corner after a project and forgotten until it is needed again. Dust, wood resin, moisture, paint, and surface corrosion can accumulate during storage. The teeth can also become damaged if the blade is dropped, struck against another tool, or stored where it is constantly rubbing against hard surfaces.
Maintaining a handsaw is not about making an old blade look brand new. The objective is to keep the blade reasonably clean, protect it from corrosion, preserve the teeth and handle, and identify damage before the tool is used again.
It is also important to distinguish basic maintenance from sharpening. Cleaning removes contamination. Sharpening changes the cutting geometry of the teeth. Those are separate tasks, and attempting to sharpen a saw without understanding its tooth design can do more harm than good.
This guide explains how to inspect, clean, protect, and store a manual handsaw while recognizing when maintenance is enough and when professional sharpening or replacement makes more sense.
Why a Handsaw Needs Regular Maintenance
A manual handsaw is exposed to several forms of wear during ordinary use.
The teeth contact the material being cut.
The blade flexes as it moves through the cut.
The handle receives repeated pressure from the user’s hand.
The blade can accumulate sawdust and resin.
Moisture can contribute to corrosion.
Storage can expose the teeth to accidental impacts.
None of these problems necessarily means the saw is unusable.
However, small issues can become more significant when the tool is repeatedly neglected.
Regular maintenance helps you:
- Keep the blade clean
- Identify damaged teeth
- Prevent unnecessary corrosion
- Maintain a secure handle
- Store the saw safely
- Determine when sharpening is needed
- Recognize when replacement is more appropriate
A few minutes of inspection after a project can save a much longer restoration later.
Start by Identifying the Saw
Before choosing a cleaning or maintenance method, determine what type of handsaw you have.
Common examples include:
- General-purpose panel saws
- Crosscut saws
- Rip saws
- Backsaws
- Pruning saws
- Coping saws
- Specialty hand saws
Their tooth patterns, blade thicknesses, handles, and intended uses can differ significantly.
A method appropriate for one saw may not be appropriate for another.
The manufacturer’s maintenance instructions should take priority when available, especially for specialty or high-quality saws.
The first objective is not to modify the blade.
It is simply to understand what you are maintaining.
Inspect the Saw Before Cleaning
Begin with a visual inspection.
Place the saw on a stable surface where you can see the entire blade.
Look for:
- Rust
- Dirt
- Resin
- Paint
- Bent sections
- Missing teeth
- Damaged teeth
- Cracks
- Loose fasteners
- Handle damage
- Corrosion around attachment points
Do not run your fingers along the tooth line.
The teeth can be sharp even when the saw looks dull or dirty.
Use careful visual inspection and appropriate handling techniques.
If the blade is badly bent or cracked, stop before attempting restoration.
Cleaning cannot repair structural damage.
Check the Handle
The handle is an important part of the saw because it allows the user to control the blade.
Inspect the handle for:
- Cracks
- Splits
- Loose sections
- Missing fasteners
- Deformation
- Excessive wear
- Chemical damage
Wooden handles should receive particular attention because moisture and environmental changes can affect them.
Plastic and composite handles can also deteriorate, especially after exposure to unsuitable chemicals or significant impacts.
A comfortable handle is useful, but structural integrity matters more than appearance.
Check the Blade for Bending
A straight blade should maintain its intended shape as it moves through the material.
Inspect the blade from several angles.
Look for obvious bends, kinks, or areas that do not align with the rest of the blade.
A small cosmetic deviation does not necessarily mean the saw is unusable, but significant bending can affect control and cutting performance.
Do not automatically attempt to straighten a badly bent blade by hand.
Forcing hardened steel can create additional damage or leave the blade with unpredictable properties.
If deformation is substantial, replacement or professional assessment may be more appropriate.
Remove Loose Sawdust First
Before using water or cleaning products, remove loose material.
A dry cloth or soft brush can remove sawdust, dirt, and other debris.
Pay attention to:
- Spaces between teeth
- The area near the handle
- The back of the blade
- Any reinforcing spine
- The blade surface
Dry cleaning is a useful first step because it removes contamination without introducing additional moisture.
It also makes it easier to see whether the remaining material is ordinary dirt, resin, paint, or corrosion.
Cleaning Resin From a Handsaw
Resin can be especially difficult to remove from saw teeth.
Wood species differ in the amount and type of residue they leave behind, and some cutting jobs can produce a sticky film that collects sawdust.
Start with a cleaning method appropriate for the blade’s material and finish.
A suitable cleaner may soften the resin, after which a soft brush or cloth can help remove it.
Avoid aggressively scraping between the teeth with a sharp metal object.
The tooth geometry needs to remain intact.
If a commercial cleaner is used, read the product instructions carefully. Some products designed for saw-blade cleaning may have specific requirements regarding contact time, ventilation, and compatible materials.
Clean the Teeth Without Changing Their Shape
The teeth are the most important working part of the handsaw.
When cleaning them, think about removing residue rather than reshaping the metal.
Use an appropriate brush and controlled movements.
Avoid grinding, filing, or sanding the tooth tips simply because they have accumulated dirt.
Those actions are part of sharpening or tooth maintenance, not ordinary cleaning.
A tooth that appears darker than the surrounding metal is not necessarily damaged.
Focus on removing contamination while preserving the original tooth profile.
Distinguish Dirt From Rust
A dirty blade can look rusty.
Before treating corrosion, clean the blade enough to determine what is actually present.
Dirt and resin may wipe or soften away.
Rust is corrosion of the metal itself.
If discoloration remains after appropriate cleaning and the surface feels rough, further investigation may be necessary.
Do not immediately use an aggressive abrasive.
The blade may have a protective finish that you do not want to remove.
How to Deal With Surface Rust
Light surface rust may be treatable.
First clean the blade.
Then choose a rust-removal method compatible with the blade’s material and finish.
For a relatively simple unfinished steel saw, controlled mechanical removal may be appropriate.
For a finished or specialized blade, a less aggressive approach may be preferable.
The objective is not to remove every microscopic trace of discoloration.
It is to stop active corrosion while preserving as much sound metal and original finish as possible.
Why Aggressive Abrasives Can Be a Problem
It may seem logical to use coarse sandpaper, a grinding wheel, or a powered wire brush when rust is present.
These methods can remove corrosion quickly.
They can also remove sound metal, alter the tooth profile, scratch the blade, or damage a protective finish.
That is particularly important around the teeth.
A saw is not a flat piece of decorative steel. Its cutting geometry is part of its function.
Aggressive restoration can change that geometry unintentionally.
For ordinary household maintenance, use the least aggressive practical method.
When Sharpening Is Actually Needed
Cleaning cannot make a genuinely dull saw sharp.
A blade may look dirty because resin has accumulated on the teeth, and cleaning may improve performance.
But if the teeth have become worn through use, sharpening is a separate process.
Whether a handsaw can be sharpened depends on the saw’s design and the condition of its teeth.
Some traditional saws can be professionally sharpened and set.
Other inexpensive or disposable-style blades may be more practical to replace.
Do not attempt to reshape unfamiliar teeth simply because the saw no longer cuts efficiently.
First determine whether the issue is contamination, tooth wear, tooth damage, or another problem.
What Is Saw Tooth Setting?
Many traditional handsaws have teeth that are slightly alternated to create a kerf wider than the thickness of the blade.
This is called tooth set.
The exact arrangement depends on the saw.
The important maintenance principle is that the tooth geometry should not be changed casually.
A cleaning process should not involve bending the teeth back and forth.
If teeth are visibly damaged or the saw’s cutting behavior has changed significantly, professional sharpening or setting may be appropriate.
This is particularly relevant for high-quality hand saws where preserving the original geometry is valuable.
Inspect the Teeth Individually When Necessary
For a detailed inspection, look along the tooth line.
You may identify:
- Missing teeth
- Bent teeth
- Uneven wear
- Broken points
- Excessive corrosion
- Resin buildup
You do not need to inspect every tooth after every use.
A closer examination becomes useful when:
- Cutting performance changes
- The saw has contacted a hard object
- The blade has been dropped
- Corrosion is visible
- The saw has been stored for a long time
The purpose of the inspection is to decide what maintenance the saw actually needs.
Cleaning Paint From a Handsaw
Paint residue can appear after renovation projects.
Fresh paint is easier to remove than cured paint.
Wipe fresh contamination away as soon as practical.
For dried paint, use a method compatible with the blade and any coating.
A plastic scraper can help with some deposits.
Avoid scraping aggressively across the teeth.
A strong solvent can also create problems if it damages a protective finish.
Test unfamiliar products on a small inconspicuous area before treating a larger section.
How to Clean a Pruning Saw
Pruning saws deserve additional attention because they can become contaminated with plant sap, soil, moisture, and organic residue.
After use:
Remove plant material.
Brush away loose debris.
Clean the blade with an appropriate method.
Dry it thoroughly.
Inspect the teeth.
Protect the metal when necessary.
Avoid returning a wet pruning saw directly to a closed toolbox.
Organic residue combined with moisture can create a particularly poor storage environment for steel.
How to Clean a Backsaw
Backsaws often have a relatively rigid blade and a reinforced upper edge.
These saws can still accumulate dust and corrosion.
Clean the blade carefully, paying attention to the teeth and upper reinforcement.
Avoid bending the blade.
If the saw has a wooden handle, control moisture exposure during cleaning.
After drying, store the saw so that the teeth cannot strike other tools.
How to Clean a Coping Saw
A coping saw uses a thinner blade mounted in a frame.
Its construction means the blade can be more vulnerable to bending during handling.
Do not press heavily against it during cleaning.
Inspect the frame and blade tension as appropriate for the design.
If the blade is bent or damaged, replacement may be more practical than attempting to restore it.
Specialty saws often use replaceable blades, making replacement a straightforward maintenance option.
Protect the Handle During Cleaning
When cleaning the blade, avoid unnecessarily exposing the handle to water or chemicals.
This is especially important for wooden handles.
Use a controlled amount of cleaning solution and wipe the handle separately.
If the handle becomes wet, dry it thoroughly.
For wood, avoid soaking.
For plastic or composite handles, avoid strong solvents unless they are confirmed to be compatible.
The handle should remain secure, comfortable, and free from structural damage.
How to Dry a Handsaw
Drying is essential after wet cleaning.
Wipe the blade with a clean, dry cloth.
Pay attention to the spaces between teeth and areas where water can remain.
Allow the saw to finish drying in a dry, ventilated location when necessary.
Do not immediately wrap a damp blade in a protective material that can trap moisture.
Do not put a wet saw into a closed toolbox.
A small amount of trapped moisture can encourage corrosion over time.
Apply Corrosion Protection When Appropriate
After the blade is clean and completely dry, consider whether additional protection is needed.
A corrosion-inhibiting product may be appropriate for exposed steel, especially when the saw will be stored for an extended period or in a humid environment.
The product should be compatible with the blade and intended use.
Do not coat the blade with excessive oil.
An oily saw can attract dust and make the teeth more difficult to maintain.
For long-term storage, a suitable protective coating or storage product may be more appropriate than a heavy layer of general-purpose oil.
Keep Protective Products Away From the Cutting Edge When Possible
The teeth need to remain suitable for cutting.
A thick protective layer should not be allowed to interfere with the working surfaces.
If a corrosion-protection product is applied for storage, follow its instructions regarding application and removal before the saw is used again.
Different products behave differently.
Do not assume that every oil, wax, or corrosion inhibitor is suitable for direct application to every blade.
Store the Saw So the Teeth Are Protected
Storage can have a major effect on tooth life.
Do not throw a handsaw into a crowded toolbox where the teeth repeatedly strike metal tools.
Repeated impacts can bend or damage teeth.
Instead, use a rack, sheath, dedicated compartment, or other suitable storage method that protects the tooth line.
The storage solution should also allow the blade to remain dry.
Do Not Store the Saw Directly Against Damp Surfaces
A saw stored against a damp wall, floor, or other moisture source is more likely to develop corrosion.
Keep the tool in a dry storage location.
If the saw is stored in a garage, pay attention to:
- Humidity
- Condensation
- Damp floors
- Water intrusion
- Toolbox condition
A clean saw can still rust if its storage environment consistently exposes it to moisture.
What to Do With a Rusty Storage Sheath
Some handsaws use a sheath or protective cover.
If the sheath becomes damp, do not immediately put the wet blade back inside.
Inspect both the sheath and blade.
Allow the protective cover to dry completely.
A damp sheath can trap moisture directly against the blade and create localized corrosion.
The storage accessory is part of the maintenance system.
Keep a Handsaw Away From Corrosive Materials
Workshop environments often contain substances that can contaminate metal.
Keep saws away from:
- Salt
- Fertilizers
- Chemicals
- Wet soil
- Cleaning products
- Oily waste
This does not mean the saw needs to be isolated completely.
It simply means that unnecessary exposure should be avoided.
Clean the blade after jobs that expose it to unusual contaminants.
How to Prevent a Saw From Rusting in a Humid Garage
Environmental control is often more important than repeated cleaning.
Keep the garage as reasonably dry as practical.
Do not store wet saws.
Inspect the toolbox or cabinet.
Use appropriate corrosion protection on vulnerable steel.
Consider desiccants in suitable enclosed storage.
Monitor humidity when corrosion is recurring.
If several metal tools are rusting at the same time, investigate the garage environment rather than treating each tool independently.
How to Know Whether a Saw Is Worth Restoring
Restoration makes the most sense when the blade remains structurally sound.
A relatively cleanable blade with surface rust, resin, or dirt may be worth maintaining.
A blade with:
- Significant cracking
- Severe bending
- Extensive pitting
- Numerous damaged teeth
- Structural corrosion
may require replacement or professional assessment.
The cost and availability of a replacement blade also matter.
For an inexpensive common saw, replacement may be more sensible.
For a high-quality traditional saw, professional restoration may be worthwhile.
Common Handsaw Maintenance Mistakes
Using a wire wheel on the teeth
It can alter or damage their geometry.
Filing teeth during ordinary cleaning
Filing changes the tooth shape and is a sharpening operation.
Soaking wooden-handled saws
Excess moisture can affect the handle.
Storing the blade while wet
This increases corrosion risk.
Throwing saws into crowded toolboxes
Heavy tools can damage the tooth line.
Coating the teeth with excessive oil
This attracts dust and can interfere with maintenance.
Trying to straighten badly bent blades by force
This can create additional damage.
Assuming cleaning sharpens the saw
Contamination and dullness are separate problems.
A Five-Minute Handsaw Maintenance Routine
For routine care, you can keep the process simple.
Step 1: Inspect the blade and handle.
Step 2: Remove loose sawdust.
Step 3: Wipe the blade.
Step 4: Check the teeth for obvious damage.
Step 5: Look for early corrosion.
Step 6: Dry the saw completely.
Step 7: Apply appropriate corrosion protection when necessary.
Step 8: Store it so the teeth are protected.
This is enough for many household saws between more thorough maintenance sessions.
A Deeper Periodic Inspection
For a saw that is heavily used, perform a more detailed inspection periodically.
Clean the blade thoroughly.
Inspect the tooth line under good lighting.
Check the handle and fasteners.
Look for corrosion underneath accumulated residue.
Inspect the blade for bending.
Check the storage sheath or rack.
If cutting performance has changed, determine whether the problem is contamination, dullness, tooth damage, or another issue.
This approach prevents unnecessary sharpening and helps you decide when replacement is justified.
When Professional Sharpening Makes Sense
Professional sharpening can be worthwhile for a quality handsaw with sound teeth and a blade that is otherwise in good condition.
This is particularly relevant when the saw has a tooth pattern that requires specific filing, setting, or other restoration work.
A professional can evaluate the tooth condition and determine whether the blade can be restored.
For inexpensive saws with heavily damaged teeth, the cost of professional sharpening may exceed the value of replacement.
The decision should consider the saw’s quality, sentimental or practical value, and availability of replacement options.
Final Thoughts
Maintaining a manual handsaw is mainly about preserving the blade and teeth while preventing corrosion and unnecessary damage.
Start with inspection.
Remove loose sawdust and resin before applying stronger cleaning methods.
Keep the tooth line clean without grinding, filing, or reshaping it during ordinary maintenance. Sharpening is a separate task that should be approached according to the saw’s tooth design.
Pay attention to the handle as well. Wooden handles should not be soaked, while plastic and composite handles can be affected by inappropriate solvents.
After wet cleaning, dry the blade completely.
If the storage environment is humid, consider suitable corrosion protection and additional moisture-control measures.
Finally, store the saw so its teeth are protected from impacts and the blade remains away from persistent moisture.
A handsaw does not need to look perfect to remain useful. What matters is that the blade is structurally sound, the teeth are in appropriate condition for the work, the handle is secure, and corrosion is under control.
Regular maintenance allows you to identify these conditions before the saw is needed for an important project.
Related Guides
- How to Clean Saw Blades and Cutting Tools Safely
- How to Restore a Rusty Hand Tool Step by Step
- How to Prevent Rust on Hand Tools in a Humid Garage
- How to Maintain Screwdrivers So They Last Longer
- How to Tell Whether a Dirty Tool Needs Cleaning, Lubrication, or Replacement
FAQ
How often should I clean a manual handsaw?
Clean it after particularly dirty or resin-producing work and whenever contamination becomes noticeable. Periodic inspection is more important than following a rigid calendar.
Can I wash a handsaw with water?
Some handsaws can be cleaned with controlled amounts of water and mild detergent, but the handle and blade material must be considered. Avoid unnecessary soaking and dry the saw completely afterward.
Does cleaning sharpen a handsaw?
No. Cleaning removes dirt and residue. Sharpening involves restoring the intended tooth geometry and is a separate maintenance procedure.
Can I use sandpaper on a rusty saw blade?
Mechanical rust removal may be appropriate for certain unfinished blades, but aggressive sanding can remove sound metal and damage finishes or tooth geometry. Use the least aggressive practical method.
Should I oil the teeth of a handsaw?
Heavy oil can attract dust and interfere with maintenance. For corrosion protection during storage, use an appropriate product according to its instructions and avoid excessive application to the working edge.
How do I prevent a handsaw from rusting in a garage?
Keep it clean and completely dry, control excessive humidity when possible, store it away from damp surfaces, protect vulnerable metal appropriately, and inspect it periodically for early corrosion.
Can I straighten a bent handsaw blade?
Minor issues may be manageable depending on the saw, but forcing a significantly bent blade can create additional damage. If the blade is badly deformed, replacement or professional assessment may be safer.
How do I protect handsaw teeth during storage?
Use a suitable sheath, rack, dedicated compartment, or other storage method that prevents the teeth from repeatedly contacting other hard tools.
When should I sharpen a handsaw instead of replacing it?
Sharpening may make sense when the blade is structurally sound and the tooth geometry can be appropriately restored. For inexpensive saws with extensive tooth damage, replacement may be more practical.
When should I replace a manual handsaw?
Consider replacement when the blade is cracked, severely bent, heavily pitted, structurally compromised, or has extensive tooth damage that cannot reasonably be restored.
