
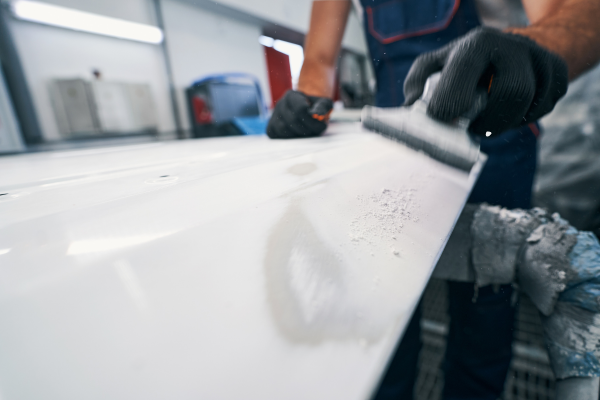
Dried paint on a wrench, screwdriver, pair of pliers, clamp, scraper, or other metal tool can be surprisingly difficult to remove. What starts as a few drops left after a painting project can harden into a stubborn layer that attracts dust, interferes with moving parts, and makes the tool difficult to inspect properly.
The obvious solution is often to scrape the paint away as aggressively as possible. Unfortunately, that approach can create another problem. A steel scraper, abrasive pad, or aggressive solvent may remove the paint but also scratch the metal, damage chrome plating, soften a painted finish, or affect nearby plastic and rubber components.
A better approach is to identify the surface, determine how firmly the paint is attached, and begin with the least aggressive method that is likely to work. The goal is not simply to make the tool look clean. The goal is to remove unwanted paint while preserving the original surface and keeping the tool functional.
Why Dried Paint Can Be Difficult to Remove
Fresh paint is usually much easier to clean because it has not fully hardened or bonded to the surface. Once paint dries, it can form a much more resistant film.
Several factors influence how difficult the removal process will be.
The type of paint matters. Water-based paints can behave differently from solvent-based coatings. Acrylic, latex, enamel, and other formulations do not necessarily respond to the same cleaning method.
The age of the paint matters as well. A small amount of relatively fresh residue may soften with a mild cleaner, while paint that has been sitting on a tool for weeks or months can become much harder.
The surface beneath the paint is equally important. Bare steel, chrome plating, polished metal, painted metal, and textured coatings should not automatically be treated in the same way.
Finally, the shape of the tool can make removal difficult. Paint trapped in threads, grooves, joints, or serrated surfaces requires more control than a flat section of metal.
Because of these differences, there is no single paint-removal method that is best for every tool.
Start by Identifying the Tool’s Surface
Before touching the paint, inspect the tool carefully.
Ask whether the metal beneath the paint is:
- Bare steel
- Stainless steel
- Chrome-plated
- Polished
- Painted
- Powder-coated
- Covered by another protective finish
This matters because a method that is acceptable for unfinished steel can damage a decorative or protective coating.
For example, a chrome-plated wrench may tolerate gentle scraping and mild cleaning, but aggressive abrasives can scratch the plating and permanently change its appearance.
A painted tool presents another challenge. If the dried paint is similar in appearance to the tool’s original finish, removing it aggressively could remove the coating you actually want to preserve.
When you are uncertain about the material or finish, check the manufacturer’s information when available and start with a very mild method.
Identify What Kind of Paint You Are Dealing With
Knowing the type of paint can make the process considerably easier.
If you know what product was being used when the spill occurred, check its label or technical information for recommended cleanup methods. Many paint manufacturers provide removal or cleanup guidance.
If you do not know the paint type, avoid immediately applying the strongest solvent you can find.
Instead, begin with a small test area in an inconspicuous location.
The purpose of the test is not only to determine whether the paint comes off. You also want to see whether the cleaning method affects the tool beneath it.
Watch for:
- Discoloration
- Loss of shine
- Softening
- Clouding
- Peeling
- Changes in texture
- Damage to plastic or rubber components
A method should be considered successful only when it removes the unwanted paint without damaging the underlying surface.
What You May Need
For a controlled removal process, gather a few simple materials before starting.
A useful setup may include:
- Microfiber cloths
- Mild dish detergent
- Warm water
- Plastic scraper
- Old toothbrush or soft nylon brush
- Cotton swabs for small areas
- Appropriate gloves for the products being used
- A suitable paint-removal product if gentler methods fail
- A container for small removable metal parts
- Dry towels
A plastic scraper is particularly useful because it can remove softened paint while creating less risk of scratching metal than a sharp steel blade.
A nylon brush can also help around textured areas and grooves.
The exact materials will depend on the tool and the paint.
Step 1: Remove Loose Paint Without Scraping Aggressively
Start with the easiest residue.
Use your fingernail, when practical, or a plastic scraper to gently test the edge of the dried paint.
The objective is to determine whether the paint is strongly bonded or whether it is already lifting from the surface.
Work slowly.
Do not begin by forcing a metal blade under the paint. If the paint is tightly bonded, aggressive scraping can leave permanent scratches while barely removing the coating.
Hold the scraper at a low angle rather than attacking the surface vertically.
Use controlled pressure and stop if you feel that you are cutting into the metal rather than lifting the paint.
This first step may remove loose sections and reduce the amount of chemical treatment needed later.
Step 2: Try Mild Soap and Warm Water
For small amounts of residue, especially paint that may not be fully cured, begin with warm water and mild dish detergent.
Use a damp cloth and work on a small section.
For textured areas, gently use a soft nylon brush.
This method may be enough for very light contamination, but do not be disappointed if it has little effect on fully cured paint. Mild soap is mainly a low-risk starting point.
Its value is that it lets you determine how strongly the paint is attached without exposing the tool to aggressive chemicals.
If the paint remains unchanged, move to the next method rather than scrubbing indefinitely.
Step 3: Soften the Paint Before Trying to Remove It
One of the most effective general strategies is to soften the dried paint rather than trying to overpower it mechanically.
The appropriate softening method depends heavily on the type of paint and the material underneath it.
For some water-based paints, moisture and a suitable cleaner may help soften the residue.
For other paints, a manufacturer-recommended solvent or commercial paint remover may be necessary.
Always read the product label before use. A product designed for bare metal may not be appropriate for painted finishes, plastics, rubber, or certain coatings.
Apply the product only where it is needed.
Avoid covering the entire tool with a strong chemical when only a few spots are contaminated.
Step 4: Use a Plastic Scraper After Softening
Once the paint begins to soften, a plastic scraper can become much more effective.
Work from the edge of the paint toward the center.
Do not repeatedly scrape the same spot with increasing force. Instead, reapply the appropriate softening method when necessary and allow it to work.
Think of the scraper as a tool for lifting softened material, not grinding hardened material away.
This is especially useful on flat metal surfaces.
For curved tools such as wrenches and pliers, use smaller sections and follow the shape of the surface.
Step 5: Deal With Paint in Grooves and Threads
Paint stuck in threads or narrow grooves requires a different approach.
Do not force a sharp metal object into the groove simply because the space is small.
A wooden toothpick, plastic pick, cotton swab, or soft nylon brush can often provide more control.
The goal is to loosen the paint without deforming the thread or scratching the surrounding surface.
For threaded components, make sure the threads are clean before returning the tool to use. Dried paint can interfere with smooth movement and can make adjustable mechanisms more difficult to operate.
If the paint is located inside a moving mechanism, do not flood the assembly with solvent unless the manufacturer specifically allows that method.
Some tools contain materials that can be damaged by solvents or excessive moisture.
Step 6: Treat Chrome-Plated Tools With Extra Care
Chrome-plated tools deserve special attention because the shiny surface is part of the tool’s protective and cosmetic finish.
Do not assume that a chrome finish can tolerate aggressive scraping.
Avoid using coarse steel wool, abrasive discs, or rough grinding methods simply to remove a few paint spots.
Start with the mildest suitable method.
Use a plastic scraper and soft cloth where possible.
If a solvent is needed, verify that the product is compatible with the finish before applying it.
If you accidentally scratch or remove the chrome plating, the problem can be much more difficult to correct than the original paint contamination.
Step 7: Protect Plastic and Rubber Components
Many modern hand tools combine metal with plastic or rubber.
A paint remover that is safe for steel may soften, stain, swell, or weaken another material.
This is why spraying an entire tool with an unknown chemical is risky.
Whenever possible, isolate the contaminated metal section and keep chemicals away from handles, grips, seals, and other non-metal components.
If contact occurs, follow the chemical manufacturer’s instructions for cleanup immediately rather than allowing the product to remain on the surface.
Step 8: Clean the Remaining Residue
After the paint has been removed, the tool may still have a thin film of cleaner, softened paint, or adhesive-like residue.
Do not assume that the removal process is complete just because the visible paint is gone.
Wipe the area with a clean cloth using the appropriate cleaning method for the surface.
If water is suitable for the tool, a mild soap solution may help remove remaining residue.
If the product used requires a specific rinse or neutralization process, follow its instructions.
The final surface should be clean and free of unnecessary chemical residue.
Step 9: Dry the Tool Thoroughly
This step is especially important for carbon-steel tools.
After using water or a water-based cleaning method, dry the tool completely.
Use a clean towel and pay attention to:
- Joints
- Threads
- Grooves
- Recesses
- Hinges
- Areas beneath adjustable components
Allow the tool to finish air-drying in a dry location if necessary.
Returning a damp tool directly to a closed toolbox can create a moisture problem even though the paint has been successfully removed.
Should You Use a Metal Razor Blade?
A razor blade can remove dried paint effectively from certain flat surfaces, but it should not be treated as a universal solution.
The problem is not simply whether the blade can remove the paint. The question is whether it can do so without scratching the surface.
A blade is particularly risky on:
- Chrome plating
- Painted finishes
- Decorative surfaces
- Soft metals
- Curved surfaces
A plastic scraper is usually the safer starting point.
Mechanical methods become more aggressive as the tools change from plastic scraper to metal scraper, abrasive pad, wire brush, sanding material, or power equipment.
For household tools, there is rarely a reason to jump immediately to the most aggressive method.
What About Acetone or Strong Solvents?
Strong solvents can dissolve some paints, but their use depends entirely on the material being cleaned and the type of paint involved.
The common mistake is assuming that because a solvent removes paint quickly, it must be the best option.
It may also damage:
- Plastic
- Rubber
- Painted surfaces
- Adhesives
- Certain coatings
If you are considering a strong solvent, verify compatibility first and test a small area.
Use appropriate ventilation and follow the manufacturer’s safety instructions.
Do not mix chemicals in an attempt to create a stronger paint remover. There is little benefit in creating an unpredictable chemical mixture when commercially formulated products are available.
What If the Paint Has Been on the Tool for Years?
Old paint can be particularly stubborn because it may have become extremely hard and firmly attached.
Even then, the same principle applies: start with identification and controlled testing.
For heavy buildup on unfinished steel, a more substantial removal process may be appropriate.
For valuable, coated, or specialized tools, preserving the underlying finish is often more important than removing every last trace of paint.
There are cases where a small amount of firmly attached residue is preferable to damaging the original coating in an effort to achieve a perfect appearance.
When You Should Stop Trying to Remove It
There is a point where continued cleaning becomes counterproductive.
Stop and reassess if:
- The underlying finish begins to change
- Scratches are appearing
- A chemical is affecting plastic or rubber
- The tool begins to discolor
- The paint is actually part of the original coating
- The contaminated area is structurally sensitive
- You cannot identify the material or finish
If the tool is valuable, specialized, collectible, or heavily damaged, professional restoration may be more appropriate than experimenting with increasingly aggressive products.
How to Prevent Paint From Getting on Your Tools
The easiest paint-removal job is the one you never have to do.
When working on painting or finishing projects, keep tools away from wet paint whenever possible.
A few practical habits help:
Use a separate container for painting materials and another for clean tools.
Cover tools that need to remain nearby but are not being used.
Wipe accidental spills immediately rather than waiting for them to dry.
Do not place clean hand tools on a work surface covered with wet paint residue.
At the end of the project, inspect tools before putting them away.
Five seconds of attention while the paint is still wet can save considerably more work later.
A Simple Decision Guide
When you find dried paint on a metal tool, think through the problem in this order:
Is the paint loose?
Try a plastic scraper.
Is the paint firmly attached but the surface is delicate?
Use the least aggressive compatible softening method.
Is the underlying surface bare metal?
A stronger removal method may be possible, but it should still be tested first.
Are plastic or rubber parts nearby?
Protect them from chemical exposure.
Does the tool have chrome or another finished surface?
Prioritize finish preservation.
Is the paint hiding possible damage?
Clean enough to inspect the tool before deciding what to do next.
This approach keeps the process controlled instead of turning it into a battle between a scraper and the paint.
Final Thoughts
Removing dried paint from metal tools does not have to mean scratching, sanding, or aggressively treating the entire surface.
The best results usually come from patience and controlled escalation.
Start by identifying the tool’s finish and the type of contamination. Remove loose material first, try a mild cleaning method, and soften stubborn paint when the material and product instructions allow it. Use plastic tools before aggressive metal scrapers, and be especially careful around chrome, painted finishes, rubber, and plastic components.
Most importantly, remember that the goal is not simply to remove the paint. The goal is to leave the tool clean, functional, dry, and protected without creating a new surface-damage problem.
A tool that still retains its original finish after cleaning is generally in a much better position for long-term maintenance than one that was aggressively stripped in the name of appearance.
Related Guides
- How to Clean Hand Tools After Heavy Use Without Damaging the Finish
- How to Clean Greasy Wrenches, Pliers, and Sockets at Home
- How to Restore a Rusty Hand Tool Step by Step
- How to Remove Adhesive Residue From Metal Tools
- How to Tell Whether a Dirty Tool Needs Cleaning, Lubrication, or Replacement
FAQ
Can dried paint be removed from a chrome-plated wrench?
Often, yes, but the cleaning method should be chosen carefully. Start with a plastic scraper and a mild approach. Avoid aggressive abrasives that can scratch the chrome finish.
What is the safest scraper for removing paint from metal tools?
A plastic scraper is usually a good starting point because it provides mechanical cleaning while reducing the risk of scratching many metal surfaces.
Can I use a strong solvent on a metal tool?
A strong solvent may be appropriate for some types of paint and bare-metal surfaces, but compatibility must be checked first. It can damage plastic, rubber, paint, and other finishes.
Should I remove every trace of paint from a tool?
Not necessarily. If removing the final layer would damage the original finish, leaving a small amount of firmly attached residue may be preferable to damaging the tool.
How do I prevent paint from drying on my tools?
Keep tools away from wet paint, wipe accidental spills immediately, cover tools that are nearby but not in use, and inspect your equipment before putting it away after a painting project.
