
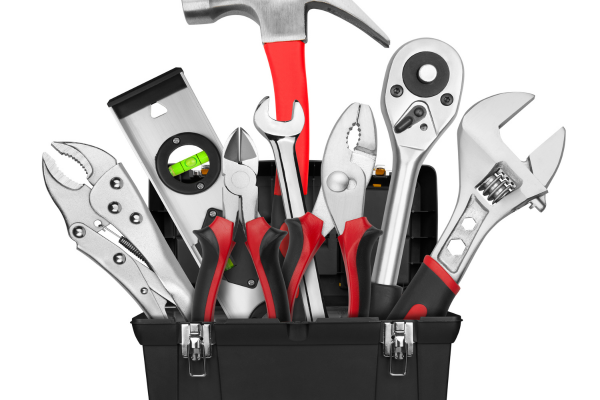
Hand tools are built to withstand demanding work, but even a well-made wrench, pliers, screwdriver, or hammer can deteriorate quickly when dirt, oil, moisture, and residue are allowed to remain on the surface. Regular cleaning is one of the simplest ways to keep tools working properly and to spot problems before they become expensive or dangerous.
The challenge is that cleaning a tool is not simply a matter of using the strongest degreaser available. Some tools have polished, painted, chrome-plated, powder-coated, or rubberized surfaces that can be damaged by aggressive chemicals or abrasive methods. Excessive scrubbing can also remove protective finishes that help prevent corrosion.
A better approach is to start with the least aggressive cleaning method that can solve the problem, inspect the result, and only move to a stronger method when necessary. This approach works for most household hand tools and reduces the risk of turning a simple cleaning job into a refinishing project.
Why Cleaning Hand Tools Matters
Tools accumulate more than visible dirt during normal use. Fingerprints leave oils and salts on metal surfaces. Grease can collect around joints and threads. Dust can become embedded in oily residue, creating a sticky layer that attracts even more debris.
Over time, this buildup can cause several problems.
First, moving parts can become harder to operate. Pliers and adjustable tools may develop resistance when dirt accumulates around their joints.
Second, moisture can become trapped underneath grime. A small amount of contamination may not appear serious, but repeated exposure to moisture can eventually contribute to surface corrosion.
Third, dirt can hide damage. A cracked handle, chipped coating, distorted jaw, or damaged screwdriver tip is much easier to identify after the tool has been cleaned.
Finally, clean tools are easier to organize and inspect. That matters because regular inspection is one of the easiest ways to catch problems before a tool fails during use.
Cleaning should therefore be considered part of basic tool maintenance, rather than something done only when a tool looks especially dirty.
Start by Identifying the Tool’s Finish
Before applying any cleaner, look closely at the tool.
Not every metal surface should be treated in the same way. A chrome-plated wrench, a painted tool, and an unfinished steel component may tolerate different cleaning methods.
Common finishes include chrome plating, polished metal, painted surfaces, powder coating, black oxide coatings, and protective treatments applied by the manufacturer.
The safest first step is to determine what you are dealing with. Check the manufacturer’s instructions when they are available, especially for specialty tools.
If you are unsure about the finish, use a mild cleaning method and test it on a small, less visible area first.
This simple precaution can prevent accidental discoloration, clouding, or removal of a protective coating.
What You Usually Need
For ordinary household cleaning, you do not need a large collection of specialized products.
A useful basic setup includes:
- A clean microfiber or lint-free cloth
- A soft-bristled brush
- Mild dish detergent
- Warm water
- A small container
- A dry towel
- A soft toothbrush for narrow areas
- A suitable light lubricant for moving mechanisms when required
For heavier grease or stubborn residue, a tool manufacturer may recommend a specific cleaner or degreaser. Always read the product instructions before applying it.
Avoid assuming that a strong solvent is automatically better. A cleaner powerful enough to remove heavy industrial grease may also affect paint, plastic, rubber, adhesives, or protective finishes.
Step 1: Remove Loose Dirt First
Begin with the tool completely dry whenever possible.
Use a dry cloth or soft brush to remove loose dust, wood particles, soil, and other debris.
This step is easy to overlook, but it is important. If you immediately add water to a layer of loose dirt, you can turn dust into a paste that is more difficult to remove.
Pay particular attention to:
- Hinges
- Threads
- Grooves
- Serrated surfaces
- Corners
- Jaw mechanisms
- Areas around handles
A soft toothbrush can be particularly useful around small joints and textured areas.
Do not use a wire brush on a finished surface simply because the dirt appears stubborn. Wire bristles can scratch some finishes and leave exposed areas that are more vulnerable to corrosion.
Step 2: Use Mild Soapy Water for General Dirt
For normal dirt and fingerprints, warm water mixed with a small amount of mild dish detergent is often enough.
Dampen the cloth rather than soaking the entire tool.
Wipe the tool thoroughly, working from cleaner areas toward dirtier sections. For grooves and joints, use the soft brush to loosen residue.
If the tool has moving parts, avoid flooding the mechanism. Excess water can remain trapped in small spaces and create problems later.
This is especially important for tools with enclosed mechanisms, hollow handles, or areas where water cannot drain easily.
The goal is to remove contamination while introducing as little moisture as practical.
Step 3: Deal With Grease Separately
Heavy grease requires a different approach from ordinary dirt.
Start by removing the thickest layer with a dry cloth or disposable material. Do not immediately spread the grease across the entire tool with a wet rag.
Once the heavy residue has been removed, use an appropriate degreasing method that is compatible with the tool’s finish.
For finished surfaces, test the cleaner in an inconspicuous area first.
Apply the cleaner to the cloth rather than flooding the tool when possible. This gives you greater control and reduces the chance of the product reaching areas that should remain dry.
After dissolving the remaining grease, wipe the surface clean and follow the cleaner manufacturer’s instructions regarding rinsing or residue removal.
Some products leave a film behind, while others require a separate wipe-down.
Step 4: Clean Moving Parts Carefully
Pliers, adjustable wrenches, cutters, and other moving tools deserve special attention.
Open and close the mechanism several times while inspecting the joint.
Look for:
- Dirt packed inside the joint
- Rust
- Excessive resistance
- Uneven movement
- Visible damage
- Unusual play or looseness
Use a soft brush to remove accessible debris.
Avoid forcing a stuck mechanism simply to make it move. If movement is restricted because of corrosion or mechanical damage, aggressive force can make the problem worse.
After cleaning, allow the mechanism to dry completely before applying a suitable lubricant, when the manufacturer recommends lubrication.
Lubrication should not be used to hide a problem. If a joint remains unusually tight or loose after cleaning, the tool may have wear or damage that requires further attention.
Step 5: Handle Chrome and Polished Surfaces Gently
Chrome-plated and polished tools can look impressive when clean, but their appearance can also encourage overly aggressive cleaning.
Do not assume that abrasive pads are appropriate simply because the surface is shiny.
For routine cleaning, use a soft cloth and mild cleaner.
If there is stubborn contamination, increase the cleaning effort gradually rather than immediately switching to an abrasive product.
Small scratches may not affect the tool’s function, but they can damage the appearance and potentially expose underlying material if the finish is compromised.
A careful cleaning method is usually preferable to trying to restore a damaged finish afterward.
Step 6: Clean Handles According to Their Material
Handles require their own approach.
Plastic handles usually tolerate mild soap and water, but solvents may affect certain plastics.
Rubberized grips can collect oils and dust and may require repeated gentle cleaning rather than aggressive scrubbing.
Wooden handles should not be soaked. Excess moisture can penetrate the material, contribute to swelling, and potentially affect the connection between the handle and the tool head.
When cleaning a wooden handle, use a lightly damp cloth followed by thorough drying.
If the manufacturer provides specific care instructions, those instructions should take priority over a general cleaning method.
Step 7: Dry the Tool Completely
Drying is just as important as cleaning.
Leaving a hand tool wet can create exactly the problem you were trying to prevent.
Use a clean, dry cloth to remove surface moisture. Then allow the tool to air-dry in a dry, ventilated location.
Pay extra attention to joints, grooves, threads, and other places where water can remain hidden.
Do not place recently cleaned tools directly into a closed toolbox while they are still damp.
A little patience here can prevent corrosion later.
What About Tools That Already Have Surface Rust?
Surface rust requires a separate treatment.
Do not assume that ordinary cleaning will remove corrosion. Cleaning removes dirt and contaminants; rust removal addresses an actual chemical reaction involving the metal.
For light surface rust, a suitable rust-removal method can be chosen based on the tool’s finish and the severity of the corrosion.
Avoid aggressively sanding or grinding a finished tool unless you understand the effect on the surface.
Removing visible rust while unnecessarily removing surrounding protective material can create a new corrosion problem.
If the tool has deep pitting, structural damage, severe corrosion around a critical joint, or damage to a load-bearing area, cleaning is no longer the main issue. The tool may need replacement or professional assessment.
What You Should Avoid
Several common cleaning habits can damage tools.
Avoid leaving tools submerged unnecessarily
Soaking may seem convenient, but water can reach places that are difficult to dry.
Avoid using harsh chemicals without checking compatibility
A product that works perfectly on bare steel may damage paint, plastic, rubber, or a plated finish.
Avoid aggressive abrasives on finished surfaces
Abrasive material can create scratches or remove protective coatings.
Avoid spraying large amounts of lubricant everywhere
More lubricant is not necessarily better. Excess oil attracts dust and can create a new layer of contamination.
Avoid using a dirty cloth to finish the job
A cloth saturated with grease simply transfers contamination from one part of the tool to another.
Avoid cleaning around visible damage without inspecting it
A cleaner tool is more valuable when you use the opportunity to inspect it.
How to Know When the Tool Is Actually Clean
A clean tool does not necessarily need to look brand new.
The practical goal is to remove dirt, grease, moisture, and unwanted residue while leaving the tool’s protective finish intact.
After cleaning, inspect the tool under good lighting.
Ask:
- Is there visible dirt remaining?
- Does the mechanism move normally?
- Is there any new or existing corrosion?
- Is the handle intact?
- Is the working surface damaged?
- Are threads and joints clear?
- Is the tool completely dry?
This inspection is often more valuable than trying to make the tool visually perfect.
A few cosmetic marks may have no effect on performance, while a small crack or distorted working surface can matter greatly.
How Often Should You Clean Hand Tools?
There is no universal cleaning schedule.
A screwdriver used occasionally for household repairs may need only occasional cleaning.
A pair of pliers used frequently in a dusty workshop may need attention much more often.
A useful approach is to clean tools:
- After heavy or particularly dirty jobs
- When grease or residue becomes visible
- Before long-term storage
- Whenever moisture has affected the tool
- During periodic maintenance inspections
The more demanding the working environment, the more important regular inspection becomes.
A Simple Maintenance Routine
For most household tools, a practical routine is:
After use: remove loose dirt and obvious residue.
When necessary: perform a more thorough cleaning.
After cleaning: dry the tool completely.
During inspection: check joints, handles, working surfaces, and signs of corrosion.
Before storage: make sure the toolbox and storage area are dry.
This routine takes considerably less time than restoring badly neglected tools later.
Final Thoughts
Cleaning hand tools properly is less about finding the strongest product and more about using the right level of cleaning for the problem.
Start gently. Identify the finish. Remove loose contamination before adding moisture. Treat grease separately, protect moving parts, dry everything thoroughly, and inspect the tool before returning it to storage.
Most importantly, think of cleaning as part of maintenance rather than a cosmetic task. A clean tool is easier to inspect, easier to organize, and less likely to hide early signs of corrosion or damage.
The best maintenance routine is one that protects the tool without creating new problems. When in doubt, choose the least aggressive method that can reasonably solve the issue, and follow the manufacturer’s recommendations for specialized tools and finishes.
Related Guides
- How to Remove Dried Paint From Metal Tools Without Scratching Them
- How to Clean Greasy Wrenches, Pliers, and Sockets at Home
- How to Restore a Rusty Hand Tool Step by Step
- How to Prevent Rust on Hand Tools in a Humid Garage
- How to Tell Whether a Dirty Tool Needs Cleaning, Lubrication, or Replacement
FAQ
Can I wash metal hand tools with soap and water?
For many ordinary metal hand tools, mild soap and water can be suitable for removing routine dirt. However, the tool should not be left wet, and moving mechanisms or materials such as wood and some plastics may require different care.
Can I use WD-40 or another lubricant after cleaning?
A suitable lubricant can be appropriate for some moving mechanisms, but it should not automatically be applied to every part of every tool. Follow the tool manufacturer’s recommendations and avoid excessive application.
Should I use a wire brush to clean rusty tools?
A wire brush may be appropriate for certain unfinished metal surfaces, but it can scratch or damage plated, painted, or otherwise finished surfaces. Choose the least aggressive method that can solve the problem.
How can I prevent tools from rusting after cleaning?
Dry them completely before storage, reduce exposure to moisture, maintain suitable protective coatings when appropriate, and keep the storage environment as dry as practical.
When should I replace a tool instead of cleaning it?
Cleaning is not a substitute for repairing structural damage. Cracks, severe corrosion, damaged working surfaces, excessive looseness, or other safety-related defects can be reasons to stop using a tool and consider replacement or professional evaluation.
