
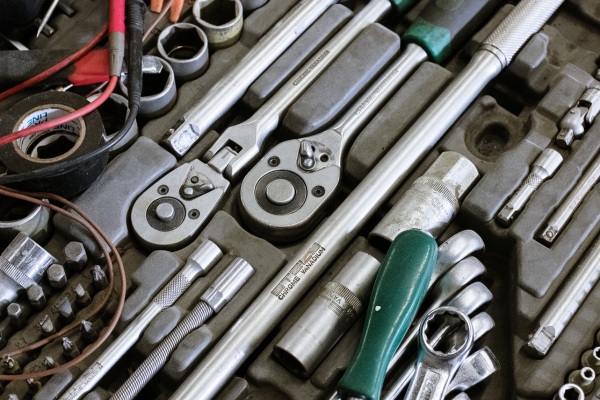
Automotive work can expose hand tools to a wide variety of contaminants. Grease, engine oil, brake dust, coolant, fuel residue, road dirt, metal particles, carbon deposits, and other substances can accumulate on wrenches, sockets, pliers, screwdrivers, ratchets, and other equipment.
Although many automotive tools are designed to withstand demanding conditions, leaving these contaminants on the surface for long periods can create maintenance problems. Grease can attract abrasive dirt, moisture can contribute to corrosion, and contaminated handles can become slippery. In addition, thick residue can hide cracks, worn surfaces, and other defects that should be identified before the tool is used again.
Cleaning metal tools after automotive work is therefore not simply a matter of appearance. A proper cleaning routine helps preserve the tool, makes inspection easier, improves handling, and reduces the chance that contaminants will spread throughout the toolbox.
The best cleaning method depends on the tool’s construction and the type of contamination involved. Manufacturer instructions should always take priority, especially for specialized tools, precision instruments, torque tools, and equipment containing electrical or electronic components.
Why Automotive Work Is Hard on Tools
Automotive environments are particularly demanding because several contaminants can appear during a single repair.
Engine oil and grease can create a thick film that attracts dust and metal particles. Brake dust can contain very fine abrasive material. Coolant can leave residue after evaporation, while road grime can contain moisture and corrosive substances.
Metal particles generated during mechanical work can also become embedded in oily deposits.
If these materials remain on a tool, they can create a layer that becomes increasingly difficult to remove.
Regular cleaning prevents contamination from becoming a permanent maintenance problem.
Clean Tools Soon After the Job
The easiest time to clean an automotive tool is shortly after use.
Fresh oil and grease are generally easier to remove than deposits that have been allowed to dry and collect dust.
Before putting tools back into the toolbox, inspect them for obvious contamination.
Remove excess grease, wipe away oil, and clear dirt from joints and recesses.
This does not necessarily mean performing a complete deep cleaning after every small task. A quick wipe can often prevent significant buildup.
More thorough cleaning can then be performed periodically or after particularly dirty repairs.
Remove Loose Dirt Before Degreasing
Before applying a cleaner, remove loose dirt and debris.
A dry cloth or suitable brush can remove particles that are not strongly attached to the surface.
This is useful because immediately applying liquid cleaner to a heavily contaminated tool can turn loose dirt into a thick slurry that spreads across the entire surface.
Brushes can be particularly helpful around textured handles, socket recesses, threads, and other difficult areas.
The objective is to remove as much loose contamination as possible before dealing with the oily residue.
Choose the Cleaning Product Carefully
Different automotive contaminants require different cleaning approaches.
A mild degreaser may be suitable for general grease and oil on robust metal surfaces, while other contaminants may require a specialized cleaner.
However, a product that works well on bare steel may not be appropriate for painted surfaces, rubber grips, plastics, coatings, or markings.
Always read the product instructions before use.
If you are unsure whether a cleaner is compatible with the tool, test it on a small inconspicuous area first.
Avoid assuming that the strongest degreaser is automatically the best choice.
Use the Least Aggressive Effective Method
A good maintenance principle is to start with the simplest method that can remove the contamination.
For example, a lightly oily wrench may only need a cloth and an appropriate cleaner.
A heavily contaminated socket may require brushing and more thorough degreasing.
Using unnecessarily aggressive chemicals can damage protective finishes or handles.
The goal is to remove contamination while preserving the tool’s original surface and function.
Be Careful With Brake Dust
Brake dust can be particularly fine and persistent.
It can settle into textured surfaces, joints, and toolboxes.
When cleaning tools exposed to brake dust, avoid unnecessarily blowing contaminated material into the air.
Use an appropriate controlled cleaning method that prevents the dust from spreading throughout the workshop.
A damp cleaning method may be suitable for some robust metal surfaces, provided the tool is then dried thoroughly and the manufacturer does not prohibit it.
Avoid directing contaminated air toward your face or other people.
Remove Grease From Ratchets and Wrenches
Ratchets and wrenches are among the most frequently contaminated automotive tools.
Grease can accumulate around the ratchet head, adjustment mechanism, wrench openings, and handles.
Start by wiping away excess grease.
Use an appropriate brush to remove dirt from recessed areas.
For ratchets, pay particular attention to the mechanism because contamination can affect its operation.
Do not flood the internal mechanism with an inappropriate solvent.
If the manufacturer specifies a cleaning or lubrication procedure, follow it.
After cleaning, operate the ratchet carefully and verify that the mechanism engages and releases normally.
Clean Sockets Thoroughly
Sockets can collect oil, grease, dirt, and metal particles inside and around their openings.
A contaminated socket may transfer dirt to fasteners during the next repair.
Use an appropriate brush or cloth to clean the internal and external surfaces.
Pay attention to the corners and recesses where debris can accumulate.
After cleaning, dry the socket thoroughly.
Inspect the drive end for rounding, deformation, or cracks.
A socket that is clean but damaged should not be returned to heavy use.
Pay Attention to Threads
Threaded tools and accessories can collect oily dirt very easily.
Examples include adjustable tools, threaded clamps, certain pullers, and other automotive equipment.
Contamination inside threads can make movement less smooth and can hide wear.
Use a suitable brush to remove debris without damaging the threads.
After cleaning, inspect the threads for damage.
If lubrication is appropriate, use the product and amount recommended for the specific tool.
Avoid applying excessive lubricant because it can attract more dust and create another layer of contamination.
Clean Pliers and Adjustable Tools
Pliers can collect grease around their pivot points and textured jaws.
Adjustable pliers may also accumulate dirt around the adjustment mechanism.
Wipe the tool first to remove excess contamination.
Use a suitable brush to reach the pivot and adjustment areas.
After cleaning and drying, check that the tool opens and closes smoothly.
If the pivot becomes stiff, determine whether cleaning is enough or whether the tool requires appropriate lubrication.
Do not use excessive force to move a mechanism that is obstructed by hardened contamination.
Clean Screwdrivers Carefully
Screwdrivers used in automotive repairs can become contaminated with grease and oil.
The shaft can generally be wiped clean, but the handle requires more consideration.
Some handles are made from plastics or composite materials that may react poorly to certain solvents.
Avoid soaking the handle in degreaser.
Clean the metal shaft with an appropriate method and use a compatible cleaner on the handle.
After cleaning, ensure the grip is dry and free of oily residue.
A slippery screwdriver handle can reduce control and make the tool less safe to use.
Do Not Forget the Tool Handles
Tool handles deserve attention because they are where the user maintains physical contact with the tool.
Oil and grease can make handles slippery.
This is particularly problematic when applying significant force with a wrench, screwdriver, pliers, or similar tool.
Clean handles thoroughly enough to remove the oily film without damaging the material.
Avoid aggressive chemicals that could soften rubber, degrade plastic, or remove surface coatings.
After cleaning, the handle should be dry and provide the grip intended by the manufacturer.
Keep Torque Wrenches Separate
Torque wrenches require special care because they are precision instruments.
They should not automatically be treated like ordinary workshop tools.
Clean the external surfaces carefully and follow the manufacturer’s instructions for storage, calibration, lubrication, and adjustment.
Avoid soaking or aggressively cleaning the mechanism.
If a torque wrench has been heavily contaminated, consult the manufacturer’s maintenance recommendations.
Cleaning the tool does not replace periodic calibration when calibration is required.
Be Careful With Electrical and Electronic Tools
Not every automotive tool is a simple piece of metal.
Modern workshops may use electronic diagnostic equipment, battery-powered tools, electrical testers, and other equipment containing sensitive components.
These tools require different cleaning methods.
Do not apply liquid cleaner directly to electrical connections, displays, switches, circuit boards, battery compartments, or ventilation openings unless the manufacturer specifically permits it.
Disconnect power when appropriate before cleaning.
When dealing with specialized equipment, follow the manufacturer’s cleaning instructions rather than applying general metal-tool cleaning practices.
Dry Tools Immediately After Wet Cleaning
Water can be useful for cleaning certain robust tools, but moisture must not be left on metal surfaces.
After wet cleaning, dry the tool thoroughly with a clean cloth.
Pay attention to joints, recesses, sockets, threads, and other areas where water can remain trapped.
Allow the tool to dry completely before placing it into a closed toolbox.
Moisture trapped inside a toolbox can contribute to corrosion, particularly when multiple metal tools are stored together.
Protect Against Rust
Automotive tools are frequently exposed to moisture, even when the workshop itself appears dry.
After cleaning and drying a bare-steel tool, an appropriate corrosion-protection product may help protect the surface during storage.
The product should be suitable for the tool and should not create a slippery working surface.
Do not apply oily substances to areas where they could interfere with grip, torque transfer, or safe operation.
For tools stored for long periods, corrosion protection becomes particularly important.
Inspect for Corrosion
Cleaning provides an excellent opportunity to look for rust and corrosion.
Inspect:
- Wrench openings
- Socket interiors
- Ratchet heads
- Threads
- Pivots
- Drive ends
- Exposed steel surfaces
- Fasteners
- Handles and connection points
Surface discoloration does not always mean severe damage.
However, deep pitting, significant material loss, cracks, or structural corrosion may affect the tool’s strength.
If corrosion has compromised an important load-bearing tool, replacement may be safer than attempting cosmetic restoration.
Inspect Tools for Mechanical Damage
A clean tool is easier to inspect.
After removing grease and dirt, look for cracks, bends, deformation, excessive wear, and damaged surfaces.
Pay particular attention to high-load tools such as sockets, ratchets, breaker bars, and wrenches.
If a tool has been overloaded previously, cleaning may reveal damage that was hidden beneath contamination.
Do not continue using a tool simply because it still appears functional.
A damaged tool can fail unexpectedly when significant force is applied.
Clean Automotive Tools Without Damaging Markings
Tool markings can be important for identifying sizes and specifications.
Aggressive abrasives or chemicals can remove printed, engraved, painted, or coated markings.
Avoid unnecessary scrubbing of identification areas.
If markings are already becoming difficult to read, document the tool’s size and type before they disappear completely.
Maintaining readable markings makes it easier to select the correct tool and reduces the chance of using the wrong size during a repair.
Avoid Abrasive Cleaning on Precision Surfaces
Some tools have carefully machined surfaces that should not be aggressively scratched.
Avoid using coarse abrasive materials simply because they remove dirt quickly.
Scratches can affect surfaces, remove protective finishes, and make future contamination easier to retain.
For most routine cleaning, controlled brushing and appropriate chemical cleaning are preferable to aggressive abrasion.
If a tool requires restoration of a heavily corroded or damaged surface, treat that as a separate restoration task rather than ordinary cleaning.
Do Not Use Fuel or Uncontrolled Solvents
Some people use automotive fuels or random solvents because they are readily available in a garage.
This is not a good general cleaning strategy.
Such products may present significant fire, health, material-compatibility, and disposal concerns.
Use cleaning products specifically intended for the job and follow their instructions.
A suitable workshop degreaser or manufacturer-approved cleaner is generally preferable to improvising with hazardous substances.
Keep the Toolbox Clean
Cleaning the tools is only part of the process.
A dirty toolbox can immediately contaminate tools again.
Remove accumulated grease, metal particles, brake dust, dirt, and other debris from drawers and compartments.
Pay particular attention to areas where oily residue collects.
A clean storage environment helps keep tools cleaner for longer and makes it easier to notice missing or damaged equipment.
For mobile toolboxes used in automotive work, periodic deep cleaning can make a significant difference.
Separate Dirty Tools During Large Repairs
When performing a particularly dirty automotive job, consider separating heavily contaminated tools from tools that remain clean.
A temporary container can be useful for tools awaiting cleaning.
This prevents grease-covered equipment from contaminating clean tools.
Once the repair is finished, clean the dirty tools before returning them to their normal storage location.
This approach is especially useful when several people share a workshop or toolbox.
Avoid Storing Wet or Oily Tools Together
Wet tools can introduce moisture into the storage environment.
Extremely oily tools can contaminate neighboring equipment.
Before storage, remove excess oil and make sure the tool is dry.
For tools that require a protective film, apply it intentionally rather than leaving heavy deposits of workshop grease on the surface.
A thin, appropriate protective layer is generally preferable to uncontrolled contamination.
Establish a Post-Repair Cleaning Routine
A simple routine can keep automotive tools in much better condition.
After finishing a repair, separate tools that require cleaning.
Remove loose dirt and excess grease.
Clean the working surfaces using an appropriate method.
Dry the tools completely.
Inspect them for corrosion or damage.
Apply suitable lubrication or corrosion protection where necessary.
Finally, return everything to a clean toolbox.
The routine becomes much faster once it becomes habitual.
Common Cleaning Mistakes
Several mistakes are particularly common when cleaning automotive tools.
One is using an excessively aggressive solvent without considering the material.
Another is leaving tools wet after cleaning.
Allowing brake dust and metal particles to remain trapped in oily residue is another problem.
Some users also ignore the condition of handles because the metal portions look clean.
Others continue using a tool with cracks or deformation because the tool still appears functional.
Cleaning should always be combined with inspection.
When a Tool Should Be Replaced
Cleaning cannot restore metal that has been significantly lost through corrosion or mechanical damage.
A wrench with a severely damaged opening, a socket with cracks, or a ratchet with a compromised mechanism may no longer be safe for heavy use.
The decision to replace a tool should consider the type of work it performs and the consequences of failure.
For high-load automotive repairs, reliability is particularly important.
If you have doubts about whether a damaged tool can safely handle the required force, replacing it is generally preferable to taking unnecessary risks.
A Practical Maintenance Schedule
A simple schedule can help keep automotive tools in good condition.
After each repair: Remove excess grease and dirt and return tools to clean storage.
After heavy contamination: Perform a more thorough cleaning and inspection.
Periodically: Check for corrosion, worn surfaces, loose components, and damaged handles.
Before major repairs: Inspect high-load tools such as sockets, ratchets, breaker bars, and torque tools.
During long-term storage: Ensure tools are clean, dry, and appropriately protected against corrosion.
This approach reduces the amount of restoration required later.
Final Thoughts
Cleaning metal tools after automotive work is an important part of long-term tool care. Oil, grease, brake dust, road grime, coolant residue, and metal particles can accumulate quickly, particularly during demanding repairs.
The most effective strategy is to clean tools soon after use, remove loose contamination before degreasing, choose cleaning products that are compatible with the tool, and dry metal surfaces thoroughly.
Do not treat every tool in the same way. Precision instruments, torque wrenches, electrical equipment, coated surfaces, plastics, and rubber handles may require specialized cleaning procedures.
Most importantly, use cleaning as an opportunity to inspect the tool. Once grease and dirt are removed, cracks, corrosion, deformation, worn surfaces, and other problems become much easier to identify.
A consistent cleaning routine keeps automotive tools easier to handle, easier to inspect, and better protected against corrosion and premature wear. Over time, those small maintenance habits can make a substantial difference in the reliability and useful life of an entire tool collection.
