
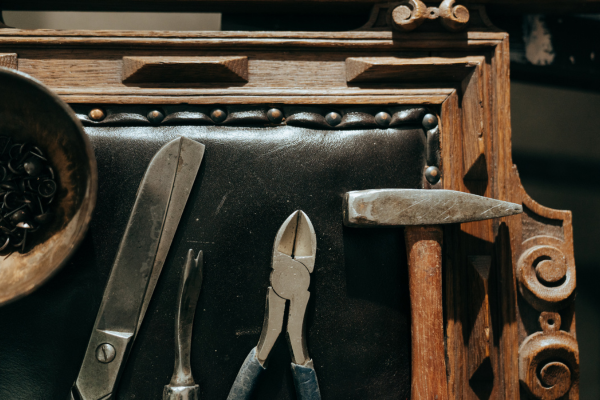
Tools are designed to withstand demanding working conditions, but their finishes can deteriorate over time. Paint can become scratched, powder coating can wear away, polished metal can become dull, and protective coatings can be damaged by moisture, chemicals, impacts, and repeated use.
A worn finish does not always mean that a tool needs to be replaced. In many cases, the underlying tool is still structurally sound and can be cleaned, lightly restored, and protected for continued use. However, restoration should focus on preserving the tool rather than making it look new at any cost.
The correct approach depends on the type of finish, the material underneath it, the amount of damage, and the purpose of the tool. A decorative restoration can be very different from restoring a tool that must continue to withstand high mechanical loads.
Before beginning, always consider the manufacturer’s recommendations. Avoid modifying critical working surfaces, removing important markings, or using aggressive chemicals that could weaken or damage the tool.
Understand What the Finish Does
A tool’s finish is not necessarily only cosmetic.
Protective coatings can help reduce exposure to moisture and contaminants. Paint and powder coating can provide a barrier between the underlying metal and the environment. Plating or other surface treatments may also contribute to corrosion resistance and durability.
When a finish becomes damaged, the exposed metal can be more vulnerable to oxidation and corrosion.
However, not every scratch requires immediate refinishing.
Minor cosmetic wear on a frequently used wrench, for example, may have little practical effect. More important is whether the damaged area exposes bare metal to moisture or whether the underlying tool has developed corrosion.
The first step in restoration is therefore determining whether the problem is cosmetic, protective, or structural.
Inspect the Tool Before Restoring It
Do not begin sanding or painting before inspecting the entire tool.
Clean the tool first so dirt and grease do not hide important defects.
Look for:
- Cracks
- Bends
- Deep corrosion
- Pitting
- Deformed working surfaces
- Loose handles
- Damaged threads
- Broken fasteners
- Excessive wear
- Missing components
If the tool has structural damage, restoring its appearance will not make it safe.
A heavily corroded load-bearing tool may be better replaced than refinished. Restoration makes the most sense when the underlying structure remains sound.
Identify the Existing Finish
Different finishes require different restoration methods.
A tool may have:
- Painted steel
- Powder coating
- Chrome plating
- Nickel plating
- Bare steel
- Anodized aluminum
- Zinc plating
- A factory-applied protective coating
These finishes do not respond equally to abrasives, solvents, moisture, or paint.
Before removing anything, determine what type of surface you are dealing with.
If you cannot identify the finish, begin with the least aggressive cleaning method possible.
Avoid assuming that every shiny metal surface is bare steel. Removing a protective coating unnecessarily can make the tool more vulnerable to corrosion.
Start With Thorough Cleaning
A damaged finish is easier to evaluate after the tool has been cleaned.
Remove grease, oil, dirt, dust, and other contamination using a cleaner appropriate for the tool.
A soft or medium brush can help remove debris from textured surfaces.
Do not use aggressive abrasives simply to make the surface appear cleaner.
After cleaning, dry the tool completely and inspect it again.
You may discover that what appeared to be severe finish damage was actually a layer of contamination.
Remove Loose or Flaking Coating
If paint or another coating is peeling, loose material should generally be removed before applying a new protective layer.
Loose coating can prevent a new finish from bonding properly.
Use a suitable scraper or controlled abrasive method appropriate for the underlying material.
Do not aggressively remove firmly attached coating simply because it has a different appearance.
The objective is to create a stable surface, not necessarily to strip every remaining trace of the original finish.
Be Careful With Sanding
Sanding can be useful during restoration, but it should be controlled.
Excessive sanding can alter dimensions, remove markings, round edges, or damage carefully machined surfaces.
For large flat areas where the finish is already damaged, light surface preparation may be appropriate.
For precision components, threads, cutting edges, bearing surfaces, and other functional areas, aggressive sanding can create more problems than it solves.
Never treat a precision working surface like a piece of decorative metal.
Do Not Sand Critical Working Surfaces
Many tools depend on precise geometry.
Examples include:
- Wrench jaws
- Socket drive areas
- Cutting edges
- Chisel bevels
- Measuring surfaces
- Threaded components
- Ratchet mechanisms
- Machined contact surfaces
Removing metal from these areas can affect fit, strength, accuracy, or performance.
If the finish is worn away on a critical working surface but the underlying metal is sound, it may be better to leave the area alone rather than trying to recreate the original appearance.
A functional tool does not need to look factory-new.
Deal With Surface Rust First
If damaged finish has allowed rust to develop, address the corrosion before applying a new coating.
Light surface rust can often be removed using an appropriate mechanical cleaning method.
Use a brush, suitable abrasive, or rust-removal product compatible with the tool’s material.
The goal is to remove loose corrosion without unnecessarily removing sound metal.
After rust removal, clean the surface and dry it thoroughly.
If corrosion has created deep pits or significant material loss, assess whether the tool remains structurally suitable before continuing with cosmetic restoration.
Distinguish Surface Rust From Serious Corrosion
Not all rust indicates the same level of damage.
A thin layer of surface oxidation may be mostly cosmetic and relatively easy to address.
Deep pitting is more concerning because corrosion has removed material from the metal.
If corrosion affects a high-load area, the tool may no longer have the same strength it originally had.
This is particularly important for tools such as sockets, wrenches, ratchets, clamps, and other equipment subjected to significant force.
Do not use paint to hide serious corrosion.
A good restoration begins with an honest assessment of the underlying metal.
Protect Bare Metal After Preparation
Once damaged coating or rust has been removed, exposed metal should not simply be left unprotected.
Bare steel can begin oxidizing when exposed to moisture and oxygen.
Depending on the intended use, protection may involve a suitable corrosion inhibitor, protective coating, primer, or another manufacturer-compatible treatment.
The protection should be appropriate for the tool.
For example, a thick decorative coating may not be suitable on a surface that must fit precisely against another component.
The function of the tool should determine the restoration method.
Choose a Compatible New Finish
If refinishing is appropriate, choose a coating compatible with the underlying material and expected working conditions.
Consider:
- Surface material
- Temperature exposure
- Moisture
- Chemical exposure
- Abrasion
- Flexibility
- Expected handling
- Required thickness
A coating that looks attractive but cannot withstand workshop conditions will quickly deteriorate.
For frequently handled tools, durability is generally more important than appearance.
Prepare the Surface Before Recoating
A new coating requires a properly prepared surface.
Remove grease and oil.
Eliminate loose rust and flaking material.
Make sure the surface is clean and dry.
If the product instructions require a particular primer or preparation method, follow those instructions.
Do not apply a new coating over loose rust, heavy grease, or unstable old paint.
The quality of the preparation often matters more than the coating itself.
Protect Threads and Moving Parts
Paint and other coatings should not be allowed to interfere with mechanical components.
Before refinishing, protect areas such as:
- Threads
- Pivots
- Ratchet mechanisms
- Bearing surfaces
- Sliding components
- Adjustment mechanisms
- Tool openings
- Precision contact areas
A thick layer of coating in a threaded or moving area can make the tool difficult to assemble or operate.
Masking or otherwise protecting these areas can prevent unnecessary problems.
Keep Coatings Away From Tool Openings
Sockets, wrench openings, clamps, and other tools may have precisely shaped contact areas.
A coating that changes the dimensions of these surfaces can affect how the tool fits.
Do not apply decorative coatings to areas that must maintain precise dimensions.
If necessary, mask the working areas before refinishing.
The restored tool should perform its intended function after the work is complete.
Do Not Cover Important Markings
Tool sizes, specifications, brand information, safety warnings, and other markings can be useful.
Avoid covering important identification with thick paint or coatings.
If markings are already damaged, record the tool’s specifications before beginning restoration.
A tool that looks attractive but no longer has readable size information can be less practical in a busy workshop.
Restore Handles Separately
Handles often require different treatment from metal working surfaces.
Wooden handles can be cleaned, lightly sanded when appropriate, and protected with a suitable finish.
Plastic and composite handles should be treated according to their material.
Rubberized grips may react poorly to certain solvents or coatings.
Do not assume that the same restoration product should be used on both the handle and metal body.
If a handle is cracked, loose, or structurally compromised, refinishing it is not enough. It may need to be replaced.
Wooden Handle Restoration
Wooden tool handles can develop scratches, dryness, stains, and worn finishes through regular use.
Begin by cleaning the handle.
Inspect it carefully for cracks and looseness.
If the wood is structurally sound, light surface preparation may improve its condition.
Avoid removing excessive material because the handle’s shape affects grip and control.
After preparation, use a suitable wood finish compatible with the tool and its intended environment.
Allow the finish to cure according to the product instructions before returning the tool to service.
Plastic and Composite Handles
Plastic and composite handles generally require a gentler approach.
Avoid aggressive solvents unless the manufacturer confirms compatibility.
Clean the surface first and inspect it for cracks, deformation, or loose sections.
Minor cosmetic wear may not require refinishing at all.
If the handle has become brittle or structurally damaged, replacement is usually more appropriate than attempting to cover the damage with paint.
A handle’s primary function is safe control of the tool, not appearance.
Avoid Making the Tool Too Thick
One potential problem with restoration is adding unnecessary material.
Multiple layers of paint, coating, or filler can change the dimensions of a component.
This can be especially problematic on tools that must fit into sockets, cases, holders, or other equipment.
Use thin, controlled layers where refinishing is appropriate.
Always follow the coating manufacturer’s instructions regarding application thickness and curing.
Allow Coatings to Cure Completely
A coating that feels dry on the surface may not yet be fully cured.
Returning a freshly refinished tool to heavy use too quickly can cause scratches, impressions, fingerprints, or premature failure.
Follow the product’s recommended drying and curing time.
Do not accelerate curing with excessive heat unless the product instructions specifically allow it.
Patience during this stage can significantly improve the final result.
Inspect the Finished Tool
Once restoration is complete, inspect the tool before using it.
Check that:
- Moving parts operate normally
- Threads turn correctly
- Handles are secure
- Working surfaces remain unobstructed
- Markings remain readable
- No coating has entered precision areas
- The finish is firmly attached
- No moisture is trapped beneath the coating
For load-bearing tools, perform a careful functional inspection before returning them to demanding work.
Restoration should improve the tool without compromising its original purpose.
Avoid Cosmetic Restoration of Unsafe Tools
One of the most important principles is knowing when not to restore a tool.
If a tool has severe corrosion, cracks, deformation, or major structural wear, a new finish will not restore its original strength.
Painting over serious damage can actually make inspection more difficult.
If you cannot confidently determine that the tool remains safe, replacement or professional assessment may be the better option.
Aesthetics should never take priority over function and safety.
Common Restoration Mistakes
Several mistakes can shorten the life of a tool during restoration.
One is sanding too aggressively.
Another is using an incompatible solvent.
Applying paint to threads or precision surfaces is another common problem.
Other mistakes include painting over rust, covering identification markings, applying coatings too thickly, and returning the tool to service before the finish has cured.
Avoiding these mistakes requires a simple principle: preserve the original function of the tool.
When Professional Restoration Is Better
Some tools are too valuable, specialized, or precise for improvised restoration.
Professional service may be appropriate for:
- Precision measuring tools
- Specialized automotive tools
- Expensive professional equipment
- Tools with complex mechanisms
- Heavily corroded load-bearing tools
- Items requiring specialized plating or coating
Professional restoration may also be worthwhile when maintaining the original finish is important.
In these cases, attempting an aggressive DIY restoration could reduce the tool’s value or performance.
How to Maintain the Restored Finish
Once the tool has been restored, regular maintenance becomes important.
Keep it clean.
Store it in a dry environment.
Remove moisture promptly.
Avoid unnecessary exposure to harsh chemicals.
Inspect scratches before they become corrosion points.
Do not use the tool in ways that exceed its intended purpose.
A restored finish will last much longer when the underlying maintenance routine is good.
A Practical Restoration Routine
A simple restoration process can be organized into several stages.
First, clean the tool. Remove grease, dirt, and contamination.
Second, inspect it. Determine whether the damage is cosmetic or structural.
Third, remove loose coating and surface corrosion. Use an appropriate method without damaging functional surfaces.
Fourth, prepare the exposed material. Make sure it is clean, dry, and suitable for protection.
Fifth, protect precision areas. Keep coatings away from threads, working surfaces, and moving components.
Sixth, apply an appropriate finish if necessary. Use a compatible product according to its instructions.
Finally, allow complete curing and inspect the tool.
This process produces a more durable result than simply painting over the damaged area.
Final Thoughts
Restoring a tool with a damaged or worn finish can be a worthwhile maintenance project when the underlying tool is still structurally sound. A scratched or faded surface does not automatically mean that the tool has reached the end of its useful life.
The most important step is to distinguish cosmetic wear from structural damage. Clean the tool thoroughly, inspect it carefully, address corrosion appropriately, and avoid removing material from precision or load-bearing surfaces.
If refinishing is appropriate, choose a compatible coating and prepare the surface properly. Protect threads, moving components, working edges, and important markings from unnecessary coating.
Most importantly, remember that restoration should preserve functionality rather than simply improve appearance. A well-restored tool should remain safe, practical, easy to maintain, and suitable for the work it was designed to perform.
With careful preparation and regular maintenance afterward, many tools with worn finishes can continue serving reliably for years instead of being discarded simply because they no longer look new.
