
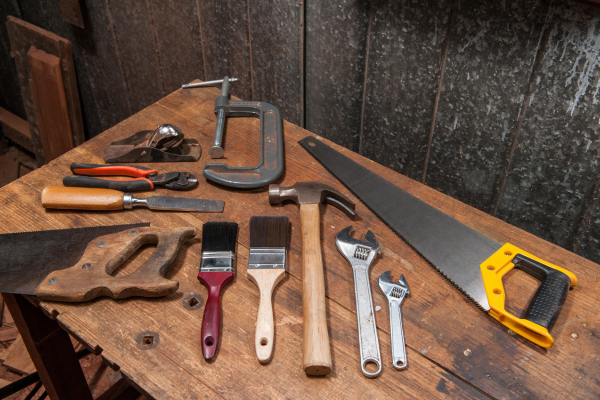
Woodworking can leave hand tools covered with resin, sap, and sticky wood residue. Over time, this material can make tools difficult to handle, interfere with moving parts, attract dust, and leave working surfaces unpleasant to use. If resin is allowed to accumulate and harden, removing it can become considerably more difficult.
Cleaning wood resin from hand tools is therefore an important part of routine tool maintenance. The goal is not simply to make a tool look clean. Proper resin removal can help preserve metal surfaces, maintain smooth movement, reduce contamination, and make tools easier and safer to use.
Different types of tools require different cleaning methods. A simple metal scraper can tolerate more aggressive cleaning than a precision measuring tool, a tool with a wooden handle, or a mechanism containing bearings and springs. Before using any solvent or cleaning product, consider the materials used in the tool and follow the manufacturer’s recommendations.
Why Wood Resin Builds Up on Tools
Wood naturally contains resins, sap, oils, and other substances that can transfer to tools during cutting, shaping, drilling, sanding, or handling.
Some types of wood are particularly resinous. Freshly cut wood can leave a sticky film on blades, saws, chisels, planes, clamps, measuring tools, and other equipment.
When the tool becomes warm during use, the resin can become softer and spread across a larger surface.
After the tool cools, the residue may become sticky, rubbery, or increasingly hard.
Dust can then attach itself to the resin, creating a thicker layer that becomes even more difficult to remove.
For this reason, cleaning the tool before the residue becomes heavily contaminated with dust can save considerable effort.
Clean Resin Before It Becomes Hard
The easiest resin to remove is generally the resin that has not been allowed to build up for a long period.
After working with resinous wood, inspect the tools before putting them away.
If you notice a sticky film on a blade or metal surface, remove it while the contamination is still relatively fresh.
A simple wipe with an appropriate cloth may be enough for light contamination.
For thicker residue, use a suitable scraper or cleaning method that will not damage the underlying surface.
Regular cleaning prevents a small amount of resin from becoming a thick, hardened layer.
Identify the Tool Material First
Before choosing a cleaning method, determine what the tool is made from.
A tool may contain several different materials, including:
- Steel
- Stainless steel
- Aluminum
- Painted metal
- Plastic
- Rubber
- Wood
- Composite materials
- Coated surfaces
A cleaner that is safe for bare steel may damage plastic or painted surfaces.
Similarly, a solvent that removes resin effectively may strip a finish from a wooden handle.
When possible, consult the manufacturer’s instructions and test a cleaning product on a small inconspicuous area before applying it broadly.
Remove Loose Dirt First
Before dealing with sticky resin, remove loose sawdust and debris.
A dry brush or cloth can often remove particles that have not bonded strongly to the resin.
This step is useful because rubbing heavily contaminated sawdust across the surface can spread the residue instead of removing it.
For tools with grooves, threads, or textured areas, use an appropriate brush to remove loose material before applying any cleaner.
Keeping the initial cleaning dry also prevents unnecessary moisture from becoming trapped around metal components.
Start With the Least Aggressive Method
A good cleaning principle is to start with the least aggressive method that can reasonably remove the contamination.
For light resin deposits, try a cloth or suitable scraper first.
If the residue remains, move to a cleaning product known to be compatible with the tool’s material.
There is rarely a good reason to begin with the strongest available chemical.
Aggressive cleaning can remove protective finishes, discolor surfaces, damage plastics, or affect handles.
The objective is to dissolve or loosen the resin while preserving the tool underneath.
Use a Suitable Scraper
A scraper can be useful for thicker resin deposits.
However, the scraper itself must be appropriate for the surface.
On robust steel surfaces, a suitable metal scraper may be acceptable in certain situations. On finished, coated, polished, or delicate surfaces, a plastic scraper may be safer.
Hold the scraper at a controlled angle and work gradually.
Avoid striking the scraper aggressively because excessive force can scratch or deform the underlying surface.
For blades and precision tools, preserving the geometry of the working edge is more important than removing every trace of resin immediately.
Choose Cleaning Products Carefully
There are many products that can dissolve or soften wood resin, but they are not universally safe for every tool.
Before applying a solvent or degreaser, verify that it is compatible with the tool’s materials.
Some products can affect:
- Paint
- Rubber
- Plastic
- Adhesives
- Protective coatings
- Printed markings
- Wooden finishes
Read the product label and follow the manufacturer’s instructions.
If the product requires ventilation or protective equipment, use it accordingly.
Avoid experimenting with combinations of cleaning chemicals.
Avoid Mixing Cleaning Chemicals
Different cleaning products should not be mixed simply because one appears ineffective.
Combining chemicals can create unexpected reactions, harmful vapors, or damage to the tool’s surface.
If one cleaner does not work, remove the residue according to the product’s instructions before considering another method.
When uncertain, use a simpler mechanical cleaning method or seek guidance from the tool manufacturer.
Tool maintenance should never involve unnecessary chemical experimentation.
Work in a Well-Ventilated Area
Some products used to remove resin can produce strong vapors.
When using a solvent or specialized cleaner, work in an area with adequate ventilation.
Keep the cleaning area away from ignition sources when the product label identifies flammability as a hazard.
Do not smoke while using flammable cleaning products.
Use gloves or other protective equipment when required by the product instructions.
Good ventilation is important not only for comfort but also for safe handling of chemical cleaners.
Clean Blades Carefully
Knives, chisels, hand planes, scrapers, and other cutting tools can collect resin along their working surfaces.
Resin can interfere with smooth cutting and may cause wood fibers to drag across the blade.
When cleaning a cutting tool, protect yourself from the sharp edge.
Do not hold the blade carelessly while applying pressure.
Use a controlled cleaning method that removes the resin without altering the cutting geometry.
After cleaning, inspect the edge for damage or dullness.
If the tool was already due for sharpening, perform that maintenance separately rather than trying to compensate for a dull edge with excessive force during cleaning.
Removing Resin From Chisels
Woodworking chisels can become sticky when used on resinous wood.
Begin by removing loose contamination.
Then soften or remove the remaining resin using a compatible cleaning method.
Avoid grinding or aggressively scraping the cutting edge simply to remove resin.
After cleaning, dry the metal surface thoroughly.
If the chisel has a wooden handle, avoid exposing the handle unnecessarily to solvents or excessive moisture.
Once clean, store the chisel in a way that protects its cutting edge.
Removing Resin From Hand Planes
Hand planes require special care because resin can accumulate on the sole, blade, adjustment components, and other surfaces.
A sticky sole can increase friction and make the plane harder to push across the wood.
Clean the sole carefully without changing its flatness.
Inspect the blade and its seating area for accumulated resin.
Adjustment mechanisms should also be checked because hardened residue can interfere with normal movement.
Avoid flooding the mechanism with solvent.
A controlled cleaning approach is better than soaking the entire tool.
Removing Resin From Hand Saws
Saw blades can collect resin between teeth and across the side surfaces.
Heavy buildup can interfere with cutting performance and make the saw more difficult to clean.
Use an appropriate brush or cleaning method to remove loose material.
When using a solvent, make sure it is compatible with the blade’s coating and handle.
Take care around the teeth because they can cause cuts even when the saw is not being used.
After cleaning, dry the blade thoroughly and consider suitable corrosion protection if recommended for the tool.
Clean Clamps and Moving Components
Resin can be especially problematic on clamps because sticky contamination may affect movement.
Inspect the threaded screw, pivot, sliding components, and contact surfaces.
Remove resin before it becomes mixed with sawdust and forms a thick abrasive paste.
Use a suitable cleaning method for the material.
After cleaning and drying, apply lubrication only where appropriate and according to the manufacturer’s recommendations.
Do not apply excessive lubricant because it can attract more sawdust.
A clean, lightly maintained mechanism generally performs better than one covered in a thick mixture of oil and wood debris.
Be Careful With Wooden Handles
Wooden handles require a different approach from steel working surfaces.
Many solvents can affect wood finishes or remove protective coatings.
Avoid soaking wooden handles in cleaning products.
Instead, clean them with a method appropriate for the finish and condition of the wood.
After cleaning, inspect the handle for cracks, loose connections, splinters, or other damage.
A handle that has become contaminated with resin should not simply be ignored because the residue can make the tool slippery or uncomfortable to hold.
Clean Plastic and Composite Handles Carefully
Plastic and composite handles can react differently to solvents.
Some cleaning chemicals can soften, discolor, or weaken certain plastics.
For this reason, avoid applying strong solvents without first confirming compatibility.
A mild cleaning method may be sufficient for light contamination.
If resin has accumulated near seams or textured grip areas, use a suitable brush or plastic scraper rather than excessive chemical exposure.
Keeping handles clean can improve grip and make it easier to identify physical damage.
Resin on Measuring Tools
Measuring tools such as squares, rulers, and marking equipment can also become contaminated during woodworking.
Sticky resin can make measurements uncomfortable and can attract dust.
However, precision measuring tools should be treated carefully.
Avoid abrasive cleaning methods that could scratch measurement surfaces or remove markings.
Use a compatible cleaner and a soft cloth when possible.
After cleaning, verify that the tool’s markings remain clear and that no residue interferes with accurate measurement.
Protect Metal After Cleaning
Once resin has been removed from a steel tool, the next priority is protecting the surface.
Cleaning can remove not only resin but also some existing protective oil or coating.
Dry the tool completely.
For appropriate bare-metal surfaces, a light corrosion-protection product may be useful.
Do not coat cutting edges or gripping surfaces with substances that could create a safety problem.
The protection method should match the tool’s intended use.
Do Not Leave Solvent Residue Behind
Removing the resin is only part of the process.
After using a cleaning product, follow the product’s instructions regarding wiping, rinsing, evaporation, or other required steps.
Do not assume that visible resin disappearance means the tool is ready for immediate use.
Residual cleaner can affect finishes, attract dirt, or create a slippery surface.
Make sure the tool is clean and dry before returning it to service.
Inspect the Tool After Cleaning
Cleaning is a good opportunity to inspect the tool for problems that were hidden beneath the resin.
Look for:
- Cracks
- Rust
- Pitting
- Loose handles
- Damaged edges
- Bent components
- Worn threads
- Loose fasteners
- Damaged coatings
- Excessive wear
Resin can sometimes conceal defects.
Once the tool is clean, determine whether it remains suitable for the work you intend to perform.
A clean tool is not automatically a safe tool if it has structural damage.
Prevent Resin From Building Up Again
The best long-term solution is to reduce accumulation rather than repeatedly remove heavy deposits.
Clean tools after working with particularly resinous wood.
Keep cutting edges maintained so that the tool does not require excessive pressure.
Store clean tools separately from heavily contaminated workshop materials.
A quick wipe after use can prevent a much larger cleaning job later.
For frequently used woodworking tools, this habit can become part of the normal end-of-project routine.
Keep Woodworking Tools Separate From Dirty Equipment
Storage organization can make resin maintenance easier.
If clean hand tools are stored in the same open container as dusty or resin-covered equipment, contamination can spread quickly.
Consider keeping frequently used precision and cutting tools in organized storage.
Separate clean tools from accessories that still need maintenance.
This reduces unnecessary contact with sawdust, resin, adhesives, and other workshop contaminants.
Avoid Excessive Heat
Heat can soften resin, which may appear useful during cleaning, but uncontrolled heating can damage the tool.
Excessive heat can affect coatings, adhesives, plastic components, wooden handles, and other materials.
Do not use an open flame or uncontrolled heating method to soften resin on a valuable tool.
If warmth is part of a manufacturer-approved cleaning process, follow the specified procedure carefully.
In most situations, controlled mechanical cleaning and compatible cleaning products are safer approaches.
Common Mistakes When Removing Wood Resin
Several mistakes can turn a simple cleaning job into a tool repair problem.
One common mistake is using an aggressive solvent without checking material compatibility.
Another is scraping delicate surfaces too forcefully.
Soaking wooden handles is another avoidable problem.
Some users also forget to dry metal tools after cleaning, allowing rust to develop.
Other mistakes include using excessive heat, mixing chemicals, ignoring sharp edges while cleaning, and applying too much lubricant after removing the resin.
A careful and controlled process is usually more effective than a fast and aggressive one.
A Simple Resin-Cleaning Routine
A practical maintenance routine can be completed in several stages.
First, remove loose sawdust and debris.
Second, remove fresh resin with a cloth, suitable scraper, or other gentle method.
Third, if necessary, apply a compatible cleaning product according to its instructions.
Fourth, remove the loosened residue and clean the surface thoroughly.
Fifth, dry the tool completely.
Finally, inspect the tool and apply suitable protection or lubrication where appropriate.
The exact method will depend on the tool, its materials, and the amount of resin present.
When a Tool Needs More Than Cleaning
Sometimes resin is not the only problem.
A tool may have developed rust, pitting, damaged threads, a loose handle, or a worn cutting edge while being exposed to woodworking conditions.
Cleaning will not correct these problems.
After removing the resin, assess the tool honestly.
If the working surface is damaged or the tool has become unsafe, repair or replacement may be necessary.
For heavily corroded or structurally damaged tools, professional assessment can be appropriate.
Final Thoughts
Removing wood resin from hand tools is much easier when it becomes part of regular maintenance rather than an occasional restoration project.
Start by cleaning tools before resin becomes heavily hardened or mixed with sawdust. Use the least aggressive method that can effectively remove the contamination, and always consider the material of the tool before applying a solvent or chemical cleaner.
Metal surfaces, wooden handles, plastic components, cutting edges, and moving mechanisms should not all be treated the same way.
After cleaning, dry the tool thoroughly, inspect it for hidden damage, and provide appropriate corrosion protection or lubrication where necessary.
A few minutes of maintenance after woodworking can prevent sticky buildup from becoming a much larger problem. Clean tools are easier to control, easier to inspect, and generally better prepared for the next project.
