
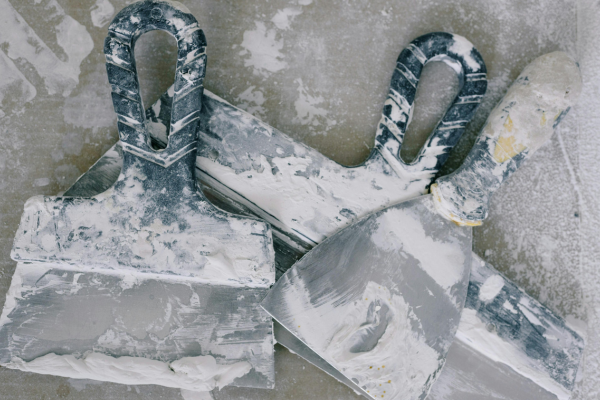
Concrete and mortar can be extremely difficult on tools. During construction and repair work, cement-based materials can stick to metal surfaces, harden around moving parts, clog openings, and contribute to corrosion if they are not removed properly. Once the material has fully cured, cleaning can become considerably more difficult and may require methods that are more aggressive than those needed immediately after use.
Proper cleaning after working with concrete and mortar is therefore an important part of tool maintenance. Removing residue while it is still fresh can save time, protect working surfaces, and help prevent long-term damage. However, cleaning must also be performed carefully because aggressive scraping, inappropriate chemicals, excessive water, and careless handling can damage the tool itself.
Different tools require different cleaning methods, and the manufacturer’s instructions should always take priority. Electrical tools, precision components, coated surfaces, and tools containing bearings or other moving parts require additional care.
Why Concrete and Mortar Can Damage Tools
Concrete and mortar contain cementitious materials that harden as they react with water. Once cured, the residue can become extremely rigid and difficult to remove.
Fresh material is generally much easier to clean because it has not yet developed its full hardness.
If residue is allowed to remain on a tool, it can interfere with moving components, reduce the accuracy of working surfaces, and trap moisture against metal.
Concrete and mortar can also contain abrasive particles. If these particles remain on a tool, they may contribute to scratching and accelerated wear during subsequent use.
For these reasons, cleaning should begin as soon as practical after the work is finished.
Clean Tools Before the Material Hardens
The most effective cleaning strategy is prevention.
Whenever possible, remove concrete or mortar residue while it is still fresh. A plastic scraper, appropriate brush, cloth, or other suitable cleaning tool can often remove most of the material before it becomes hard.
This is particularly important for:
- Trowels
- Masonry tools
- Buckets
- Mixing paddles
- Hand scrapers
- Shovels
- Measuring tools
- Clamps
- Metal work surfaces
- Tool accessories
The less cured material that remains on the tool, the less aggressive the later cleaning process will need to be.
Remove Large Pieces First
Before washing or wiping the tool, remove large pieces of concrete or mortar mechanically.
Use a suitable scraper or brush rather than immediately applying large amounts of water.
For metal tools, carefully loosen hardened edges without striking delicate components unnecessarily.
The goal is to remove the bulk of the material while minimizing scratches and deformation.
Avoid using another valuable precision tool as a makeshift scraper. A dedicated cleaning scraper is preferable because it can be subjected to this type of work without risking damage to a tool that has another purpose.
Use a Suitable Brush
A stiff brush can be useful for removing cement residue from textured or difficult surfaces.
Choose the brush according to the tool being cleaned.
A relatively robust metal surface may tolerate a stiffer brush, while painted, coated, polished, or delicate surfaces may require a softer brush.
Do not assume that the hardest brush is always the most effective choice. An excessively aggressive brush can remove protective coatings or scratch the underlying metal.
Use controlled pressure and work progressively rather than attempting to remove everything with force.
Avoid Allowing Cement Residue to Dry Inside Moving Parts
Moving components deserve special attention.
Concrete and mortar residue around hinges, threads, clamps, adjustable mechanisms, or other moving areas can interfere with normal operation once the material hardens.
If residue reaches a moving component, remove it as soon as practical.
Do not repeatedly force a mechanism that is becoming difficult to operate. Excessive force can damage threads, handles, pivots, or other components.
After cleaning, verify that the mechanism moves normally before returning the tool to service.
Be Careful With Water
Water can be useful for cleaning many construction tools, particularly when removing fresh cement-based residue.
However, water should not be treated as harmless for every type of tool.
Electrical tools, battery-powered equipment, tools containing bearings, and precision mechanisms may be damaged by moisture.
Before using water, consider the construction of the tool and the manufacturer’s cleaning instructions.
For cordless power tools, avoid directing water into ventilation openings, switches, battery compartments, charging connections, or other electrical areas.
A damp cloth or controlled cleaning method may be much more appropriate than soaking the entire tool.
Clean Electrical Tools Differently
Concrete and mortar dust can accumulate around power tools used during construction.
However, electrical tools require a different cleaning approach from simple metal hand tools.
Remove the battery or disconnect the tool from its power source before cleaning when appropriate.
Keep water away from electrical components.
Use a suitable dry cleaning method to remove loose dust and particles. For heavier contamination, follow the manufacturer’s recommended cleaning procedure.
Do not assume that because a tool appears rugged it can safely be washed with a hose.
The external housing may tolerate construction environments while the internal electronics remain vulnerable to moisture.
Pay Attention to Ventilation Openings
Cordless drills, grinders, saws, mixers, and other power tools often have ventilation openings that help control operating temperature.
Concrete and mortar dust can accumulate around these areas.
If the openings become blocked, airflow can be restricted, increasing heat buildup during operation.
Inspect ventilation openings after dusty work and remove loose debris using a method appropriate for the specific tool.
Do not push debris deeper into the housing.
Keeping the ventilation system clean is particularly important after working with dry concrete dust because fine particles can travel easily through a workshop environment.
Remove Cement Dust Before It Spreads
Construction dust can spread well beyond the tool that produced it.
If a tool is placed directly into a toolbox while covered in cement dust, the particles can contaminate other tools, storage compartments, batteries, and accessories.
Whenever possible, clean the tool before returning it to storage.
This simple habit helps keep the entire tool storage area cleaner and reduces the amount of abrasive dust that accumulates over time.
It also makes future inspections easier.
Cleaning Metal Hand Tools
Many metal hand tools used with concrete and mortar can be cleaned relatively simply if addressed promptly.
Remove loose material first.
Then use an appropriate brush, scraper, cloth, or controlled water cleaning method according to the tool’s construction.
After washing a metal tool, dry it thoroughly.
Leaving moisture on bare or lightly protected steel can encourage rust.
Pay particular attention to joints, edges, recesses, and areas where water can remain trapped.
A clean and dry tool is much less likely to develop corrosion during storage.
Dry Tools Thoroughly
Drying is an essential part of concrete and mortar cleanup.
A tool that appears clean may still retain moisture around seams, joints, handles, threads, or recessed areas.
Wipe the tool thoroughly and allow it to dry completely before placing it into storage.
For tools with moving parts, operate them carefully after cleaning if appropriate to help identify trapped moisture, but do not force them.
Do not use excessive heat to dry tools unless the manufacturer specifically permits it. High temperatures can damage plastics, coatings, seals, electrical components, and batteries.
Protect Bare Steel After Cleaning
Some tools have exposed steel surfaces that can begin to corrode when moisture remains after cleaning.
After the tool has been thoroughly dried, a suitable corrosion-protection product may be appropriate for certain metal surfaces.
The product should be compatible with the tool and its intended use.
Avoid applying oily or greasy substances to surfaces where they could create a slipping hazard or interfere with the tool’s function.
For tools used around concrete, maintaining clean and protected metal surfaces can make future cleaning easier.
Removing Hardened Mortar
If mortar has already hardened, cleaning becomes more difficult.
Start with mechanical removal using a suitable scraper or brush.
Work gradually rather than attempting to break off large sections with excessive force.
For robust metal tools, carefully loosening hardened material may be possible without damaging the surface. However, delicate coatings, precision edges, and moving mechanisms require greater caution.
If a chemical product is being considered, verify that it is compatible with the tool’s material and finish.
Never assume that a strong chemical is automatically a better cleaning solution.
Be Careful With Acidic Cleaners
Some products marketed for removing cement residue rely on acidic chemistry.
These products can be effective in appropriate applications, but they can also damage certain metals, coatings, plastics, seals, and other materials.
They should not be used casually on valuable tools.
Before using a chemical cement remover, read the product instructions and determine whether it is suitable for the specific tool.
Use appropriate protective equipment and ventilation as required by the product label.
For many tools, mechanical cleaning while the residue is fresh is preferable to relying on aggressive chemical treatment after the material has cured.
Do Not Mix Cleaning Chemicals
Never combine different cleaning chemicals simply because one product appears ineffective.
Mixing cleaning agents can produce dangerous reactions or harmful vapors.
Use one product according to its instructions and rinse or neutralize only when the manufacturer’s directions specifically call for it.
If you are uncertain about chemical compatibility, avoid experimenting on an important tool.
The tool’s material, finish, and manufacturer recommendations should determine the cleaning method.
Cleaning Trowels and Masonry Tools
Trowels and similar masonry tools are frequently exposed to mortar and concrete.
Because these tools are usually relatively simple, immediate cleaning is often straightforward.
Remove excess material before it dries.
Use an appropriate scraper or brush to remove remaining residue.
If water is suitable for the tool, wash away remaining fresh material and dry the tool thoroughly afterward.
Pay attention to the connection between the blade and handle because hardened material can accumulate there.
A clean trowel is easier to use and less likely to transfer old material into a new mix.
Cleaning Mixing Paddles
Mixing paddles can accumulate significant amounts of mortar, grout, plaster, adhesive, or concrete.
The best time to clean the paddle is immediately after mixing.
Remove excess material before it hardens around the blades.
If the paddle is connected to a power tool, disconnect it before cleaning and keep water away from the power tool itself.
Inspect the paddle after cleaning for bent sections, cracks, or excessive wear.
Hardened material left on the paddle can increase imbalance and vibration during the next use.
Cleaning Shovels and Buckets
Shovels, mixing buckets, and similar equipment should also be cleaned before residue becomes fully cured.
Remove large pieces first.
Wash suitable surfaces with water when appropriate and remove remaining material with a brush or scraper.
For metal shovels, dry the surface after washing.
Plastic buckets should also be inspected for cracks, deformation, and damage caused by excessive force during cleaning.
Avoid striking a plastic container aggressively to remove hardened material because it may crack or become brittle.
Protect Tool Handles During Cleaning
Not every part of a tool should be treated the same way.
Wooden handles can absorb moisture, while certain plastics and rubber materials may be affected by aggressive chemicals or prolonged exposure to water.
When cleaning a tool, focus the strongest cleaning action on the contaminated working surface rather than unnecessarily exposing the entire handle.
Dry wooden handles thoroughly and inspect them for cracks, splinters, or looseness.
For composite or plastic handles, avoid chemicals that are not approved for the material.
Inspect Tools After Cleaning
Cleaning is an excellent opportunity to inspect a tool.
Once the concrete and mortar residue is gone, look for:
- Cracks
- Bends
- Excessive wear
- Loose handles
- Damaged threads
- Corrosion
- Broken edges
- Deformed working surfaces
- Missing fasteners
- Damage around joints
Construction residue can hide problems that become visible only after the tool is clean.
Do not return a damaged tool to heavy use simply because it has been cleaned.
Watch for Rust After Concrete Work
Concrete and mortar cleanup often involves water, and moisture is one of the main contributors to corrosion.
After cleaning, inspect bare steel surfaces carefully.
If rust is beginning to appear, address it before it becomes more severe.
Light surface rust may often be removed with an appropriate mechanical method, followed by drying and suitable corrosion protection.
Deep corrosion, pitting, or structural damage requires a more careful assessment before the tool is returned to service.
Clean Tools Before Long-Term Storage
If a tool will not be used for several weeks or months, cleaning becomes even more important.
Concrete residue should not be left on the tool during long-term storage.
Remove dirt and cement material, dry the tool completely, inspect it for damage, and store it in an appropriate environment.
For metal tools, consider suitable corrosion protection where necessary.
Avoid storing dirty tools in sealed containers because trapped moisture and residue can contribute to corrosion and deterioration.
Avoid Common Cleaning Mistakes
Several cleaning habits can cause more damage than the concrete or mortar itself.
One mistake is allowing residue to remain until it becomes extremely hard.
Another is using excessive force to break hardened material from delicate surfaces.
Using aggressive chemicals without checking material compatibility is another common problem.
Other mistakes include soaking electrical tools, leaving metal tools wet, using damaged scrapers, and placing contaminated tools directly into storage.
Good cleaning should remove contamination without creating a new maintenance problem.
Establish a Post-Construction Cleaning Routine
A consistent routine can make tool maintenance much easier.
Immediately after completing the task, remove the largest pieces of concrete or mortar.
Next, clean the working surfaces using an appropriate brush, scraper, cloth, or water-based method where suitable.
Then dry the tool thoroughly.
After drying, inspect it for damage, corrosion, or loose components.
Finally, return the tool to clean and appropriate storage.
The entire process can take only a few minutes when performed immediately, while removing fully hardened cement later may require considerably more time.
When a Tool Should Be Replaced
Not every damaged tool is worth restoring.
If concrete or mortar has contributed to severe corrosion, cracks, deformation, damaged threads, or other structural problems, replacement may be safer and more economical than continued use.
This is particularly important for tools that are subjected to high loads.
A tool that looks acceptable after cleaning may still have structural damage hidden beneath corrosion or hardened material.
Evaluate the tool based on its intended workload rather than appearance alone.
Final Thoughts
Cleaning tools after working with concrete and mortar is one of the simplest ways to extend their useful life. The most important principle is to act early. Fresh cement-based residue is much easier to remove than fully hardened material.
Remove large pieces promptly, use appropriate brushes and scrapers, keep electrical components away from unnecessary moisture, dry metal tools thoroughly, and inspect every tool after cleaning.
Aggressive chemicals should only be considered when appropriate for the material and when the product instructions support their use. In many situations, careful mechanical cleaning performed soon after the work is finished is the safest and most effective approach.
A few minutes of proper cleanup after each construction job can prevent hardened residue, corrosion, blocked mechanisms, and unnecessary wear. Over time, this simple habit helps keep tools cleaner, safer, easier to use, and ready for the next project.
