
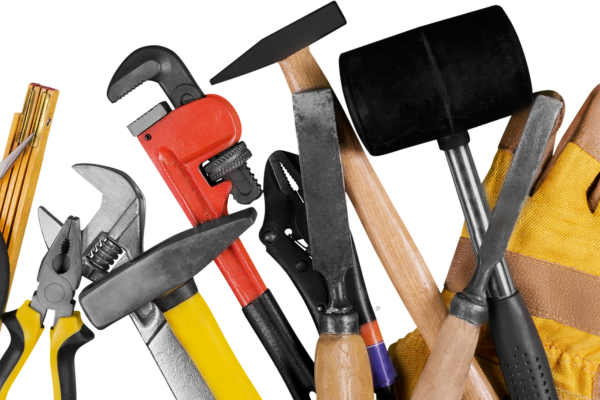
Hand tools are designed to withstand repeated use, but even high-quality tools can become damaged or worn over time. A wrench, pliers, hammer, screwdriver, chisel, clamp, or socket may look perfectly normal at first glance while developing cracks, deformation, corrosion, loose components, or other problems that can affect its performance. These issues become especially important when a tool is going to be used for heavy work that involves substantial force.
A few minutes of inspection before starting a demanding task can help identify problems before they become failures. The purpose is not to make every tool look new. Instead, the goal is to determine whether the tool remains structurally sound, appropriate for the task, and capable of handling the forces involved.
A useful inspection should consider the tool’s overall condition, working surfaces, handles, moving components, corrosion, and signs of previous misuse. It should also consider whether the tool is actually designed for the job. A tool can be in excellent condition and still be the wrong choice for a particular application.
Why Inspecting a Hand Tool Before Heavy Work Matters
Heavy work places greater stress on hand tools than ordinary light-duty tasks. Increased force can expose weaknesses that may not be noticeable during casual use.
A cracked handle, for example, might survive several light tasks but fail when the tool is struck or placed under significant pressure. A worn wrench may slip from a fastener when substantial torque is applied. A damaged screwdriver tip can suddenly lose contact with the fastener and cause the user’s hand to move unexpectedly.
Tool inspection therefore serves two purposes. First, it helps prevent damage to the tool itself. Second, it reduces the likelihood of unexpected movement that could result in injury or damage to the workpiece.
Inspection is particularly important when working with seized fasteners, heavy materials, hardened components, construction materials, or any task where considerable force will be applied.
Start With the General Condition of the Tool
Begin the inspection by looking at the entire tool rather than immediately focusing on one component.
Check for obvious cracks, bends, deep scratches, severe corrosion, missing parts, or unusual deformation. Compare the tool with another tool of the same type if you are unsure whether a particular shape is normal.
A hand tool should maintain the general geometry intended by its manufacturer. A bent wrench, distorted pliers, or damaged hammer head may no longer transfer force as intended.
Look for evidence of previous abuse as well. Deep impact marks, mushroomed striking surfaces, heavily damaged edges, and improvised modifications can indicate that the tool has previously been subjected to forces beyond its intended use.
Do not assume that cosmetic damage is harmless. Some surface marks are insignificant, while others can indicate deeper structural problems. The location and severity of the damage matter.
Inspect Handles for Cracks and Looseness
Handles deserve particular attention because they are the part of the tool that the user normally holds while applying force.
For plastic or composite handles, look for cracks, splitting, deformation, and areas that appear unusually soft or damaged. A crack around the point where the handle connects to the working portion can be particularly important.
Wooden handles should be checked for splits, loose areas, severe dents, and signs of deterioration. Pay special attention to handles that are used for repeated striking.
If the handle moves independently from the metal portion of the tool when it should not, stop and investigate the cause. A loose handle can become increasingly unstable as force is applied.
Do not wrap a damaged handle with tape and assume that the problem has been repaired. Temporary coverings may hide damage without restoring the structural integrity of the tool.
When a handle is replaceable, use an appropriate replacement designed for that tool rather than improvising a repair.
Examine Working Edges and Contact Surfaces
The working portion of a hand tool is where force is transferred to the material or fastener, so its condition directly affects performance.
For a wrench, inspect the jaws or contact surfaces for excessive rounding or deformation. For pliers, check whether the jaws meet correctly and whether their surfaces are excessively worn.
For screwdrivers, inspect the tip for rounding, twisting, or damage. A worn tip may not fit securely into the fastener.
For chisels, inspect the cutting edge for chips, cracks, and excessive deformation.
For hammers, inspect the striking face for severe damage or deformation.
The important question is whether the working surface still has the shape necessary to perform its intended function. A small scratch may have little significance, while a distorted contact surface can create a serious performance problem.
Check for Cracks Around High-Stress Areas
Some areas of a hand tool experience greater stress than others. These include joints, necks, corners, handles, drive connections, and transitions between different sections of the tool.
Inspect these areas carefully under good lighting.
Look for fine cracks, unusual lines, deep corrosion, or areas where the metal appears distorted. Surface discoloration can sometimes make a crack harder to see, so clean the tool if necessary before inspection.
Do not attempt to determine the safety of a structurally damaged tool simply by applying additional force to it. Testing a questionable tool under load can create the exact failure you are trying to prevent.
If a significant crack is visible in a load-bearing component, remove the tool from service until it has been properly evaluated or replaced.
Look for Corrosion
Rust is common on steel hand tools, especially those stored in garages, sheds, workshops, and other humid environments.
Not all rust means that a tool must be discarded. Light surface corrosion can often be removed without significantly affecting the tool.
However, deep corrosion deserves more attention. Pitting can remove material from the surface and may affect dimensions, threads, edges, or structural areas.
Inspect areas around joints and moving mechanisms particularly carefully because corrosion can interfere with movement.
If a heavily corroded component is going to be subjected to substantial force, do not assume that removing the visible rust automatically restores the original strength.
The condition of the metal underneath the corrosion is what matters.
Check Moving Components
Pliers, adjustable wrenches, ratchets, clamps, folding tools, and other hand tools contain moving components that should operate predictably.
Move the mechanism through its normal range without applying excessive force.
Look for binding, excessive looseness, grinding, unexpected movement, or inconsistent operation.
A mechanism that suddenly feels different from normal deserves attention. Changes in movement can indicate contamination, corrosion, wear, or damage.
For tools with locking mechanisms, verify that the locking function engages correctly. A mechanism that appears to lock but releases unexpectedly should not be trusted for demanding work.
Do not compensate for a stiff or damaged mechanism by forcing it. Excessive force can make an existing problem worse.
Inspect Threads and Fasteners
Tools that contain threaded components should be checked for damaged or contaminated threads.
A clamp, adjustable tool, or threaded mechanism should move smoothly without excessive resistance.
Look for flattened, damaged, or heavily corroded thread sections. Contamination can also interfere with normal movement.
If a tool contains screws, rivets, or other fastening components, check whether they remain secure and correctly positioned.
A loose pivot on pliers, for example, can affect alignment and increase the chance of unexpected movement.
Do not automatically tighten every visible fastener as much as possible. Some components require a specific level of adjustment, and excessive tightening can interfere with movement or damage the assembly.
Examine Striking Tools Carefully
Hammers, mallets, chisels, and similar tools require a particularly careful inspection before heavy use.
Look at the striking face of a hammer for severe deformation or mushrooming. A damaged striking surface can behave unpredictably during repeated impacts.
Inspect the handle where it enters the head. The connection should be secure, and there should be no obvious cracking or movement that should not be present.
For a chisel designed to be struck, inspect the striking end as well as the blade. Repeated impacts can deform the striking area over time.
If a striking tool has developed significant structural damage, do not continue using it simply because it still produces results during light work.
Check Wrenches Before Applying High Torque
Wrenches are frequently subjected to high forces, especially when removing seized or over-tightened fasteners.
Before applying substantial torque, check that the wrench is the correct size and type for the fastener.
Inspect the jaws or contact surfaces for rounding, spreading, cracks, or deformation.
A wrench should fit the fastener securely. If there is noticeable play, verify that the correct size is being used and that the fastener itself is not damaged.
Avoid using damaged or visibly worn wrenches for high-torque applications.
If a fastener requires extreme force, consider whether a tool designed specifically for high-torque work would be more appropriate than simply applying more force to a standard hand wrench.
Inspect Pliers Before Heavy Use
Pliers should have properly aligned jaws and a secure pivot.
Open and close the handles several times. The movement should be controlled and consistent.
Check whether the jaws meet correctly when closed. Significant misalignment can reduce grip and cause the tool to slip.
Look for cracks around the pivot and handle area. Also inspect the cutting edges of combination or cutting pliers for chips or excessive damage.
Do not use ordinary pliers as a substitute for a wrench when turning fasteners. The jaws can damage the fastener and may not provide the same secure contact.
Selecting the correct tool is part of the inspection process because suitability is just as important as physical condition.
Inspect Screwdrivers Before Heavy Work
A screwdriver should match the fastener’s drive type and size.
Before applying significant force, inspect the tip for rounding, twisting, chips, or other deformation.
A damaged tip can slip from the fastener, particularly when substantial torque is applied.
Check the shaft for bending or severe corrosion. A bent shaft can indicate previous misuse or excessive force.
Inspect the handle for cracks or looseness, particularly where the shaft enters the handle.
Do not use a screwdriver as a pry bar or chisel unless it is specifically designed for that purpose. Misusing the tool can create damage that may not be immediately visible.
Inspect Sockets and Ratchets
Socket sets also require inspection before demanding work.
Check that the socket is the correct size and fits the fastener completely. Inspect the socket for cracks, severe corrosion, deformation, or excessive wear.
For the ratchet, check the direction mechanism and square drive. The socket should attach securely.
Operate the ratchet without load and listen for unusual sounds or irregular movement.
If the ratchet slips unexpectedly, remove it from service until the cause has been identified.
Never assume that a ratchet is suitable for unlimited torque simply because it has a long handle. When extremely high torque is required, use a tool specifically intended for that application.
Check for Previous Improvised Repairs
A hand tool that has been modified or repaired incorrectly deserves additional scrutiny.
Examples include welded handles, drilled components, ground-down working surfaces, improvised extensions, or components held together with unsuitable materials.
Some repairs can be performed correctly using manufacturer-approved replacement parts, but improvised modifications can change the way forces move through the tool.
Before using a modified tool for heavy work, determine whether the modification was appropriate and whether the tool remains structurally sound.
If you cannot establish that a critical repair was performed correctly, replacing the tool may be the safer option.
Make Sure the Tool Matches the Job
A physically perfect tool can still be dangerous if it is inappropriate for the task.
Before heavy work, consider the material, required force, fastener type, working environment, and intended application.
Use impact-rated sockets with impact tools where required. Use appropriate chisels for the material being worked. Use tools designed for striking when striking is necessary.
Do not extend a standard tool’s handle with a pipe simply because more leverage is needed. Increased leverage can exceed the tool’s design limits.
Choosing the correct tool reduces stress and is one of the most effective ways to prevent premature tool damage.
Keep the Work Area Part of the Inspection
Tool safety is not limited to the tool itself.
Before applying heavy force, make sure the workpiece is stable and properly supported. A secure workpiece allows the tool to remain aligned and reduces unexpected movement.
Check that there is sufficient room for the handle to move without striking nearby objects.
Keep your hands positioned where they will not be exposed to unnecessary movement if the tool slips.
Remove oil, grease, and other contamination from handles and gripping surfaces when appropriate. A slippery handle can reduce control.
A well-maintained tool cannot compensate for an unstable workpiece or poorly arranged workspace.
What to Do When a Tool Fails Inspection
If a hand tool shows significant damage, do not automatically try to finish one last job with it.
Separate questionable tools from those that are ready for use. This prevents a damaged tool from accidentally being selected later.
If the tool has replaceable components, determine whether an appropriate replacement is available.
For minor maintenance issues such as dirt, light surface corrosion, or inadequate lubrication, clean and service the tool before returning it to use.
For cracks, severe deformation, structural corrosion, or other serious damage, replacement is generally more appropriate than continued use.
The important principle is to make the decision before the tool is placed under heavy load.
A Practical Pre-Use Inspection Checklist
A simple checklist can make inspections consistent.
Start by checking the overall condition of the tool.
Inspect handles for cracks, looseness, and damage.
Examine working surfaces for excessive wear or deformation.
Look for corrosion, particularly around joints, threads, and load-bearing areas.
Operate moving mechanisms without excessive force.
Check screws, pivots, and other fastening components.
For striking tools, inspect both the striking end and handle connection.
Confirm that the tool is the correct type and size for the task.
Make sure the workpiece and surrounding area are stable.
If anything appears questionable, stop and investigate before applying heavy force.
This process can usually be completed in a short time, especially once it becomes a normal workshop habit.
Common Inspection Mistakes
One common mistake is inspecting only the part of the tool that directly touches the workpiece. Handles, pivots, joints, and structural transitions can be equally important.
Another mistake is relying on appearance alone. A clean tool can still have internal wear or structural damage.
Some users also test questionable tools by deliberately applying more force to see whether they fail. This is not a reliable inspection method and can turn a suspected problem into an actual failure.
Ignoring small changes in how a tool feels is another common mistake. Increased looseness, unusual resistance, grinding, or slipping can indicate developing problems.
Finally, users sometimes continue using a tool because replacing it is inconvenient. A damaged hand tool is not worth risking an injury or damaging an expensive workpiece.
How Regular Maintenance Makes Inspections Easier
A clean, organized tool collection is easier to inspect than one covered in dirt and corrosion.
Regular cleaning makes new damage easier to identify. Organized storage prevents tools from being damaged by repeated contact with one another. Lubrication keeps moving components operating normally and makes changes in movement more noticeable.
When maintenance is performed consistently, the user develops a baseline for how each tool normally looks and feels.
That familiarity is valuable. A mechanic, woodworker, contractor, or homeowner who regularly uses the same tools will often notice a change in operation before obvious damage becomes visible.
Maintenance and inspection therefore work together rather than being separate activities.
Final Thoughts
Inspecting a hand tool before heavy work does not need to be complicated. The most important step is to slow down long enough to examine the tool before significant force is applied.
Look for cracks, deformation, corrosion, loose components, damaged handles, worn working surfaces, and unusual movement. Make sure the tool is appropriate for the task and that the workpiece is stable.
Minor problems can often be corrected through cleaning, lubrication, sharpening, or replacement of an appropriate component. Serious structural damage should not be ignored or hidden with temporary repairs.
A hand tool is designed to transfer force in a controlled way. When its structure or working surfaces become compromised, that control can be reduced. Regular inspection helps preserve the tool’s performance while giving the user an opportunity to identify problems before they become more serious.
Making a pre-use inspection part of the normal routine is one of the simplest ways to extend the useful life of hand tools. It also encourages better workshop habits: using the correct tool, applying appropriate force, maintaining equipment regularly, and replacing tools when they can no longer be relied upon. For demanding work, those habits are just as important as the quality of the tools themselves.
