
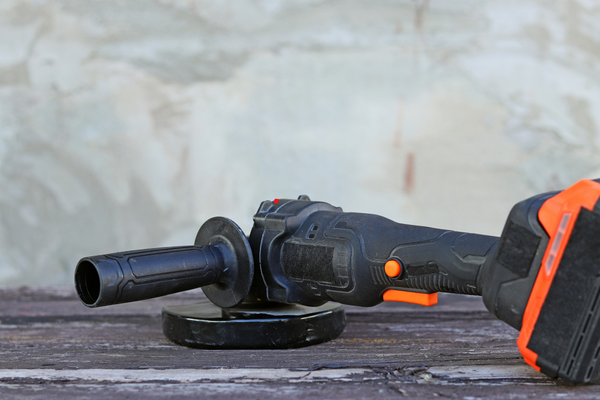
A cordless angle grinder is one of the most versatile power tools in a workshop. It can be used for tasks such as cutting, grinding, deburring, surface preparation, and other applications when equipped with the correct accessory.
Its versatility also means that the tool can be exposed to some of the most demanding workshop conditions.
Grinding and cutting can produce fine dust, sparks, metal particles, heat, vibration, and significant debris. Over time, these conditions can affect the grinder, its accessories, ventilation openings, battery interface, guards, and storage equipment.
Routine maintenance is therefore particularly important.
However, maintaining an angle grinder does not mean dismantling the machine after every project. For most users, the most valuable maintenance consists of inspecting the tool before and after use, keeping ventilation openings reasonably clear, cleaning dust from the exterior, checking the guard and accessory, protecting the battery, and storing the equipment correctly.
The accessories deserve just as much attention as the grinder itself. A damaged disc can create vibration and excessive loading, while an incorrect accessory can be unsuitable for the intended operation.
This guide explains how to inspect and maintain a cordless angle grinder without unnecessarily opening the housing or performing repairs that require specialized service.
Why an Angle Grinder Needs Careful Maintenance
An angle grinder operates under demanding conditions.
Depending on the application, it may be exposed to:
- Metal dust
- Abrasive particles
- Sparks
- Heat
- Vibration
- Cutting debris
- Grinding residue
- Moisture
- Repeated high loads
The combination is harder on equipment than ordinary household drilling or fastening.
Fine abrasive particles can settle around ventilation openings.
Metal debris can collect around the accessory area.
A damaged disc can create abnormal vibration.
Repeated overload can create excessive heat.
A humid storage environment can contribute to corrosion.
These factors make inspection an important part of normal grinder ownership.
Remove the Battery Before Maintenance
Before cleaning, inspecting, or changing accessories, remove the battery according to the manufacturer’s procedure.
This is one of the most important habits to develop.
An angle grinder is capable of rapid rotation and should never be treated as harmless simply because the trigger is not currently being pressed.
Removing the battery:
- Prevents unintended startup
- Makes accessory inspection easier
- Allows battery-compartment cleaning
- Separates the power source during maintenance
Follow the manufacturer’s instructions for removing and installing the battery.
Allow the Grinder to Cool
A grinder can become hot during cutting and grinding.
The housing, spindle area, accessory, and internal components may all retain heat after operation.
Allow the tool to cool appropriately before performing maintenance.
Do not cool the grinder rapidly with water.
Do not place a very hot tool immediately into a tightly closed case if doing so could trap excessive heat.
Follow the manufacturer’s recommendations for cooling and storage.
Inspect the Grinder Before Every Important Job
A quick inspection before use can reveal problems that are easier to address before the grinder is operating.
Look at:
- Housing
- Battery compartment
- Ventilation openings
- Trigger
- Safety controls
- Guard
- Spindle area
- Accessory
- Flanges or mounting components
Check for:
- Cracks
- Missing parts
- Deformation
- Heavy contamination
- Corrosion
- Unusual looseness
- Signs of overheating
Do not skip this inspection simply because the grinder worked normally during the previous project.
A tool can be damaged during storage or transport.
Inspect the Housing
The housing protects internal components.
Look for:
- Cracks
- Deep impact marks
- Melted plastic
- Discoloration
- Loose sections
- Damaged ventilation openings
A small cosmetic scratch is usually not significant.
A structural crack near the motor, battery connection, switch, or accessory area may be more important.
Do not attempt to repair a major housing defect with tape, glue, or other improvised methods unless the manufacturer specifically supports the repair.
Keep Ventilation Openings Clear
Angle grinders generate heat, and their housings commonly include ventilation openings.
After grinding or cutting, inspect these areas for dust accumulation.
Remove loose material using an appropriate brush, vacuum, or manufacturer-approved cleaning method.
Avoid forcing abrasive dust deeper into the tool.
High-pressure compressed air can sometimes move contamination from the outside into the housing.
The objective is to remove accessible contamination while preserving the equipment.
Why Grinding Dust Deserves Special Attention
Grinding dust is not ordinary household dirt.
It can be extremely fine and may contain material from the workpiece and abrasive accessory.
It can spread over a large area.
When the grinder is used repeatedly, dust can accumulate around the ventilation openings and other accessible areas.
Use appropriate dust and personal-protection practices for the work environment.
From a maintenance perspective, clean the tool before the particles become heavily compacted.
Do Not Blow Grinding Dust Toward Yourself
Cleaning an angle grinder can create airborne particles.
Avoid positioning yourself directly in the path of expelled dust.
Use appropriate respiratory and eye protection for the materials involved and the cleaning procedure.
The safest cleaning strategy is generally one that collects particles instead of simply redistributing them.
A suitable vacuum can be particularly useful for loose surface contamination.
Check the Guard Before Use
The guard is an important component of an angle grinder.
Its purpose and design depend on the specific tool and accessory.
Inspect the guard for:
- Cracks
- Deformation
- Loose attachment
- Heavy contamination
- Incorrect positioning
- Other damage
Follow the manufacturer’s instructions for guard adjustment and installation.
Do not remove or bypass the guard simply because it seems inconvenient for a particular job.
The accessory and guard combination must be appropriate for the operation.
Never Operate With a Damaged Guard
If the guard is cracked, severely deformed, loose, or otherwise compromised, do not simply continue using the grinder because the disc still spins.
The guard is part of the tool’s protective system.
A damaged protective component deserves attention before operation.
Follow the manufacturer’s repair or replacement procedure.
Inspect the Accessory Carefully
The disc, wheel, brush, or other accessory is one of the most important parts to inspect.
Different accessories have different requirements.
Check for:
- Cracks
- Chips
- Excessive wear
- Deformation
- Missing sections
- Damage around mounting areas
Do not use an accessory simply because it physically fits the spindle.
It must be appropriate for the grinder, speed, application, and material.
Follow the accessory manufacturer’s instructions.
Never Use an Accessory Beyond Its Rated Speed
This is one of the most important principles when using an angle grinder.
Accessories are designed for specific operating limits.
Before installation, verify that the accessory is appropriate for the tool’s operating speed and intended application.
Do not assume that a larger or more heavily constructed accessory is automatically safer.
The manufacturer’s specifications should determine compatibility.
Inspect Abrasive Discs for Damage
Abrasive discs deserve particularly careful inspection.
Look for:
- Cracks
- Chips
- Deformation
- Excessive wear
- Signs of moisture damage
- Damage around the mounting area
Do not use a disc with visible damage.
Do not continue using an accessory simply because the damaged area appears small.
A compromised abrasive accessory should be treated conservatively.
Replace it according to the manufacturer’s and accessory supplier’s recommendations.
Store Abrasive Accessories Correctly
Abrasive accessories should be protected from unnecessary:
- Moisture
- Heat
- Impacts
- Contamination
- Deformation
Store them according to the accessory manufacturer’s instructions.
Do not throw discs loosely into a tool drawer where heavy objects can strike or bend them.
Keep accessories organized and clearly separated.
Check Wire Wheels and Brushes
Wire wheels and brushes require different inspection considerations.
Look for:
- Bent wires
- Missing sections
- Deformation
- Excessive wear
- Damage around the mounting area
Follow the accessory manufacturer’s instructions for use.
Do not assume that a worn brush is safe to continue using indefinitely.
As with abrasive discs, accessory condition matters.
Check Cutting Accessories
Cutting accessories should be inspected before use.
Look for visible damage and excessive wear.
Use only accessories intended for the material and type of operation.
Do not modify an accessory simply to make it fit.
The correct combination of grinder, accessory, guard, and material is part of maintaining the tool correctly.
Inspect the Spindle Area
With the battery removed, inspect the accessible spindle and mounting area.
Look for:
- Dust
- Metal particles
- Corrosion
- Damaged threads
- Contamination
- Unusual wear
Follow the manufacturer’s procedure when installing or removing accessories.
Do not use improvised tools or excessive force on mounting components.
The spindle and mounting system need to remain in good condition for the accessory to operate properly.
Check Mounting Hardware
Flanges, nuts, washers, and other mounting components should match the grinder’s design and accessory.
Inspect them for:
- Damage
- Excessive wear
- Deformation
- Corrosion
- Contamination
Do not substitute random hardware.
The correct mounting arrangement is important to the accessory’s secure installation.
Follow the manufacturer’s procedure.
Do Not Over-Tighten the Accessory
More tightening does not automatically mean better retention.
Over-tightening can make removal difficult and may damage components depending on the design.
Use the manufacturer’s specified installation procedure.
The accessory needs to be secure without inappropriate force.
Inspect the Trigger and Safety Controls
The trigger or switch should operate predictably.
Check for:
- Sticking
- Excessive resistance
- Physical damage
- Inconsistent operation
If the grinder includes a lock or safety control, check that it operates as intended.
Do not bypass a malfunctioning safety system.
A switch that behaves differently from normal use deserves attention before the tool is returned to service.
Clean the Trigger Area Carefully
Dust can accumulate around controls.
Use a soft brush or controlled vacuuming method to remove loose debris.
Avoid spraying liquid cleaner directly into the trigger or switch.
Do not insert sharp objects into gaps.
The goal is to remove visible contamination without forcing dust or liquid deeper into the housing.
Check the Battery Interface
Remove the battery and inspect the compartment.
Look for:
- Dust
- Metal particles
- Moisture
- Corrosion
- Bent contacts
- Foreign objects
Use gentle dry cleaning for loose contamination.
Do not apply random oil or cleaning chemicals to electrical contacts.
If contacts are burned, severely corroded, or damaged, follow the manufacturer’s service guidance.
Inspect the Battery Separately
The battery needs its own inspection.
Look for:
- Cracks
- Swelling
- Deformation
- Leakage
- Burn marks
- Damaged terminals
Do not use or charge a visibly damaged battery simply to test whether it still works.
Follow the battery manufacturer’s safety instructions.
Protect Batteries From Grinding Dust
Grinding work produces fine particles that can contaminate nearby equipment.
Do not leave batteries sitting directly beside the active grinding area.
Store them in an appropriate clean location.
After the job, inspect the battery before returning it to normal storage.
Keeping the battery away from the dust source is easier than cleaning contamination afterward.
Clean the Exterior Housing
After removing loose dust, wipe the exterior with an appropriate cloth.
A mildly damp cloth may be suitable for some surfaces when permitted by the manufacturer.
Do not soak the grinder.
Do not spray cleaner directly into vents or switches.
Allow the tool to dry completely before storage.
Avoid Strong Solvents
The grinder housing can combine:
- Plastic
- Rubber
- Metal
- Coatings
- Labels
A strong solvent can damage some of these materials.
Use a cleaning product only when it is compatible with the tool’s materials.
For ordinary grinding dust, dry cleaning is often the better first step.
Look for Signs of Overheating
A grinder naturally becomes warm during demanding work.
Excessive or unusual heat is different.
Inspect the housing for:
- Discoloration
- Melting
- Burn marks
During operation, watch for:
- Burning smell
- Smoke
- Sudden loss of power
- Repeated thermal shutdown
If these symptoms appear, stop using the tool and follow the manufacturer’s troubleshooting or service instructions.
Do not continue operating the grinder simply because it still starts.
Listen for Unusual Noise
The grinder should have a familiar operating sound.
Changes may include:
- Grinding
- Rattling
- Squealing
- Clicking
- High-pitched mechanical noise
Abnormal sound can have several causes.
It may originate from the accessory or from the machine itself.
Remove and inspect the accessory when safe and appropriate.
If the abnormal sound continues, professional service may be necessary.
Watch for Excessive Vibration
Some vibration is normal for a grinder.
A sudden or substantial change is not something to ignore.
Possible causes include:
- Damaged accessory
- Improper installation
- Worn mounting components
- Mechanical problems
- Physical damage
Stop the tool and inspect it.
Do not attempt to compensate for abnormal vibration through a tighter grip or greater pressure.
Do Not Press Excessively During Grinding
Applying excessive pressure can increase load and heat.
A grinder should be operated using the technique appropriate for the specific accessory and material.
If the tool begins slowing significantly, investigate:
- Accessory condition
- Material
- Operating technique
- Tool capacity
Do not simply force the grinder harder into the workpiece.
Use the Correct Accessory for the Material
An accessory intended for one type of operation may not be suitable for another.
Before starting a project, verify:
- Material compatibility
- Accessory type
- Accessory size
- Rated speed
- Tool compatibility
This reduces unnecessary loading and protects the grinder.
Avoid Using a Grinder for Unintended Tasks
A cordless angle grinder is versatile, but it is not a universal workshop machine.
Do not use it as a substitute for unrelated tools simply because an accessory can be attached.
Follow the grinder and accessory manufacturer’s specified applications.
Using the equipment outside its intended purpose increases wear and can create avoidable hazards.
Keep Sparks Away From Sensitive Equipment
Grinding can produce sparks and hot particles.
During use, keep batteries, chargers, plastic containers, fabrics, and other sensitive materials away from the spark path when practical.
Do not place the grinder immediately beside materials that can be damaged by heat or sparks.
This is both good workshop practice and good equipment protection.
Clean the Storage Case
After grinding, the case can contain substantial amounts of dust.
Before storing the tool, clean:
- Corners
- Accessory compartments
- Foam inserts
- Tool recesses
- Lid surfaces
A clean tool stored in a dirty case can become contaminated again quickly.
Make sure the case is completely dry before closing it.
Keep Abrasive Dust Out of the Case
Do not place a grinder covered in fresh grinding dust directly into its storage case.
First remove loose contamination.
If the case contains removable inserts, clean them appropriately.
This is particularly useful when the grinder will remain stored for several weeks.
Store the Grinder in a Dry Environment
Humidity can affect exposed metal components and electrical contacts.
Keep the grinder away from:
- Damp floors
- Leaking pipes
- Standing water
- Wet cleaning materials
- Direct weather exposure
A suitable cabinet or closed case can provide additional environmental protection.
The tool should be completely dry before enclosed storage.
Avoid Storing the Grinder Immediately After Wet Cleaning
If you use a damp cloth to clean the tool, allow it to dry completely.
Do not close it inside a case while moisture remains around:
- Battery compartment
- Vents
- Housing seams
- Spindle area
Trapped moisture can create corrosion and storage problems.
Use Desiccants in Small Enclosed Storage
A suitable desiccant can provide supplemental moisture control inside an enclosed tool case.
It is not a replacement for storing the grinder in a dry environment.
Use desiccants according to their manufacturer’s instructions.
Do not store a wet tool inside a case and expect silica gel to solve the underlying problem.
Inspect the Grinder After Long Storage
Before using a grinder that has been stored for an extended period, perform a full visual inspection.
Check:
- Housing
- Guard
- Accessory
- Battery
- Contacts
- Vents
- Mounting components
- Storage case
Look for corrosion, dust, moisture, and damage.
Then test the tool according to the manufacturer’s recommended procedure.
Do Not Immediately Start With a Demanding Operation
After long storage, do not make the first use an extremely demanding cutting or grinding job.
Perform the normal preliminary inspection.
Install the appropriate accessory.
Test the tool under suitable conditions.
Listen for unusual noise.
Watch for abnormal vibration or heat.
If the machine behaves normally, proceed with the intended work.
When the Grinder Needs Service
Routine cleaning cannot fix every problem.
Consider qualified service when the tool develops:
- Persistent overheating
- Burning smell
- Smoke
- Electrical abnormalities
- Severe vibration
- Abnormal mechanical noise
- Major power loss
- Trigger failure
- Chuck or spindle problems
Do not continue using equipment that is showing serious warning signs.
Do Not Open the Housing Without an Appropriate Procedure
Internal maintenance can involve:
- Motor components
- Electronics
- Bearings
- Gears
- Wiring
- Switches
Do not open the grinder simply because dust appears to have entered the housing.
If internal service is required, follow the manufacturer’s procedure or seek qualified assistance.
When the Grinder Should Be Replaced
Replacement may make sense when:
- The housing is severely damaged
- The motor or gearbox has failed
- Repair costs approach replacement cost
- Parts are unavailable
- The tool platform is obsolete
- Reliable operation cannot be restored
The decision should consider the grinder’s quality, age, availability of parts, and intended future use.
A Five-Minute Post-Project Routine
After a normal grinding project:
1. Stop the tool and remove the battery.
2. Allow the grinder to cool appropriately.
3. Remove loose grinding dust.
4. Inspect the guard.
5. Inspect the accessory.
6. Clean the ventilation openings.
7. Inspect the battery compartment.
8. Check the housing for damage.
9. Clean the storage case.
10. Store the tool and battery appropriately.
This routine is simple enough to become a habit.
A Deeper Maintenance Routine
For heavily used grinders, periodically perform a more complete inspection.
Clean the housing thoroughly.
Inspect the vents.
Check the guard.
Inspect mounting hardware.
Inspect the spindle area.
Check common accessories.
Examine the battery.
Inspect the case.
Look for rust and corrosion.
Review whether heat, vibration, noise, or performance have changed.
A deeper inspection helps identify gradual deterioration.
Common Maintenance Mistakes
Using damaged discs
A compromised accessory should be replaced.
Installing an accessory without checking its rating
Physical fit is not enough.
Removing or bypassing the guard
The protective system should remain functional.
Applying excessive grinding pressure
This can increase load and heat.
Blowing dust deep into the housing
Aggressive airflow can make internal contamination worse.
Spraying cleaner into vents
Liquid can reach internal components.
Leaving batteries near grinding sparks
Keep sensitive equipment away from the work area.
Storing the tool covered in grinding dust
Contamination remains trapped inside the case.
Ignoring excessive vibration
The accessory or tool may have a problem.
Continuing after smoke or a burning smell
Stop and investigate instead.
Final Thoughts
A cordless angle grinder deserves more attention than many ordinary power tools because grinding and cutting expose it to dust, heat, sparks, vibration, and demanding workloads.
The best maintenance routine begins before the grinder is even turned on.
Inspect the housing, guard, accessory, mounting components, battery interface, and ventilation openings. Confirm that the accessory is suitable for the tool, operating speed, material, and intended task.
After use, remove the battery and allow the tool to cool appropriately. Remove loose abrasive dust using a controlled method, inspect the guard and accessory, clean the vents, and check the battery compartment.
Avoid washing the tool, spraying cleaner directly into openings, or using excessive compressed air that can force abrasive particles deeper into the housing.
Storage is equally important.
Keep the grinder dry, protect the battery, clean the storage case, and prevent abrasive dust from remaining trapped around the equipment between projects. A suitable desiccant can provide supplemental moisture control inside an enclosed case, but it cannot replace proper drying or environmental humidity management.
Pay particular attention to warning signs.
Unusual vibration, persistent overheating, burning smell, smoke, abnormal mechanical noise, electrical problems, or major performance changes are not ordinary cleaning issues.
Stop using the equipment and follow the manufacturer’s service guidance when these symptoms appear.
Most importantly, remember that the accessory is part of the maintenance system. A damaged, worn, inappropriate, or incorrectly rated disc can place unnecessary stress on the grinder and create problems that are not caused by the machine itself.
A well-maintained cordless grinder should be clean enough to inspect, equipped with the correct accessory, mechanically sound, adequately ventilated, protected from moisture, and stored safely between projects.
That routine does not require complicated servicing.
It requires consistency.
Related Guides
- How to Clean a Cordless Drill After Working in Dust
- How to Store Cordless Power Tools Between Projects
- How to Keep Dust From Building Up Inside Power Tools
- Why Power Tools Overheat and What You Should Check First
- How to Care for Power Tool Batteries During Long-Term Storage
FAQ
How often should I clean a cordless angle grinder?
Clean it after dusty grinding or cutting projects and whenever visible contamination accumulates. Frequently used grinders should also receive periodic detailed inspections.
Should I remove the battery before cleaning an angle grinder?
Yes. Remove the battery according to the manufacturer’s procedure before cleaning, inspecting, or changing accessories.
Can I wash an angle grinder with water?
Do not assume that a cordless angle grinder can be washed or rinsed. Water can reach electrical and mechanical components. Use controlled cleaning methods and follow the manufacturer’s instructions.
How do I clean grinding dust from an angle grinder?
Remove the battery first, allow the tool to cool, and use a suitable dry brush or vacuum to remove loose dust. Pay particular attention to the housing and ventilation openings without forcing debris deeper into the tool.
Can compressed air be used to clean an angle grinder?
Compressed air can be useful in some manufacturer-approved cleaning procedures, but excessive pressure may force abrasive dust deeper into the housing. Use it carefully and follow the manufacturer’s recommendations.
How do I know if a grinding disc is damaged?
Inspect it for cracks, chips, deformation, excessive wear, or other visible damage. Also verify that it is appropriate for the tool’s speed and intended application. Do not use a visibly damaged accessory.
Can I use any disc that fits my grinder?
No. An accessory must be compatible with the grinder, its operating speed, the intended operation, and the material. Physical fit alone does not establish compatibility.
Should I remove the guard when grinding?
Do not remove or bypass the guard simply for convenience. Follow the manufacturer’s instructions for the appropriate guard and accessory combination.
Why does my angle grinder vibrate more than before?
Possible causes include a damaged or improperly installed accessory, mounting problems, mechanical wear, or physical damage. Stop and inspect the tool rather than continuing to operate it with abnormal vibration.
Why does my cordless grinder get hot?
Some heat is normal during demanding grinding. Excessive or rapidly increasing heat can result from workload, accessory condition, restricted airflow, mechanical problems, or other issues. Persistent overheating deserves investigation.
Should I oil my angle grinder?
Do not oil the entire tool automatically. Follow the manufacturer’s lubrication instructions for any components that require servicing. Excess oil can attract abrasive dust.
How should I store an angle grinder between projects?
Clean the tool, remove the battery according to manufacturer instructions, make sure everything is dry, protect accessories from damage, clean the storage case, and keep the equipment away from humidity, sparks, chemicals, and extreme temperatures.
When should I stop using an angle grinder?
Stop using it when you notice smoke, burning smell, severe or unusual vibration, abnormal mechanical noise, major electrical problems, significant structural damage, or another condition that indicates the tool is not operating normally.
When should I replace an angle grinder instead of repairing it?
Consider replacement when the tool has severe structural or mechanical damage, repair parts are unavailable, repair costs are unreasonable compared with replacement, or reliable operation cannot be restored through an appropriate service procedure.
