
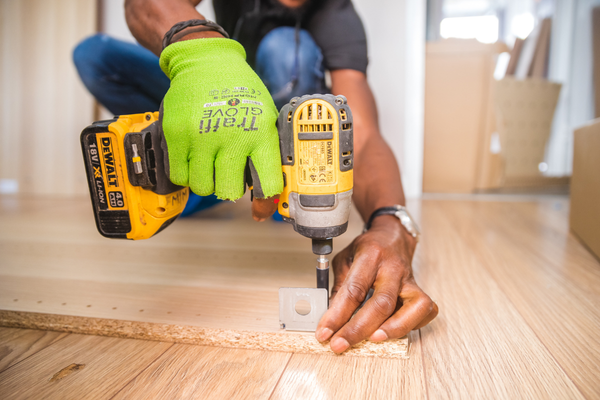
A cordless impact driver can make repetitive fastening work dramatically easier. It is compact, powerful, and particularly useful when installing long screws, structural fasteners, deck hardware, cabinetry components, and other applications suited to its design.
Because an impact driver delivers rotational force through repeated impacts, however, it experiences stresses that are different from those of an ordinary drill. The tool, bit holder, driver bits, fasteners, battery, and surrounding components all need to remain in suitable condition.
Maintenance does not have to be complicated.
For most homeowners and workshop users, the most important habits are keeping the tool clean, protecting the quick-release chuck and bits, inspecting the battery connection, using impact-rated accessories where required, avoiding excessive contamination, and storing the equipment properly between projects.
The bits themselves deserve almost as much attention as the impact driver. A worn or damaged bit can slip, damage the fastener, increase user effort, and make a healthy tool appear to be performing poorly.
This guide explains how to maintain a cordless impact driver and its bits, what problems to look for, and when cleaning is enough versus when an accessory or tool should be replaced.
Why Impact Drivers Need Different Care From Drills
A drill and an impact driver may look similar, but they perform different jobs.
An impact driver is designed to deliver rotational impacts that help it handle certain fastening tasks efficiently.
That means the tool and accessories are exposed to repeated impact forces.
During normal work, the driver can experience:
- High torque
- Repeated impacts
- Dust
- Metal particles
- Wood debris
- Vibration
- Heat
- Fastener contamination
These conditions make accessory quality and tool inspection particularly important.
The maintenance routine should therefore focus not only on cleanliness but also on the condition of the bit holder, bits, battery connection, housing, and controls.
Start by Removing the Battery
Before cleaning or inspecting a cordless impact driver, remove the battery according to the manufacturer’s procedure.
This is the first step because it prevents unintended operation and gives you access to the battery compartment.
It also allows you to inspect the electrical interface separately.
Make battery removal part of your normal maintenance routine rather than something you do only when the tool is badly contaminated.
Let the Tool Cool Before Cleaning
An impact driver can become warm during demanding work.
The motor, gearbox, and other components may retain heat after the trigger is released.
Allow the tool to cool appropriately before beginning maintenance.
Do not use water as an improvised cooling method.
Do not place a hot tool immediately into a tightly enclosed case if doing so could trap unnecessary heat.
Follow the manufacturer’s recommendations for cooling and storage.
Remove Loose Dust First
Start cleaning with the tool dry.
Use a soft brush, cloth, or suitable vacuum to remove loose material from the exterior.
Pay particular attention to:
- Ventilation openings
- Quick-release bit holder
- Trigger
- Battery compartment
- Housing seams
- Grip
- Metal surfaces
Removing loose particles before using a damp cloth makes the rest of the cleaning process easier.
It also reduces the chance of turning dust into a sticky paste.
Clean the Quick-Release Bit Holder
The bit holder is one of the most important areas of an impact driver.
Dust, wood debris, and metal particles can accumulate around the release collar and inside accessible areas of the holder.
Remove visible loose contamination carefully.
Operate the mechanism normally if needed to expose accessible surfaces.
Do not force it.
The bit holder should accept compatible accessories smoothly and retain them securely.
If the release collar becomes difficult to move, first investigate contamination before applying excessive force.
Do Not Flood the Bit Holder With Cleaner
The temptation to spray cleaner directly into a mechanical opening should be avoided.
Liquid can travel deeper into the mechanism.
Instead, when a compatible cleaning product is necessary, use a controlled application according to the product’s instructions.
A cloth or suitable brush often provides better control for ordinary dirt.
If the bit holder remains mechanically abnormal after cleaning, follow the manufacturer’s service guidance rather than continuing to add chemicals.
Inspect the Bit Holder for Wear
A quick-release holder can wear over time.
Check for:
- Excessive looseness
- Difficulty retaining bits
- Damaged locking components
- Unusual play
- Corrosion
- Cracks
- Inconsistent release
The bit holder should securely retain compatible accessories during normal use.
If a bit repeatedly falls out or sits unusually loosely, do not continue relying on friction alone.
The accessory holder may require service.
Use the Correct Bits
One of the most important maintenance habits is choosing the right accessory.
Impact drivers should generally be paired with accessories designed to tolerate the forces involved.
Do not assume that every ordinary screwdriver bit is suitable simply because it fits physically.
Using inappropriate accessories can increase the likelihood of:
- Bit breakage
- Tip damage
- Fastener damage
- Poor engagement
- Unexpected failure
Use impact-rated accessories when required by the tool or application.
Follow the accessory manufacturer’s recommendations.
Why Impact-Rated Bits Matter
Impact-rated bits are designed for applications involving the type of loading associated with impact drivers.
They are not simply ordinary bits with different colors or coatings.
The material and design can differ.
Using a conventional bit in a high-impact application can increase the risk of premature failure.
When selecting bits, consider:
- Drive type
- Size
- Length
- Material
- Application
- Impact compatibility
A correct accessory is part of maintaining the tool.
Inspect Bits Before Every Important Project
Bits are inexpensive compared with the cost of damaged fasteners and wasted time.
Inspect them regularly.
Look for:
- Rounded tips
- Chipped edges
- Cracks
- Twisting
- Severe wear
- Corrosion
- Deformation
A worn bit may still appear to fit the fastener.
But the engagement may be poor.
That can cause slipping and increase stress on the fastener and tool.
If the tip is visibly compromised, replace the bit.
Do Not Keep Using a Bit That No Longer Fits Correctly
A bit should engage the fastener cleanly.
If it rocks, slips, or repeatedly cams out, stop and determine why.
Possible causes include:
- Wrong bit type
- Wrong size
- Damaged fastener
- Worn bit
- Poor alignment
- Excessive force
Do not simply press harder.
Impact drivers can deliver considerable torque, so poor engagement can damage the fastener rapidly.
Using the correct bit is one of the easiest ways to reduce wear.
Keep Bits Clean
Bits can accumulate:
- Dust
- Grease
- Metal particles
- Paint
- Adhesive
- Rust
Clean them before storage.
For ordinary contamination, wiping with a cloth may be sufficient.
For heavier residue, use a cleaning method appropriate for the bit material and finish.
Avoid aggressive abrasives that can alter the tip geometry.
A clean bit is easier to inspect and less likely to carry contamination into the impact driver’s holder.
Remove Metal Debris Carefully
Metalworking can leave sharp chips on a driver bit.
Do not wipe these particles away with your bare hands.
Use an appropriate brush, cloth, or controlled collection method.
Inspect the bit afterward for actual damage.
A particle embedded in a bit is a contamination problem.
A chipped or cracked bit is a replacement problem.
Do not confuse the two.
Woodworking Creates Different Contamination
Wood dust can accumulate around the bit holder and trigger area.
Resin from certain woods can make contamination sticky.
After extended woodworking, clean the driver before returning it to storage.
Use appropriate dust-control methods during the project.
Reducing airborne dust at the source also reduces the amount that reaches the tool.
Construction Work Can Be Harder on the Tool
Impact drivers used around construction sites may encounter:
- Drywall dust
- Sawdust
- Masonry particles
- Concrete dust
- Dirt
- Adhesive residue
These environments can create substantially more contamination than occasional household use.
After particularly dusty work, inspect the ventilation openings and bit holder.
Clean the storage case as well.
A clean driver placed into a case full of construction dust will quickly become dirty again.
Keep the Ventilation Openings Clear
Impact drivers generate heat during operation.
The tool’s housing may contain ventilation openings that support cooling.
Inspect the accessible areas around these openings.
Remove loose dust using a soft brush or suitable vacuum.
Avoid forcing contamination deeper into the housing.
High-pressure air can be useful in some manufacturer-approved cleaning procedures, but excessive pressure can move dust into the tool rather than removing it.
Do Not Insert Objects Into the Vents
Avoid using screwdrivers, picks, wires, or other sharp objects to clean ventilation openings.
These can damage internal components or electrical insulation.
Use external cleaning methods.
If the vents appear severely blocked internally, consult the manufacturer’s service information.
Clean the Trigger Area
The trigger is exposed to the user’s hand and surrounding debris.
Inspect it for:
- Dust
- Sticky residue
- Physical damage
- Unusual resistance
Use a soft brush or cloth.
Avoid spraying liquid directly around the trigger.
The trigger should operate consistently.
If it becomes intermittent or behaves differently from normal, stop and investigate the tool rather than assuming it only needs more lubricant.
Keep the Grip Clean
Impact drivers often have textured or rubberized grip surfaces.
These can collect:
- Oil
- Dust
- Dirt
- Hand residue
A mildly damp cloth may be suitable for some materials if permitted by the manufacturer.
Do not assume that solvents safe for metal are safe for rubberized surfaces.
A strong chemical can change the grip’s texture or cause deterioration.
The handle should remain comfortable and secure to hold.
Inspect the Housing
Look for:
- Cracks
- Deep scratches
- Broken vents
- Deformation
- Loose components
- Signs of impact damage
A minor cosmetic scratch is usually not a reason to replace a tool.
A crack near the battery interface, trigger, or structural housing is more important.
If a major housing component is damaged, follow the manufacturer’s service guidance.
Check the Battery Interface
Remove the battery and inspect the compartment.
Look for:
- Dust
- Moisture
- Corrosion
- Foreign objects
- Damaged contacts
Use gentle dry cleaning for loose particles.
Do not apply oil or random chemicals to electrical contacts.
If contacts are bent, burned, or severely corroded, consult the manufacturer’s service instructions.
Inspect the Battery Separately
The impact driver and battery should be treated as two components.
Check the battery for:
- Cracks
- Swelling
- Deformation
- Leakage
- Burn marks
- Damaged terminals
Do not install or charge a visibly damaged battery simply to test whether it works.
Follow the manufacturer’s safety guidance.
Avoid Storing the Driver With the Battery Installed When Long-Term Storage Instructions Say Otherwise
Different manufacturers provide different recommendations.
For short intervals between projects, your normal operating procedure may be sufficient.
For long-term storage, follow the tool and battery manufacturer’s instructions regarding battery removal.
Do not assume that one storage procedure applies to every cordless platform.
Do Not Leave the Battery in a Hot Truck
A common situation for contractors and DIY users is leaving tools in a vehicle between projects.
Vehicles can reach temperatures significantly outside normal indoor conditions.
Batteries are particularly sensitive to environmental extremes.
When practical, store battery packs according to the manufacturer’s temperature recommendations rather than leaving them in a hot vehicle for long periods.
Keep the Impact Driver Dry
Water is an avoidable problem.
Do not store the impact driver:
- In a damp toolbox
- On a wet garage floor
- Beside leaking pipes
- Under a roof leak
- With wet cleaning materials
If the tool becomes wet, follow the manufacturer’s guidance before returning it to service.
Do not power up a tool simply to check whether it still works after water exposure.
Protect the Tool From Humidity
If your workshop or garage is humid, pay attention to exposed metal components.
Possible corrosion points include:
- Bit holder
- Fasteners
- Drive components
- Metal housing areas
- Battery contacts
Keep storage dry.
Use suitable environmental moisture control when necessary.
For smaller enclosed cases, appropriate desiccants can provide supplemental protection.
Do not treat them as a replacement for a dry environment.
Lubrication: What Should You Actually Lubricate?
Impact drivers contain mechanical components that may require specific lubrication during servicing.
That does not mean the user should inject oil into every opening.
Do not add lubricant randomly.
If the manufacturer provides a lubrication procedure, follow it.
For routine user maintenance, focus on:
- Cleaning
- Inspection
- Correct accessory selection
- Proper storage
Internal gearbox maintenance may require a service procedure rather than general-purpose oil.
Do Not Spray Oil Into the Bit Holder Without Instructions
The bit holder is mechanical, but adding random lubricant can attract dust and may not be appropriate for its design.
If the mechanism becomes stiff, clean it first.
Then follow the manufacturer’s recommendation.
If lubrication is specifically required, use the correct product and amount.
Do not assume that more lubricant creates better performance.
Watch for Excessive Heat
Impact drivers can become warm during use, especially when fastening continuously.
Normal operating warmth is not necessarily a problem.
Pay attention when heat is accompanied by:
- Burning smell
- Unusual noise
- Smoke
- Sudden power loss
- Repeated thermal shutdown
Stop using the tool if significant warning signs appear.
Do not attempt to cool it with water.
Allow it to cool according to manufacturer guidance and investigate the cause.
Listen for Unusual Noise
Changes in sound can reveal mechanical or accessory problems.
Listen for:
- Grinding
- Rattling
- Squealing
- Clicking
- Unusual vibration
A damaged bit can sometimes produce abnormal behavior.
A mechanical problem inside the tool is another possibility.
Do not continue operating the tool just to see whether the sound becomes worse.
Watch for Excessive Vibration
Some vibration is inherent in impact tools.
However, a sudden change deserves attention.
Possible causes include:
- Damaged accessory
- Improperly seated bit
- Worn holder
- Mechanical issue
Remove the accessory and inspect it.
If unusual vibration continues without the original bit, the tool may need service.
Inspect Fasteners When Troubleshooting Bit Problems
The bit is not always the cause of slipping.
Fasteners can be damaged.
A rounded screw head or deformed recess may prevent even a good bit from engaging correctly.
Do not repeatedly force the impact driver into a damaged fastener.
The repeated impacts can make the fastener problem worse.
Choose the correct recovery method for the fastener instead.
Do Not Use the Impact Driver as a Hammer
An impact driver produces impact internally, but that does not make it a general-purpose impact hammer.
Avoid striking the tool body against components.
Do not hit the housing with a hammer to loosen a stuck bit unless the manufacturer specifically instructs such a procedure.
The internal mechanism is designed for controlled rotational impact, not arbitrary external blows.
Do Not Use the Bit Holder as a Pry Point
Using the driver or bit as a lever can put forces on the holder for which it was not designed.
The holder is intended to retain and drive compatible accessories.
Prying can damage:
- Bit holder
- Shaft
- Gear mechanism
- Accessory
Use a proper pry tool when leverage is required.
Store Bits in an Organized Case
Bits should ideally have dedicated storage.
A bit case can protect the tips and make it easier to identify sizes.
Avoid throwing loose bits together with:
- Screws
- Washers
- Metal tools
- Heavy accessories
Repeated contact can damage the tips.
Organization also makes it easier to notice which bits are becoming worn.
Keep Different Bit Types Separated
A practical storage system can group:
Phillips
Pozidriv
Torx
Slotted
Hex
Nut drivers
and other specialty accessories separately.
Within each group, arrange them by size where practical.
This makes selection faster and reduces the chance of using the wrong accessory.
Separate Worn Bits From Good Bits
Do not keep damaged bits mixed with usable ones.
A rounded bit can accidentally be chosen for an important fastening job.
Create a small section for:
- Worn bits
- Damaged bits
- Bits awaiting replacement
Dispose of unusable accessories appropriately according to local rules and material requirements.
The objective is to make the good accessories easy to identify.
Inspect Bits Before Large Projects
Before starting a major fastening job, inspect the bits you expect to use.
Do not wait until the bit begins slipping repeatedly.
A few seconds of inspection can help avoid:
- Damaged fasteners
- Lost time
- Excessive pressure
- Premature bit failure
Keep spare impact-rated bits available for common sizes.
How Long Should Impact Bits Last?
There is no universal lifespan.
Bit life depends on:
- Material
- Fastener type
- Torque
- Number of cycles
- User technique
- Work environment
- Bit quality
A bit used occasionally in household projects may last a long time.
A bit used continuously on structural fasteners may wear much faster.
Do not judge lifespan solely by age.
Judge it by condition and performance.
When to Replace the Bit
Replace a bit when you see:
- Cracks
- Chips
- Severe rounding
- Twisting
- Deformation
- Persistent slipping despite correct size and fastener condition
A low-cost bit is not worth risking damage to an important fastener.
Use a fresh, compatible accessory.
When the Impact Driver Itself Needs Service
Consider professional or manufacturer-supported service when the tool develops:
- Persistent abnormal noise
- Severe vibration
- Burning smell
- Electrical problems
- Repeated overheating
- Chuck or holder failure
- Major power loss
- Intermittent operation
Routine cleaning cannot repair a failing motor, gearbox, electronic controller, or damaged internal component.
Do not continue using the tool until the cause has been addressed.
When Replacement Makes More Sense
Replacement may be appropriate when:
- The tool has severe structural damage
- Repair costs approach the replacement cost
- Replacement parts are unavailable
- The battery platform is obsolete
- Reliable operation cannot be restored
Consider the quality and value of the tool.
A professional-grade impact driver may justify repair.
An inexpensive tool with extensive damage may not.
A Five-Minute Maintenance Routine
After a typical project:
Step 1: Remove the battery.
Step 2: Remove loose dust and debris.
Step 3: Clean the bit holder.
Step 4: Wipe the housing and grip.
Step 5: Inspect the battery compartment.
Step 6: Check the tool for cracks or impact damage.
Step 7: Inspect the bit.
Step 8: Store the bit in its case.
Step 9: Clean the storage case if necessary.
Step 10: Store the tool and battery according to manufacturer instructions.
This short routine can become part of the normal end-of-project process.
A Deeper Periodic Inspection
For heavily used impact drivers, inspect the equipment more thoroughly.
Clean the entire exterior.
Inspect ventilation openings.
Check the bit holder for wear.
Inspect the battery interface.
Inspect the trigger.
Check the housing for damage.
Examine common-use bits.
Clean the storage case.
Watch for changes in noise, vibration, heat, and performance.
If anything has changed significantly, investigate it before the next demanding project.
Common Maintenance Mistakes
Using ordinary bits in demanding impact applications
Use accessories appropriate for the tool and task.
Continuing with worn bits
Worn tips can damage fasteners.
Adding lubricant without cleaning
Oil can trap dust and debris.
Spraying cleaner into the holder
Liquid may enter the mechanism.
Blocking ventilation openings
This can affect cooling.
Storing batteries in extreme heat
Follow battery temperature recommendations.
Leaving the tool wet
Moisture can affect metal and electrical components.
Using the impact driver as a pry tool
The holder and internal components are not designed for arbitrary leverage.
Ignoring abnormal noise
Unusual sounds can indicate accessory or mechanical problems.
Testing damaged batteries
Follow the battery manufacturer’s safety guidance instead.
Final Thoughts
A cordless impact driver can provide years of dependable service when the tool and its accessories are maintained together.
Start with the basics.
Remove the battery before cleaning. Keep dust and debris away from the ventilation openings, trigger, battery interface, and quick-release bit holder. Clean the tool after particularly dusty work and store it in a dry environment.
The bits deserve equal attention.
Use accessories appropriate for impact applications, inspect their tips regularly, and replace bits when they become rounded, chipped, cracked, twisted, or otherwise damaged. A worn bit can create problems that appear to be caused by the impact driver when the actual issue is poor engagement with the fastener.
Avoid common mistakes such as using the driver as a pry tool, spraying liquids directly into mechanical openings, adding excessive lubricant, or continuing to use the tool after abnormal heat, burning smell, smoke, severe vibration, or unusual noise appears.
Battery care remains important as well. Keep battery packs dry, protect them from extreme temperatures and physical damage, and follow the manufacturer’s instructions for charging and long-term storage.
The most effective maintenance routine is not complicated.
Clean the tool. Inspect the holder. Check the bit. Protect the battery. Store everything properly.
Those habits reduce unnecessary wear and make it much easier to identify a genuine mechanical problem before it turns into a failed tool.
Related Guides
- How to Clean a Cordless Drill After Working in Dust
- How to Store Cordless Power Tools Between Projects
- How to Keep Dust From Building Up Inside Power Tools
- Why Power Tools Overheat and What You Should Check First
- How to Care for Power Tool Batteries During Long-Term Storage
FAQ
Do I need special bits for a cordless impact driver?
Use accessories that are compatible with the impact driver’s design and the intended application. Impact-rated bits are appropriate for applications involving the repeated impact loading associated with impact drivers.
Why do my impact-driver bits keep slipping?
Possible causes include the wrong bit type or size, a worn or damaged bit, a damaged fastener, poor alignment, or a problem with the bit holder. Inspect the bit and fastener before assuming the tool itself is defective.
How should I clean an impact driver’s bit holder?
Remove the battery and remove loose dirt with a soft brush or appropriate vacuum. Clean accessible contamination carefully and avoid flooding the mechanism with liquid. Follow the manufacturer’s maintenance instructions for the specific model.
Should I lubricate the bit holder?
Do not automatically add lubricant. First clean the mechanism and check the manufacturer’s recommendations. If lubrication is required, use the specified product and amount.
Can I use regular drill bits in an impact driver?
Do not assume that any bit that physically fits is suitable for impact loading. Use accessories specified for the impact driver and application, especially when significant torque and repeated impacts are involved.
How often should I replace impact bits?
There is no fixed schedule. Replace them when the tip becomes rounded, chipped, cracked, twisted, deformed, or no longer engages the fastener reliably.
Can dust damage an impact driver?
Heavy dust can accumulate around ventilation openings, the bit holder, trigger, battery interface, and housing. Control dust during work and clean the tool after dusty projects.
What should I do if my impact driver becomes very hot?
Stop using it if the heat is excessive or unusual, particularly when accompanied by a burning smell, smoke, abnormal noise, or power loss. Allow it to cool according to the manufacturer’s guidance and investigate the cause.
Should I leave the battery attached between projects?
Follow the specific tool and battery manufacturer’s storage recommendations. For longer periods of non-use, many systems have separate battery-storage guidance.
Can I use an impact driver to loosen any fastener?
An impact driver is versatile, but the tool, bit, socket adapter, and fastener all need to be appropriate for the application. Do not use excessive force or continue working on a fastener that is damaged or severely seized without an appropriate method.
When should an impact driver be professionally serviced?
Seek appropriate service when the tool develops persistent abnormal noise, severe vibration, burning smell, electrical problems, repeated overheating, major power loss, or mechanical failure that routine cleaning and accessory replacement do not resolve.
