
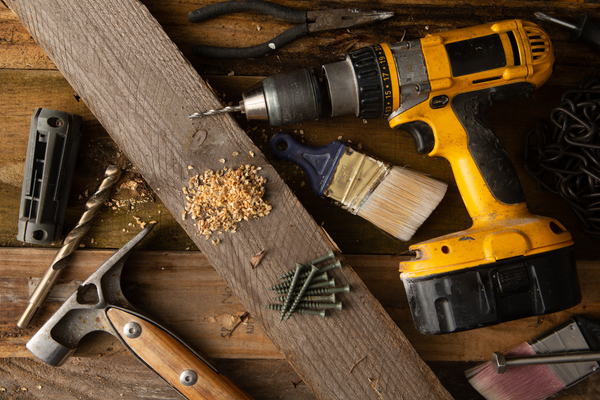
A cordless drill can collect an impressive amount of dust during a single project. Drilling wood, drywall, masonry, plastic, or other materials produces fine particles that can settle on the housing, gather around ventilation openings, enter the chuck area, and accumulate around switches and other exposed components.
At first, the dust may appear harmless. The drill still works, the battery still fits, and the chuck still rotates. However, repeated exposure to dust can make maintenance more difficult and may allow contamination to accumulate in areas where airflow, mechanical movement, or electrical components are involved.
Cleaning a cordless drill after dusty work is therefore less about making the tool look new and more about preventing unnecessary buildup while preserving the tool’s materials and components.
The safest approach is controlled cleaning. Remove the battery before maintenance, eliminate loose dust without forcing debris deeper into the tool, clean accessible surfaces carefully, inspect the ventilation openings and chuck, and allow the tool to remain completely dry before returning it to storage.
This guide focuses on routine external care and inspection. It does not replace manufacturer-specific maintenance instructions or authorized service for internal electrical or mechanical repairs.
Why Dust Is a Problem for Cordless Drills
Dust is not all the same.
Fine wood dust, drywall particles, masonry dust, and metal particles can behave differently once they enter or settle on a power tool.
Some particles remain loose.
Others combine with grease or moisture and become harder to remove.
Fine dust can also accumulate gradually. A drill used for a few minutes during a household project may not need significant cleaning, but a tool used regularly in a dusty workshop can require much more frequent attention.
The most important areas include:
- Ventilation openings
- Trigger and switches
- Chuck
- Battery interface
- Housing seams
- Rubberized grips
- Accessories and attachments
Keeping these areas reasonably clean makes inspection easier and reduces unnecessary contamination.
Disconnect the Drill From Its Power Source First
Before cleaning a cordless drill, remove the battery according to the manufacturer’s procedure.
This is the first step because cleaning can involve contact with switches, the chuck, ventilation openings, and other components.
Even though a cordless drill is not connected to a wall outlet, an installed battery means the tool remains powered.
Removing the battery also makes it easier to clean around the battery compartment and inspect the contacts.
Do not treat battery removal as an optional step.
Make it part of the normal cleaning routine.
For tools with additional power or accessory systems, follow the manufacturer’s instructions for making the equipment safe before maintenance.
Remove Loose Dust Before Using Any Liquid
The first cleaning stage should normally be dry.
Use a soft brush, cloth, or another appropriate method to remove loose dust from the housing.
Pay particular attention to:
- Vent openings
- Trigger area
- Around the chuck
- Battery compartment
- Seams
- Crevices
- Grip texture
Removing loose material first is important because adding water or cleaner can turn dust into a paste that is more difficult to remove.
It can also make the contamination spread to areas that were previously clean.
The objective at this stage is simple:
Remove as much loose dust as possible without forcing it deeper into the tool.
Be Careful With Compressed Air
Compressed air can be useful for removing loose dust from some power tools, but it needs to be used thoughtfully.
High-pressure air can push contamination farther into the tool rather than removing it.
It can also send fine particles into the surrounding air, where they may be inhaled or reach the eyes.
If compressed air is appropriate for your tool and work environment, use it in a controlled manner and follow the manufacturer’s recommendations.
Avoid directing a strong stream into every opening simply because the dust becomes visible.
For many household cleaning jobs, a soft brush and vacuum can provide better control.
A Vacuum Can Be More Controlled
A suitable vacuum can help collect loose dust rather than redistributing it around the workspace.
This can be particularly useful when cleaning:
- Ventilation openings
- Battery compartments
- Tool cases
- Work surfaces around the drill
Do not press the vacuum attachment aggressively against delicate components.
The goal is to collect loose particles, not create physical stress on the tool.
For small crevices, a soft brush used together with a vacuum can provide good control.
Clean the Exterior Housing
Once loose dust has been removed, inspect the housing.
For ordinary surface dirt, a lightly damp cloth may be appropriate if the manufacturer permits it and the tool is disconnected from its battery.
Do not soak the housing.
Use controlled moisture.
Wipe the surface, then remove any remaining moisture with a dry cloth.
A cordless drill contains electrical and mechanical components that should not be unnecessarily exposed to water.
The fact that the housing is made from plastic does not mean the entire tool is waterproof.
Never Submerge a Cordless Drill
A cordless drill is not equivalent to a washable household object.
Do not place it in a bucket or sink.
Do not rinse it under running water unless the manufacturer specifically states that the particular model has an appropriate ingress-protection rating and is designed for that type of exposure.
Even then, follow the manufacturer’s maintenance instructions.
For ordinary drills, controlled surface cleaning is the safer approach.
The goal is to remove dust from accessible surfaces while keeping moisture away from internal components.
Pay Attention to the Ventilation Openings
Ventilation openings are among the most important areas to inspect after dusty work.
Power tools generate heat during operation, and airflow around the housing can be important to the tool’s design.
Dust accumulated around the openings can reduce airflow or become drawn farther into the tool during future operation.
Use a soft brush or controlled vacuuming method to remove loose material.
Avoid inserting sharp objects into the vents.
Do not scrape deep inside the tool.
The ventilation openings should be kept as clear as practical without disturbing components behind them.
Do Not Push Dust Through the Vents
One common mistake is using a stiff brush or high-pressure air directly into the ventilation openings.
That may make the outside look cleaner while moving the dust deeper into the housing.
A better strategy is to remove material from the surface and around the openings without forcing it through.
Use moderate, controlled cleaning.
If heavy contamination appears to have entered deeply into the tool, professional service may be more appropriate than increasingly aggressive home cleaning.
Clean Around the Trigger Carefully
The trigger area often collects fine dust because it is exposed to the user’s hand and surrounding work environment.
Use a soft brush to remove visible particles.
Do not flood the trigger area with liquid cleaner.
Avoid inserting sharp objects into gaps around the trigger.
The trigger should continue to move smoothly and predictably.
If it becomes sticky, inconsistent, or unusually difficult to operate after cleaning, do not assume that adding lubricant will solve the problem.
There may be contamination or a mechanical issue that requires further assessment.
Clean the Battery Compartment
Remove the battery and inspect the compartment.
Look for:
- Dust
- Debris
- Moisture
- Corrosion
- Damaged contacts
- Foreign objects
Loose dust can often be removed with a soft brush or suitable vacuum.
Do not scrape electrical contacts aggressively.
Do not apply random liquids or lubricants to the contacts.
If corrosion, deformation, or obvious electrical damage is present, follow the manufacturer’s service guidance.
The battery connection is important to normal operation and is not an area where improvised cleaning methods are advisable.
Inspect the Battery Contacts
Battery contacts should remain reasonably clean and free of contamination.
After dusty work, inspect them visually.
Look for:
- Dust buildup
- Dirt
- Corrosion
- Bent contacts
- Burn marks
- Signs of overheating
Do not attempt to reshape damaged electrical contacts casually.
Do not sand them aggressively unless the manufacturer specifically provides such a maintenance procedure.
If a contact is visibly damaged, the battery interface may require service.
Remove Dust From the Chuck
The chuck is another area where contamination can accumulate.
Start by brushing away loose material around the outside.
If the drill has a keyless chuck, operate it according to the manufacturer’s normal procedure while inspecting the jaws.
Do not force the chuck if it feels abnormal.
Look for:
- Dust
- Metal particles
- Resin
- Corrosion
- Uneven movement
The chuck should hold compatible accessories securely and operate consistently.
A dirty exterior can usually be cleaned.
A chuck with mechanical damage may need service or replacement.
Keep Dust Away From Chuck Threads and Moving Parts
Fine dust can mix with existing lubricant around moving components.
This can create a sticky or abrasive buildup.
Do not automatically add more lubricant because a chuck feels rough.
First clean accessible contamination and reassess.
If the mechanism requires lubrication, follow the manufacturer’s recommendations.
The type and amount of lubricant can vary between designs.
Be Careful With Wood Dust
Wood dust is common during drilling and woodworking projects.
It can accumulate around the vents, trigger, battery compartment, and chuck.
Fine wood dust can also combine with oils and create compacted residue.
After working extensively with wood, remove visible dust before storing the drill.
If the tool is used frequently in woodworking, make cleaning part of the normal end-of-project routine rather than waiting until the housing is visibly coated.
Masonry Dust Requires Extra Attention
Masonry and concrete drilling can produce very fine mineral dust.
This type of contamination deserves particular attention because of how easily fine particles spread throughout the work area.
After drilling masonry, clean the exterior before placing the drill into its storage case.
Avoid simply blowing the tool with high-pressure air while standing in the same workspace.
Use an appropriate dust-management method and personal protective equipment for the environment.
If you suspect significant internal contamination, do not assume that external cleaning has removed everything.
Follow the tool manufacturer’s maintenance guidance.
Metal Particles Are Different
Metal drilling can produce particles that may be more abrasive and potentially magnetic depending on the material.
Clean visible metal debris carefully.
Do not use your bare hand to wipe up sharp metal chips.
A suitable brush, vacuum, or other controlled method is preferable.
Inspect the tool’s ventilation and chuck areas after metalworking.
If metal particles appear to have entered deeply into the housing, professional cleaning may be appropriate.
Clean the Rubberized Grip
Many cordless drills have rubberized or textured grip surfaces.
These can collect dust, oil, and skin residue.
A mild cleaning method compatible with the specific material is usually a better starting point than strong solvents.
Use a lightly damp cloth when appropriate.
Avoid excessive liquid.
Do not assume that a solvent safe for metal is safe for rubber.
A chemical that affects the grip may cause it to become sticky, brittle, swollen, or discolored.
Do Not Use Strong Solvents on the Housing Without Checking Compatibility
Cordless-drill housings often combine several materials.
These can include:
- Plastic
- Rubber
- Paint
- Labels
- Printed markings
A strong solvent can affect one material while leaving another unchanged.
Before using any chemical cleaner, check the manufacturer’s recommendations and the product’s material-compatibility information.
When in doubt, use the mildest effective method.
For ordinary dust, a soft brush and cloth are usually more appropriate than a powerful solvent.
Check for Moisture After Cleaning
Dust removal should not create a moisture problem.
If you use a damp cloth, make sure the tool is completely dry before reinstalling the battery.
Inspect:
- Battery compartment
- Vent openings
- Chuck area
- Trigger
- Housing seams
Do not return a wet or damp drill to a closed case.
A small amount of trapped moisture combined with dust can create a much less favorable storage environment.
Inspect the Drill for Damage While Cleaning
Cleaning is an excellent opportunity to inspect the drill.
Look for:
- Cracked housing
- Damaged trigger
- Loose chuck
- Broken battery latch
- Damaged vents
- Exposed wiring
- Unusual discoloration
- Signs of overheating
Some damage is obvious.
Other signs may be subtle.
For example, a housing crack near the chuck can affect the tool’s structural integrity.
A damaged battery latch can allow the battery to move or disengage unexpectedly.
A missing piece of ventilation housing can expose internal components.
Do not return a visibly damaged drill to normal use simply because it is clean.
Look for Signs of Overheating
Dust accumulation can sometimes occur alongside heavy tool use.
Inspect the housing for unusual discoloration, melting, or other visible signs of excessive heat.
The presence of a little warmth after normal use is not a problem by itself.
However, a tool that repeatedly becomes unusually hot, smells abnormal, or shows visible heat damage deserves further investigation.
Do not attempt to solve an overheating problem simply by applying lubricant.
The cause could involve workload, airflow, mechanical condition, battery behavior, or another factor.
Inspect the Chuck for Damage
The chuck should be inspected as a mechanical component.
Look for:
- Cracks
- Excessive wobble
- Damaged jaws
- Corrosion
- Uneven movement
A dirty chuck can be cleaned.
A chuck that has developed significant wobble or mechanical damage may need repair or replacement.
Do not compensate for a damaged chuck by tightening accessories excessively.
The accessory needs to be held securely by a properly functioning chuck.
Check Accessories Separately
Drill bits, drivers, adapters, and other accessories can carry dust and debris back into a clean tool.
Before storing the drill, inspect the accessories as well.
Remove:
- Wood dust
- Metal particles
- Masonry dust
- Resin
- Grease
Store accessories in an organized container when possible.
A clean drill placed into a case full of dirty bits will quickly become contaminated again.
Clean the Storage Case Too
The drill is only one part of the storage system.
The case can collect:
- Dust
- Wood particles
- Metal chips
- Masonry powder
- Grease
Before putting the cleaned drill away, inspect the case.
Remove loose debris.
Wipe compatible surfaces.
Allow any damp sections to dry completely.
Pay particular attention to foam inserts and compartments.
Dust hidden beneath the drill can be transferred back onto the housing the next time the case is closed.
Keep the Battery Clean and Dry
The battery should be maintained separately from the drill.
Inspect its housing for:
- Dust
- Dirt
- Cracks
- Moisture
- Damaged terminals
- Swelling
- Unusual discoloration
Do not immerse the battery.
Do not expose it unnecessarily to cleaning chemicals.
If a battery shows significant physical damage, swelling, leakage, overheating, or other abnormal signs, follow the manufacturer’s safety guidance and do not continue using it casually.
Battery maintenance deserves its own set of precautions.
Don’t Spray Cleaner Directly Into the Drill
This is one of the easiest mistakes to avoid.
Spraying cleaner directly into:
- Vents
- Trigger gaps
- Chuck areas
- Battery contacts
- Housing seams
can introduce liquid into areas where you cannot easily remove it.
A safer general approach is controlled application to a cloth when the product is appropriate.
This gives you more control over how much moisture reaches the tool.
Avoid Household “Hacks” That Add Unnecessary Risk
Online cleaning advice can include aggressive or improvised methods.
Examples may involve:
- Excessive solvent
- Uncontrolled compressed air
- Water immersion
- Heavy oiling
- Unrelated household chemicals
The fact that a method works on one tool does not mean it is appropriate for another.
Cordless drills contain electronics, batteries, plastics, seals, lubricated components, and mechanical assemblies.
Use methods designed for the materials involved.
How Often Should You Clean a Cordless Drill?
The ideal schedule depends on how and where you use it.
A drill used occasionally to assemble furniture may need only light cleaning after projects.
A drill used every day in a woodworking environment may need attention much more frequently.
A practical approach is:
After dusty projects: remove loose debris.
After masonry work: clean the exterior carefully before storage.
After metal drilling: remove metal particles.
After wet exposure: dry the tool completely.
Periodically: inspect vents, battery compartment, chuck, housing, and case.
Condition-based maintenance is more useful than an arbitrary calendar.
A Five-Minute Cleaning Routine
For ordinary household use, you can keep maintenance simple.
Step 1
Remove the battery.
Step 2
Brush or vacuum loose dust from the housing.
Step 3
Clean the ventilation openings carefully.
Step 4
Wipe the exterior with an appropriate cloth.
Step 5
Inspect the chuck.
Step 6
Check the battery compartment and contacts.
Step 7
Inspect the trigger and housing for damage.
Step 8
Clean the storage case if necessary.
Step 9
Make sure everything is completely dry.
Step 10
Reinstall the battery only when the tool is ready to return to normal use.
This routine takes very little time and can become part of the normal workflow.
A Deeper Cleaning Routine
After particularly dusty work, perform a more detailed inspection.
Remove the battery.
Clean the entire exterior.
Inspect the vents.
Inspect the chuck.
Check the battery compartment.
Inspect the housing.
Clean accessories.
Clean the case.
Look for signs of overheating.
Look for corrosion or moisture.
Then allow everything to dry completely.
If the drill appears to have significant internal contamination, do not dismantle it casually.
Consult the manufacturer’s service information or use qualified service.
When Internal Cleaning Requires Professional Service
External cleaning is different from internal repair.
If dust has clearly entered deep into the tool, if ventilation appears blocked internally, or if the drill develops abnormal behavior after dusty use, professional service may be appropriate.
Warning signs can include:
- Unusual noise
- Burning smell
- Repeated overheating
- Intermittent operation
- Trigger problems
- Abnormal motor behavior
- Electrical arcing
- Significant loss of performance
Do not open a cordless drill simply because you want to “clean it better.”
The internal components may require specialized procedures, and disassembly can create additional problems.
When a Drill Should Be Removed From Service
Cleaning cannot solve every problem.
Stop using the drill and investigate when you find:
- Cracked housing affecting important components
- Exposed electrical wiring
- Damaged battery connection
- Severe overheating
- Burning smell
- Major chuck damage
- Significant electrical abnormalities
- Battery damage or swelling
A dirty drill can usually be cleaned.
A damaged drill requires a different response.
How to Prevent Dust Buildup
Prevention is easier than deep cleaning.
Use appropriate dust collection when working with dusty materials.
Keep the drill away from unnecessary piles of debris.
Do not place it directly onto a dusty work surface when a cleaner location is available.
Return it to its case or storage location after cleaning.
Clean the area around the tool as well.
The amount of dust reaching the drill can be reduced significantly through better job-site organization.
Keep the Drill Out of the Dust Cloud When Possible
The best time to prevent contamination is during the work itself.
When practical, position the drill and your workpiece so that dust is directed away from the tool.
Use appropriate extraction or collection systems for dusty operations.
For drilling applications that generate significant dust, controlling the dust at the source can reduce contamination of both the tool and the surrounding workshop.
Tool maintenance and workshop cleanliness are therefore closely connected.
Final Thoughts
Cleaning a cordless drill after working in dust is a simple maintenance habit that can make the tool easier to inspect, store, and keep in good working condition.
The process should begin with safety: remove the battery and make sure the tool is disconnected from its power source before cleaning.
Start dry.
Brush or vacuum loose dust before introducing any moisture. Clean the housing with controlled methods, pay close attention to ventilation openings, inspect the battery compartment and contacts, and clean the chuck without forcing debris deeper into its mechanism.
Avoid submerging the tool, spraying cleaner directly into openings, or using strong solvents without checking compatibility.
Different work materials also create different cleaning needs. Wood dust, masonry dust, and metal particles should all be removed carefully, especially before the drill returns to its storage case.
Use the cleaning process as an inspection opportunity.
Look for cracks, damaged vents, unusual heat marks, battery problems, chuck damage, trigger issues, and other signs that cannot be solved through cleaning.
If the drill shows abnormal noise, overheating, burning smell, intermittent operation, or obvious internal contamination, stop treating it as a simple cleaning job and consult the manufacturer’s service guidance or qualified service personnel.
Most importantly, prevention matters.
The cleaner the working environment and the better the dust is controlled at the source, the less contamination the drill will collect.
A few minutes of cleaning after a dusty project can prevent a much larger maintenance problem later.
Related Guides
- How to Store Cordless Power Tools Between Projects
- How to Keep Dust From Building Up Inside Power Tools
- How to Clean the Exterior of a Cordless Drill Without Damaging It
- Why Power Tools Overheat and What You Should Check First
- How to Care for Power Tool Batteries During Long-Term Storage
FAQ
Should I remove the battery before cleaning a cordless drill?
Yes. Removing the battery according to the manufacturer’s procedure should be part of the normal cleaning process. It makes the tool safer to handle and allows you to inspect the battery compartment and contacts.
Can I wash a cordless drill with water?
Do not assume that a cordless drill can be washed or rinsed. Unless the manufacturer specifically states that the model is designed for such exposure, use controlled external cleaning and keep moisture away from internal components.
Can I use compressed air to clean a cordless drill?
Compressed air can help remove loose dust in some situations, but high-pressure air can force contamination deeper into the tool and create airborne dust. Use controlled pressure and follow the manufacturer’s recommendations.
How do I clean dust from the ventilation openings?
Use a soft brush, suitable vacuuming, or another controlled method that removes loose dust without forcing it deeper into the housing. Avoid inserting sharp objects into the vents.
Should I lubricate the chuck after cleaning?
Not automatically. The correct maintenance depends on the chuck design and manufacturer instructions. Clean the accessible mechanism first and use lubrication only when appropriate.
Can I spray cleaner directly onto the drill?
It is generally better to avoid spraying liquid directly into the tool. Apply an appropriate cleaner to a cloth when practical and keep moisture away from vents, switches, battery contacts, and housing openings.
How often should I clean my cordless drill?
Clean it after dusty or dirty projects and whenever visible contamination accumulates. A drill used frequently in a dusty workshop will generally need more frequent cleaning than one used occasionally at home.
Why does my cordless drill get hot after dusty work?
Possible causes can include heavy workload, restricted airflow, accumulated contamination, mechanical problems, or other conditions. If overheating is unusual, persistent, or accompanied by a burning smell or abnormal behavior, stop using the tool and consult the manufacturer’s guidance.
What should I do if dust has entered deep inside the drill?
Do not automatically dismantle the drill. If there is significant internal contamination or abnormal operation, consult the manufacturer’s service information or qualified service personnel.
Can dust damage the battery?
Dust can contaminate the battery interface and surrounding compartment, but a battery showing swelling, leakage, severe damage, overheating, or other abnormal signs should be handled according to the manufacturer’s safety instructions rather than simply cleaned and returned to use.
How do I keep my cordless drill cleaner while drilling?
Reduce dust at the source with appropriate work practices and dust collection when practical. Keep the drill away from unnecessary debris, use a clean work surface, and clean the tool before returning it to storage.
