
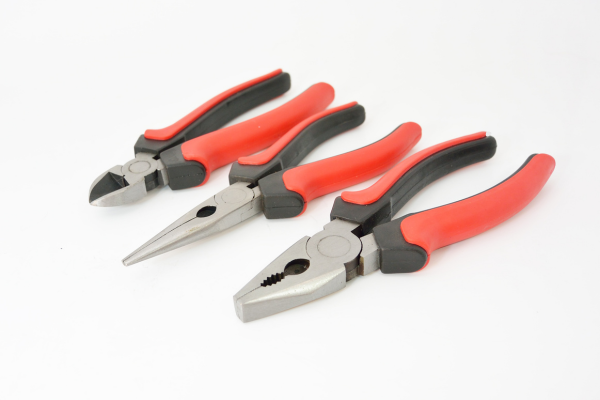
Pliers are among the most versatile tools in a household toolbox. They can grip, hold, bend, pull, cut, and manipulate a wide variety of materials. Because they are used for so many different tasks, their joints are constantly exposed to dust, grease, moisture, metal particles, paint, adhesive, and other contaminants.
The pivot is particularly important. When it becomes dirty or corroded, the handles can become difficult to move. Some people respond by adding more lubricant, but that is not always the best first step. A joint covered with contaminated grease may actually need cleaning before it needs additional lubrication.
Proper plier maintenance is therefore based on a simple sequence: inspect the tool, remove contamination, check the pivot and working surfaces, dry the tool, lubricate only when appropriate, and store it in a suitable environment.
The goal is not to make a pair of pliers feel excessively loose or oily. The goal is to keep the mechanism moving predictably while preserving the jaws, cutting edges, handle, and pivot.
Why the Pivot Matters
The pivot connects the two halves of the pliers and allows the handles and jaws to move together.
During normal use, the pivot experiences repeated movement and force.
A clean, properly maintained joint should move through its intended range without unusual resistance.
When contamination builds up, several problems can appear.
Dust can mix with grease and create abrasive residue.
Rust can form on exposed metal.
Old lubricant can become sticky.
Debris can accumulate around the pivot.
Mechanical wear can create excessive looseness.
A damaged pivot can make the entire tool feel unreliable.
This is why the joint deserves attention during routine maintenance.
Start With an Inspection
Before cleaning, examine the pliers carefully.
Look at:
- The pivot
- Both handles
- The gripping jaws
- Cutting edges, if present
- Serrated surfaces
- Springs or locking mechanisms, if fitted
- Protective handle coverings
Check for visible rust, dirt, cracks, deformation, and unusual gaps.
Then open and close the pliers gently.
Pay attention to how the movement feels.
A little resistance from normal friction is not necessarily a problem. What matters is whether the movement feels significantly different from what you would expect from the tool.
Also look for side-to-side movement.
A small amount of normal movement may occur depending on the design, but excessive looseness can indicate pivot wear or other mechanical problems.
Identify the Type of Pliers
Maintenance can vary depending on the tool.
Common types include:
- Combination pliers
- Long-nose pliers
- Slip-joint pliers
- Locking pliers
- Diagonal cutters
- Groove-joint pliers
- Circlip pliers
- Specialized gripping tools
Some have simple pivots.
Others contain adjustment mechanisms, springs, locks, or other components.
The manufacturer’s maintenance instructions should take priority for specialized designs.
A cleaning routine suitable for ordinary combination pliers should not automatically be applied to a complex specialty mechanism.
Remove Loose Dirt First
Before applying water, cleaner, or lubricant, remove loose contamination.
Use a dry cloth or soft brush.
Brush around the pivot and jaws.
Pay attention to the areas where the handles meet and where dirt tends to collect.
This step may reveal that the apparent problem is largely cosmetic.
It also prevents loose particles from becoming mixed with cleaning fluid and spreading across the tool.
Do not use aggressive wire brushes on finished surfaces simply because they remove dirt quickly.
A soft nylon brush is often a safer starting point.
Clean the Pivot Carefully
Once loose debris has been removed, inspect the pivot more closely.
Use a small brush to work around accessible areas.
If grease and dirt have accumulated, a mild cleaning solution may help.
Apply the cleaner in a controlled manner rather than flooding the entire tool.
Move the handles gently through their normal range while cleaning if it is safe and appropriate for the tool.
This can expose different parts of the pivot.
Do not force the pliers open or closed.
If the joint is heavily seized, excessive force may damage the mechanism rather than solving the problem.
Why Cleaning Should Come Before Lubrication
A common maintenance mistake is to reach for oil as soon as pliers become stiff.
Suppose the pivot contains dust mixed with old grease.
Adding new oil can make the mechanism feel smoother initially, but it can also produce a thicker contaminated mixture.
That mixture can trap even more dust and metal particles.
A better sequence is:
Inspect → clean → dry → evaluate → lubricate if appropriate.
This approach helps distinguish contamination from mechanical problems.
If the pliers move normally after cleaning, additional lubricant may not be necessary unless the manufacturer recommends routine lubrication.
Use the Right Cleaner
For general dirt, mild dish detergent and warm water may be suitable for many tools, provided the handle and finish are compatible.
For heavy grease, an appropriate degreaser may be more effective.
Before using a chemical product, check whether it is suitable for:
- Metal
- Chrome plating
- Paint
- Rubber
- Plastic
- Composite handles
A cleaner that works well on bare steel may damage another component.
When in doubt, test the product on a small inconspicuous area.
The purpose of cleaning is to remove contamination without creating a new finish or material problem.
Keep Water Out of Unnecessary Areas
Water can be useful for cleaning, but excessive moisture introduces a drying challenge.
Avoid soaking the entire pair of pliers unless the manufacturer specifically supports that method.
Water can remain trapped around:
- The pivot
- Spring mechanisms
- Handle seams
- Locking components
- Small recesses
Controlled cleaning is often easier to manage.
After cleaning, remove moisture promptly and allow the tool to dry completely.
Clean the Jaws at the Same Time
The pivot should not be the only area you maintain.
Inspect the jaws.
They can accumulate:
- Grease
- Paint
- Adhesive
- Metal particles
- Dirt
- Rust
Contamination on the jaws can reduce grip and make it harder to inspect the working surfaces.
Use a suitable cloth or soft brush.
For material stuck between serrations, a non-metallic pick or small brush may provide better control than a sharp metal object.
Avoid unnecessarily altering the shape of the jaws.
The serrations are part of the tool’s working geometry.
Inspect Cutting Edges
If the pliers include cutters, inspect the cutting edges carefully.
Look for:
- Nicks
- Chips
- Rounded edges
- Excessive wear
- Corrosion
- Deformation
Do not assume that cleaning restores a dull cutter.
A cutting edge that has lost its geometry may require appropriate sharpening by a qualified method or replacement of the tool, depending on its design.
Do not casually grind the cutters simply to make them appear sharper.
Changing the geometry can affect performance.
Check for Rust
Surface rust around the pivot can interfere with movement.
If you find corrosion, first determine its severity.
Light surface corrosion may be treatable with an appropriate rust-removal method.
Deep pitting is more serious.
Corrosion that has significantly removed material from the pivot or working surfaces can affect the tool’s condition.
Rust removal does not replace lost metal.
If corrosion has compromised the mechanism or cutting edges, the pliers may need professional evaluation or replacement.
Inspect the Handles
Handles are important for control.
Check for:
- Cracks
- Cuts
- Loose coverings
- Excessive wear
- Chemical damage
- Deformation
- Unusual stickiness
A rubberized grip that has become soft or sticky may have been affected by age, chemicals, heat, or other environmental factors.
A mild cleaning method may be appropriate, but aggressive solvents should be avoided unless the manufacturer confirms compatibility.
A damaged handle should not be ignored simply because the pivot works smoothly.
Check the Pivot for Excessive Looseness
A clean pivot can still be worn.
Hold the pliers and inspect the relationship between the two halves.
Excessive side-to-side movement may indicate:
- Pivot wear
- Loose hardware
- Material loss
- Mechanical damage
Do not attempt to eliminate all movement by applying excessive force to a fastener unless the tool was specifically designed for adjustment and you understand the correct procedure.
Specialized or high-quality tools may require specific service methods.
A worn pivot cannot always be restored by cleaning or lubrication.
What If the Pliers Are Too Tight?
After cleaning and drying, if the pliers remain unusually stiff, consider several possibilities.
The pivot may still contain contamination.
There may be corrosion.
Old lubricant may remain.
The pivot could be worn or damaged.
The handles may be bent.
The tool may have been exposed to excessive force.
Do not immediately apply a large amount of oil.
First identify whether the resistance is consistent throughout the movement or occurs at a specific point.
A mechanism that catches at one location can indicate a physical problem rather than generalized friction.
What If the Pliers Are Too Loose?
Excessive looseness can be more difficult to diagnose.
If the pivot is designed to be adjustable, follow the manufacturer’s instructions.
If it is not adjustable, significant play may indicate wear.
A loose pivot can affect how accurately the jaws meet and can reduce the control you have over the tool.
Do not try to compensate by forcing the handles together during use.
If the joint is significantly worn, replacement may be the appropriate solution.
When Lubrication Makes Sense
After the pivot is clean and dry, determine whether lubrication is appropriate.
Some pliers benefit from a small amount of lubricant at the pivot.
Others may be designed to operate with minimal lubrication.
If the manufacturer specifies a lubricant or maintenance procedure, follow it.
The lubricant should be suitable for the mechanism.
Apply a small amount to the appropriate location.
Then move the pliers through their normal range.
Finally, wipe away excess residue.
The goal is smooth movement without creating an oily surface that attracts dirt.
Avoid Over-Lubricating the Pivot
More lubricant does not necessarily mean smoother operation.
An excessively oily pivot can collect:
- Dust
- Sand
- Metal particles
- Wood fibers
- Other debris
Over time, that contamination can become abrasive or sticky.
A thin, appropriate application is generally easier to maintain than a heavy coating.
If lubricant continues to spread onto the handles or jaws, you have probably applied more than necessary.
Wipe away excess before returning the tool to storage.
Do Not Lubricate the Jaws
In ordinary gripping applications, the working jaws generally need to remain clean rather than oily.
An oily gripping surface can reduce control and attract contamination.
For cutting pliers, oil on the cutting area may also transfer to materials being cut.
Keep lubrication focused on the mechanism where it serves a specific purpose.
What About Locking Pliers?
Locking pliers contain additional mechanisms, so maintenance should account for those components.
Inspect the adjustment mechanism, locking action, and release mechanism.
Remove dirt and grease from accessible areas.
Avoid flooding the mechanism with cleaner.
If the locking system behaves abnormally after cleaning, do not assume that more lubricant is the solution.
A locking tool should operate predictably.
If a mechanical component is damaged or worn, appropriate service or replacement may be necessary.
What About Groove-Joint Pliers?
Groove-joint pliers contain an adjustment system that can accumulate dirt in addition to the main pivot.
Clean the exposed grooves and sliding areas carefully.
Move the adjustment through its normal positions while inspecting it.
Do not force the mechanism if it becomes stuck.
Pay attention to rust because corrosion can make adjustment increasingly difficult.
Once clean and dry, follow the manufacturer’s recommendations regarding lubrication.
Cleaning Pliers Used for Plumbing Work
Pliers used around plumbing can encounter:
- Water
- Pipe compound
- Sealants
- Mineral deposits
- Dirt
- Corrosion-promoting residues
After use, clean them rather than allowing residue to remain on the jaws.
If the tool was exposed to water, dry it thoroughly.
Residues from a wet environment can be particularly troublesome when a tool is later stored in a humid garage.
Cleaning Pliers Used Around Paint
Pliers used during painting or renovation can accumulate dried paint around the pivot and jaws.
Remove paint as soon as practical.
Fresh contamination is usually easier to manage than fully cured paint.
For dried paint, choose a method compatible with the tool’s finish.
Avoid aggressively scraping near the pivot.
Paint that becomes trapped inside a mechanism can affect movement.
Cleaning Pliers Used in Outdoor Work
Outdoor work exposes tools to additional moisture and dirt.
After use:
Clean visible dirt.
Remove plant residue or soil.
Dry the tool completely.
Inspect for corrosion.
Protect exposed metal when appropriate.
Do not store wet outdoor tools immediately in a closed toolbox.
The combination of moisture, dirt, and enclosed storage can create a favorable environment for corrosion.
How to Store Pliers
Storage affects maintenance almost as much as cleaning.
Keep pliers:
- Dry
- Organized
- Protected from unnecessary impacts
- Away from direct moisture
- Easy to inspect
Avoid throwing several heavy tools together in a drawer.
Repeated impacts can damage handles and jaws.
A dedicated compartment, tool tray, rack, or suitable organizer can reduce unnecessary wear.
Keep Pliers Away From Corrosive Materials
Avoid storing pliers alongside materials that can contaminate them.
This may include:
- Wet rags
- Chemical containers
- Rusty scrap
- Salt-covered equipment
- Oily waste
A clean tool stored next to corrosive or contaminated materials may eventually pick up residue.
Good storage is about controlling the environment around the tool.
How Often Should Pliers Be Maintained?
There is no universal maintenance interval.
A pair of pliers used occasionally for household repairs may need only periodic cleaning and inspection.
A tool used every day in a workshop may need attention much more frequently.
A practical approach is to inspect them:
After particularly dirty work.
After exposure to water.
When the joint becomes noticeably stiff.
When the handles stop moving smoothly.
When rust appears.
During periodic toolbox maintenance.
Condition-based maintenance is more useful than blindly following a calendar.
A Five-Minute Plier Maintenance Routine
When the tool only needs basic maintenance, the process can be quick.
Step 1
Wipe away visible dirt and grease.
Step 2
Brush the pivot and jaws.
Step 3
Inspect the cutting edges if present.
Step 4
Check the handles for cracks or damage.
Step 5
Open and close the pliers gently.
Step 6
If lubrication is appropriate, apply a small amount to the pivot.
Step 7
Wipe away excess lubricant.
Step 8
Store the tool in a clean, dry location.
This routine can be enough to prevent small problems from becoming significant.
When Professional Service May Be Appropriate
Most household pliers do not require professional service for ordinary maintenance.
However, specialized, expensive, or heavily damaged tools can be different.
Consider professional assessment when:
- The pivot is severely worn
- The mechanism is damaged
- A locking system fails
- The cutting edges have significant damage
- Corrosion has removed substantial material
- The handles are structurally compromised
- The tool is specialized and difficult to replace
Do not improvise repairs to safety-critical components when the condition of the tool is uncertain.
When Replacement Is the Better Option
Replacement makes sense when the tool has suffered significant damage that basic maintenance cannot correct.
Consider replacement when you find:
- Cracked handles
- Deep corrosion
- Severely damaged jaws
- Broken pivot components
- Excessive permanent looseness
- Severely worn cutters
- Deformed working surfaces
A cheap pair of pliers with extensive wear may not justify extensive restoration.
A premium specialty tool may justify professional repair.
The decision should consider cost, safety, availability, and intended use.
Common Maintenance Mistakes
Adding oil before cleaning
This can turn dirt into contaminated sludge.
Using too much lubricant
Excess oil attracts debris.
Cleaning with aggressive solvents
They may damage handles or protective finishes.
Using wire brushes indiscriminately
They can scratch or alter surfaces.
Soaking the entire tool unnecessarily
Water can become trapped inside the pivot or other mechanisms.
Ignoring the working jaws
The pivot is important, but the gripping and cutting surfaces need inspection too.
Using damaged pliers
Cleaning does not restore structural integrity.
Storing wet pliers
This increases corrosion risk.
A Complete Plier Maintenance Routine
For long-term care, use a simple cycle:
Inspect.
Look for wear, damage, and corrosion.
Clean.
Remove contamination appropriate to the tool’s materials.
Dry.
Eliminate moisture from the pivot and other recesses.
Lubricate when appropriate.
Use a small amount of suitable product.
Inspect again.
Check movement, jaw alignment, handles, and cutters.
Store properly.
Keep the tool dry and organized.
This approach avoids both neglect and unnecessary maintenance.
Final Thoughts
Pliers are simple tools, but their pivot and working surfaces deserve regular attention.
When a pair of pliers becomes stiff, the problem is not automatically a lack of oil. Dirt, old grease, corrosion, wear, or mechanical damage can produce similar symptoms.
Start with inspection.
Remove loose contamination.
Clean the pivot carefully.
Check the jaws, cutting edges, and handles.
Dry the tool completely.
Only then decide whether lubrication is appropriate.
When lubricant is needed, use a small amount and keep it concentrated on the mechanism rather than coating the entire tool.
Good storage matters too. Keeping pliers dry, organized, and away from corrosive materials reduces the amount of maintenance they require later.
The goal is not to make a pair of pliers feel excessively loose or slippery. A well-maintained tool should move smoothly, grip or cut as intended, and remain structurally sound.
Regular attention also helps you recognize when a maintenance problem has become a replacement problem.
A clean pivot can restore movement when contamination is the cause. But no amount of cleaning or lubrication can repair a cracked handle, badly worn pivot, severely corroded component, or damaged working surface.
Knowing that distinction is one of the most useful skills in maintaining a household toolbox.
Related Guides
- How to Maintain Screwdrivers So They Last Longer
- How to Remove Dirt From Tool Hinges, Pliers, and Adjustable Joints
- How to Clean Greasy Wrenches, Pliers, and Sockets at Home
- How to Tell Whether a Dirty Tool Needs Cleaning, Lubrication, or Replacement
- How to Protect Tools From Rust Without Making Them Oily
FAQ
How often should I lubricate my pliers?
There is no universal schedule. Lubrication depends on the tool design, how frequently it is used, the environment, and the manufacturer’s recommendations. Clean and inspect the pivot first rather than automatically adding oil on a fixed schedule.
Why are my pliers stiff after I add oil?
The pivot may contain dirt, old grease, or corrosion. Excess oil can also combine with debris and create a sticky buildup. Clean the joint first and reassess its movement.
Can I use WD-40 on plier pivots?
Products with the WD-40 brand have different formulations and intended purposes. Check the specific product’s label and compatibility before using it as a cleaner, lubricant, or corrosion inhibitor.
Should the jaws of pliers be oily?
Generally, the working gripping and cutting surfaces should be kept clean rather than coated with unnecessary lubricant. Oil on the jaws can reduce grip and attract contamination.
Can rusty pliers be restored?
Light surface rust may be treatable with an appropriate corrosion-removal method. Deep pitting, significant material loss, damaged pivots, or compromised working surfaces may make replacement or professional assessment more appropriate.
Why do my pliers have side-to-side movement?
Some movement can be normal depending on the design, but excessive looseness may indicate pivot wear, a loose component, or material loss. Cleaning will not necessarily correct mechanical wear.
How do I clean paint from pliers?
Remove fresh paint as soon as practical. For dried paint, use a method compatible with the tool’s metal finish and handle materials. Avoid aggressive scraping around the pivot and test chemical products before broad application.
Can I soak pliers in water?
It is generally better to avoid unnecessary soaking because water can remain trapped around the pivot, handles, and other mechanisms. Controlled cleaning followed by thorough drying is usually easier to manage.
How do I keep pliers from rusting in a garage?
Keep them clean and completely dry, control garage humidity where necessary, avoid storing them with wet materials, inspect them periodically, and use an appropriate corrosion-protection product on vulnerable metal when needed.
When should I replace a pair of pliers?
Consider replacement when the handle is cracked, the pivot is severely worn, the jaws are badly damaged, corrosion has caused significant material loss, or the tool no longer operates reliably despite appropriate maintenance.
