
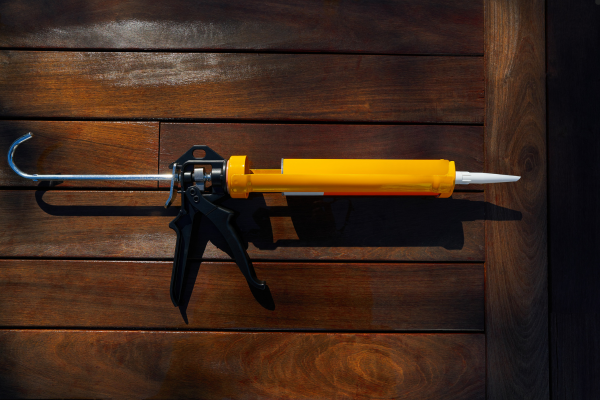
A caulking gun is a useful tool for many household maintenance projects. It helps apply sealants around windows, doors, bathtubs, sinks, countertops, and other areas where gaps need to be sealed against moisture, air, or dirt. Although the tool has a relatively simple design, neglecting its maintenance can make the trigger difficult to operate, cause uneven sealant application, and shorten its useful life.
One of the most common maintenance problems is allowing sealant to accumulate around the plunger rod, frame, pressure-release mechanism, and cartridge holder. Fresh residue is usually easier to remove than hardened material. Therefore, cleaning the tool shortly after use can save time and reduce the risk of damaging its components.
The good news is that most manual caulking guns require only basic cleaning supplies and a few minutes of attention after a project. The exact procedure depends on the gun’s design and the type of sealant used, so it is important to follow the manufacturer’s instructions.
This guide explains how to clean a caulking gun, remove different types of residue, inspect its moving parts, prevent corrosion, and store the tool properly between projects.
Why Regular Caulking Gun Maintenance Matters
A typical manual caulking gun uses a trigger mechanism to push a plunger against a cartridge. As pressure increases, the sealant moves through the cartridge nozzle and onto the surface being sealed.
During normal use, small amounts of material can escape from the cartridge or collect around the front of the frame. If this residue remains on the tool, it may harden and interfere with the movement of its components.
Several problems can develop when maintenance is neglected.
First, dried sealant can accumulate on the plunger rod, making it harder for the mechanism to move smoothly. Second, residue around the cartridge holder may prevent the next cartridge from sitting correctly. Third, moisture trapped beneath dirt or dried material can contribute to corrosion on exposed metal components.
These problems do not always mean that the tool is permanently damaged. In many cases, careful cleaning and inspection can restore normal operation.
Regular maintenance also makes it easier to recognize more serious problems, such as a bent rod, a damaged release lever, or a cracked frame, before they affect the next project.
What You Need to Clean a Caulking Gun
Before beginning, gather a few basic supplies. Having everything ready makes the cleaning process easier and reduces the temptation to use unsuitable tools or chemicals.
For routine maintenance, you may need:
- A clean, dry cloth or disposable paper towels.
- A soft brush for removing loose dust and residue.
- A plastic scraper for suitable external surfaces.
- Mild soap and water when compatible with the materials involved.
- A lubricant recommended by the tool manufacturer, when necessary.
- Protective gloves and eye protection appropriate for the sealant and cleaner.
You may not need every item after each use. A cloth and a basic inspection are often sufficient when very little residue is present.
Before using a solvent, check the sealant label and the caulking gun manufacturer’s instructions. Cleaning products that work on one material may damage plastic, rubber, painted finishes, or other components.
Never mix cleaning chemicals, and do not use gasoline or other unsuitable flammable products to clean the tool.
Step 1: Release Pressure Before Removing the Cartridge
The first step is to release the pressure applied to the cartridge.
On many manual caulking guns, a release lever or thumb-operated mechanism allows the plunger rod to move backward slightly. This reduces pressure and helps prevent additional sealant from escaping when you stop squeezing the trigger.
Release the pressure according to the tool’s instructions. Keep the nozzle pointed away from your face and hands, and avoid placing your fingers in areas where the moving mechanism could pinch them.
Once the pressure has been released, remove the cartridge carefully. Be prepared for a small amount of sealant to remain around the nozzle or cartridge opening.
If you are using a powered caulking gun, switch it off and follow the manufacturer’s procedure for releasing pressure and removing the cartridge. Do not apply the maintenance instructions for a manual tool to powered equipment without checking the appropriate manual.
Step 2: Remove Fresh Sealant Residue Immediately
Fresh sealant is generally easier to remove than material that has already cured. For this reason, inspect the caulking gun as soon as you finish your project.
Use a cloth or disposable paper towel to remove visible residue from the cartridge holder, front frame, plunger rod, and other accessible exterior surfaces.
Work carefully around the moving parts. Avoid pushing sealant deeper into the trigger mechanism or spreading it over previously clean surfaces.
If the sealant is water-based, the manufacturer’s instructions may recommend cleaning uncured residue with water and mild soap. Other materials, including certain silicone and polyurethane sealants, may require a specific compatible cleaner.
Do not assume that water is appropriate for every sealant. Consult the label before selecting a cleaning method.
For example, product instructions for some LOCTITE Polyseamseal products recommend immediate cleaning of uncured residue with warm soapy water, while other sealants have different requirements.
If a particular cleaner is recommended, use it in the manner specified by the product manufacturer. Ensure adequate ventilation and wear any protective equipment required by the label.
Step 3: Clean the Plunger Rod and Cartridge Holder
The plunger rod is one of the most important parts to inspect after using a caulking gun.
As the rod moves forward, it applies pressure to the cartridge. If dried material builds up on its surface, the movement may become less smooth. Dirt and residue can also collect around the point where the rod passes through the frame.
With the cartridge removed and pressure released, wipe the exposed rod using a suitable cloth.
Use a soft brush to remove loose debris from accessible areas around the cartridge holder. A plastic scraper may help with some external residue if the tool’s instructions permit its use.
Avoid using a screwdriver, knife, or other sharp metal object to scrape the rod aggressively. Scratches and deformation can interfere with the mechanism’s operation.
Do not disassemble the trigger assembly or remove components simply to reach a small amount of residue. Some tools have mechanisms that require specialized servicing or must be reassembled in a particular way.
If residue has hardened in an inaccessible area, consult the manufacturer’s instructions before attempting a deeper cleaning.
Step 4: Remove Hardened Sealant Without Damaging the Tool
Sometimes, a caulking gun is left uncleaned after a project. When the residue hardens, removing it can become more difficult.
Begin by identifying the sealant involved. Acrylic, latex, silicone, polyurethane, and construction adhesive products can have different curing properties and cleaning requirements.
Do not immediately apply a strong solvent or begin scraping forcefully.
Instead, inspect the affected area and determine whether the residue is on a metal surface, a plastic component, or a moving mechanism. A method suitable for a metal frame may damage a plastic release lever or protective coating.
If the manufacturer’s instructions permit it, a plastic scraper may help lift hardened material from an accessible exterior surface. Work slowly and avoid bending the frame or scratching the plunger rod.
For residue that cannot be removed without aggressive scraping, stop and consult the tool and sealant manufacturer’s guidance. In some situations, replacing a damaged component or seeking professional servicing is preferable to forcing the mechanism apart.
Never attempt to heat the gun with an open flame or use a heat source to soften dried sealant unless the manufacturer explicitly provides a safe, approved procedure.
Step 5: Dry the Tool and Inspect for Corrosion
After cleaning, dry the caulking gun thoroughly with a clean cloth.
Pay attention to the plunger rod, joints, release mechanism, and areas where moisture could remain trapped. If the tool has exposed steel components, leaving them damp can encourage corrosion, particularly when it is stored in a humid garage or shed.
Examine the frame and rod for orange discoloration, rough patches, or visible corrosion. Also check whether the trigger and release lever move as expected.
A small amount of superficial residue is different from structural damage. A bent rod, cracked frame, severely corroded component, or mechanism that no longer locks securely may make the tool unreliable.
Do not continue using a caulking gun with visible structural damage or a mechanism that cannot safely maintain or release pressure.
If you find corrosion on an important moving part, follow the manufacturer’s recommendations for cleaning and determining whether the tool remains suitable for use.
Step 6: Lubricate Moving Parts Only When Necessary
Some caulking guns benefit from occasional lubrication of particular moving parts. However, lubrication should not be treated as a substitute for cleaning.
Before applying any product, check whether the manufacturer recommends lubrication and identify the correct locations.
If lubrication is permitted, use a small amount of a compatible product on the specified metal components. Avoid applying lubricant indiscriminately to the cartridge holder, grip, or every part of the trigger mechanism.
Excess lubricant can attract dust and debris, creating another maintenance problem. It can also contaminate nearby surfaces or interfere with components that need to remain clean.
Keep lubricant away from the surfaces that will contact the sealant unless the manufacturer specifically permits its use there.
If the trigger remains stiff after cleaning, do not assume that more lubricant will solve the problem. A bent rod, damaged spring, worn mechanism, or hardened residue in an inaccessible location may require a different response.
Step 7: Store the Caulking Gun Correctly
Proper storage protects the caulking gun between projects.
Choose a dry location where the tool will not be exposed to rain, persistent condensation, or unnecessary temperature extremes. Avoid placing heavy equipment on top of it or storing it where it could fall from a shelf.
A toolbox, workshop cabinet, or dedicated tool rack can be suitable when the space is reasonably dry and offers enough room to prevent the plunger rod from being bent.
Before storage, make sure the exterior is clean and dry. Position the rod and release mechanism as recommended by the manufacturer.
If you intend to keep a partially used sealant cartridge, follow the cartridge manufacturer’s storage instructions. Some products permit temporary storage with a sealed nozzle, but storage life and sealing methods differ between materials.
Do not assume that keeping the cartridge installed indefinitely is appropriate for every product or tool. Check whether the remaining material could cure inside the nozzle or otherwise interfere with future use.
If the tool has a dedicated storage case, use it when practical. Keeping the caulking gun separate from loose fasteners, abrasive debris, and other materials can help prevent scratches and contamination.
Common Caulking Gun Maintenance Mistakes
Several simple mistakes can make routine maintenance more difficult.
Waiting too long to clean the tool: Fresh residue is usually easier to remove than cured material. Make cleaning part of the project rather than postponing it indefinitely.
Using the wrong solvent: A chemical that removes one type of sealant may damage the tool’s finish or plastic components. Always check product compatibility first.
Scraping aggressively: Excessive force can scratch the plunger rod, damage the frame, or interfere with moving parts.
Applying too much lubricant: Excess product can collect dust and create additional buildup instead of improving performance.
Ignoring a damaged release mechanism: If the rod does not retract correctly or the release lever no longer works as intended, the tool should be inspected before further use.
Storing the tool while wet: Moisture left on metal components can contribute to corrosion. Dry the tool before putting it away.
Avoiding these mistakes makes maintenance simpler and helps you recognize when cleaning is sufficient and when repair or replacement may be necessary.
Frequently Asked Questions
How often should I clean a caulking gun?
Clean visible residue after every project, preferably before the sealant cures. A more detailed inspection is useful whenever the tool has been used heavily, stored for an extended period, or exposed to moisture.
Can I use water to clean every type of caulking gun residue?
No. Water may be appropriate for some water-based products, but silicone, polyurethane, and other sealants can require different cleanup methods. Read the sealant label and follow the manufacturer’s instructions.
Should I oil the plunger rod after every use?
Not necessarily. Some manufacturers recommend occasional lubrication, while others specify different maintenance procedures. Clean the rod first and lubricate only when the tool’s instructions call for it.
Why is my caulking gun difficult to squeeze?
Possible causes include hardened sealant, dirt on the plunger rod, a damaged trigger mechanism, an unsuitable cartridge, or a problem with the release mechanism. Inspect the tool and cartridge safely before using additional force.
When should I replace a caulking gun?
Replacement may be appropriate if the frame is cracked, the rod is significantly bent, the release mechanism fails, or the tool cannot apply and release pressure reliably. For expensive or specialized equipment, consult the manufacturer about repair options first.
Final Maintenance Checklist
Before storing your caulking gun, confirm that:
- The cartridge has been removed or stored according to its instructions.
- Pressure has been released and the mechanism is in its recommended storage position.
- Fresh sealant residue has been removed.
- The plunger rod and accessible components are clean.
- The tool has been dried and inspected for damage.
- Any necessary lubrication follows the manufacturer’s guidance.
- The tool is stored in a dry, secure location.
A few minutes of routine maintenance can make a noticeable difference in how reliably a caulking gun works over time. By removing residue promptly, choosing compatible cleaning products, inspecting the mechanism, and storing the tool correctly, you can help keep it ready for future household repairs.
The most important principle is simple: clean the tool carefully, avoid unnecessary disassembly, and use the manufacturer’s instructions whenever a cleaning or repair method depends on the particular model or sealant.
