
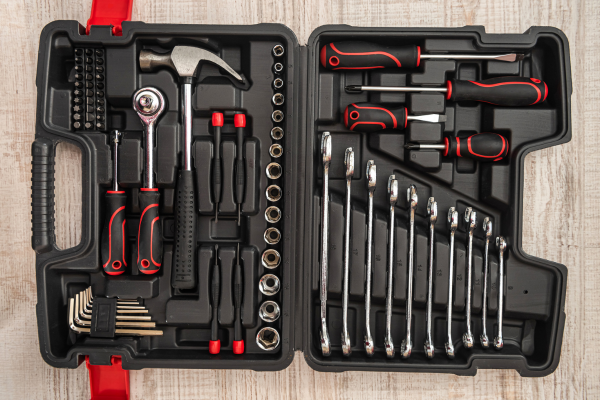
Tool storage cases protect valuable equipment from dust, moisture, impacts, and accidental damage, but the cases themselves also require regular maintenance. Over time, sawdust, metal particles, grease, oil, dirt, rust residue, and other workshop contaminants can accumulate inside drawers, compartments, foam inserts, and molded sections.
A dirty tool case can eventually become a source of contamination rather than protection. Dirt can transfer back onto clean tools, moisture can remain trapped against metal surfaces, and damaged or deteriorating interior materials can make storage less effective.
Cleaning a tool storage case correctly is therefore an important part of overall tool maintenance. However, different cases use different materials. Plastic, metal, fabric, molded foam, rubber, painted surfaces, and adhesives can all react differently to water and cleaning products.
The goal should be to remove contamination without damaging the case’s structure, protective lining, foam, compartments, or closures.
Why Tool Storage Cases Need Regular Cleaning
Tool cases are often exposed to the same conditions as the tools inside them.
A case used for woodworking may collect sawdust and resin. A case used for automotive work may accumulate grease, oil, brake dust, and metal particles. A construction toolbox may become contaminated with cement dust, mortar, and dirt.
Because the case is often closed after the work is finished, contaminants can remain trapped for long periods.
This can create several problems.
Fine dust can settle into hinges and latches. Oil can stain foam and fabric. Moisture can encourage corrosion on tools stored inside. Metal particles can accumulate in corners and compartments.
Regular cleaning prevents these contaminants from becoming a permanent part of the storage system.
Empty the Case Completely Before Cleaning
The first step is to remove everything from the case.
Do not try to clean around tools and accessories that are still inside.
Place the contents on a clean surface and inspect them separately.
This gives you an opportunity to identify damaged tools, rusty accessories, broken bits, and other items that may have contributed to the contamination.
It also prevents cleaning products or moisture from accidentally reaching tools that should remain dry.
Once the case is empty, inspect every compartment before beginning the cleaning process.
Remove Loose Dirt First
Loose dirt should generally be removed before applying water or cleaning products.
Turn the case upside down if appropriate and gently remove loose debris.
A soft brush can help clean corners, grooves, hinges, and molded compartments.
For certain cases, a vacuum cleaner may be useful for removing dry dust and small particles.
The objective is to remove as much loose contamination as possible before wiping the surfaces.
If you immediately introduce water to a large amount of dust, the result can become a muddy residue that is more difficult to remove.
Identify the Case Material
Before using any cleaning product, determine what the interior and exterior are made from.
Common materials include:
- Hard plastic
- Metal
- Fabric
- Molded foam
- Rubber
- Vinyl
- Composite materials
- Painted surfaces
- Adhesive-backed liners
A cleaner that is safe for hard plastic may not be appropriate for foam or fabric.
Similarly, excessive moisture can damage some liners or weaken adhesives.
If the case includes several materials, treat each area according to its requirements.
When manufacturer instructions are available, they should take priority over general cleaning advice.
Start With a Mild Cleaning Method
The safest approach is usually to begin with the least aggressive cleaning method that can remove the contamination.
For light dirt, a dry cloth or soft brush may be enough.
For more persistent contamination, a damp cloth with a mild cleaning solution may be appropriate for compatible surfaces.
Avoid immediately using strong solvents, abrasive powders, or aggressive degreasers.
A tool case does not need to look perfectly new to be clean and functional.
The objective is to remove contamination without damaging the material.
Be Careful With Foam Inserts
Foam inserts are common in tool cases because they help prevent tools from moving during transportation.
Foam can also absorb or retain contaminants.
If the foam is lightly dusty, use a gentle dry cleaning method first.
For stains or sticky residue, check whether the foam manufacturer or case manufacturer provides specific cleaning instructions.
Avoid soaking foam unnecessarily.
Excessive moisture can remain trapped inside the material for a long time, potentially creating odors, deterioration, or corrosion risks for tools placed back into the case.
Allow foam to dry completely before returning tools to storage.
Do Not Saturate Fabric Liners
Fabric-lined cases can absorb water and cleaning products.
Instead of soaking the lining, use a controlled amount of moisture on a cloth when appropriate.
Work gradually over contaminated areas.
Avoid leaving the case closed while the fabric is damp.
Open the case fully and allow adequate air circulation while it dries.
If the fabric develops mold, persistent odors, or severe contamination, the lining may require more specialized treatment or replacement.
Cleaning Molded Plastic Compartments
Hard plastic compartments are generally easier to clean than foam or fabric.
Start by removing loose dust and debris.
Then wipe the surfaces using an appropriate cloth and mild cleaning solution.
Use a soft brush to reach corners and textured areas.
Pay attention to recessed sections where small metal particles and dirt can accumulate.
After cleaning, dry the compartments thoroughly.
Avoid storing tools inside while the case is still damp.
Clean Metal Cases Carefully
Metal tool cases require additional attention because moisture can contribute to corrosion.
Remove dust and dirt using a dry method first.
For heavier contamination, use a compatible cleaner and a controlled amount of moisture.
Dry the case thoroughly after cleaning.
Inspect the inside for scratches, exposed metal, or signs of rust.
If bare steel is exposed, appropriate corrosion protection may be useful depending on the case design.
Do not apply oily products to surfaces where tools or hands will routinely contact them unless the product is specifically appropriate for that purpose.
Pay Attention to Hinges
Hinges are often overlooked during cleaning.
Dust, dirt, and grease can accumulate around them and eventually interfere with movement.
Use a small brush or cloth to remove loose debris.
If the hinge requires lubrication, use a suitable product in the appropriate quantity.
Avoid excessive lubricant because it can attract dust and turn the hinge into a sticky collection point.
After cleaning, open and close the case several times to make sure the hinge moves normally.
Clean Latches and Closures
Latches can also collect dirt and metal particles.
A dirty latch may become difficult to operate or fail to close properly.
Clean around the mechanism using a brush or cloth.
Check for broken plastic, bent metal, loose fasteners, or other damage.
Do not force a latch that has become stuck.
If the mechanism remains difficult to operate after cleaning, it may require repair or replacement.
A case that cannot close securely cannot provide reliable protection for the tools inside.
Do Not Ignore the Case Handle
The handle is one of the most important structural components of a portable tool case.
Inspect it after cleaning.
Look for:
- Cracks
- Loose fasteners
- Deformation
- Splits
- Excessive movement
- Damaged attachment points
A dirty handle can hide damage.
If a case is regularly used to carry heavy tools, a damaged handle should not be treated as a cosmetic problem.
Repair or replacement may be necessary before transporting the case again.
Remove Oil and Grease Carefully
Automotive and mechanical tools can leave significant amounts of grease and oil inside a storage case.
Begin by removing excess contamination with disposable or washable cloths.
Then use a cleaner appropriate for the case material.
Do not automatically use the strongest automotive degreaser available.
Some degreasers can damage plastic, rubber, foam, paint, or adhesives.
Test the product on an inconspicuous area if compatibility is uncertain.
After cleaning, remove any remaining cleaner residue and allow the case to dry completely.
Be Careful With Solvents
Solvents can be effective at removing stubborn grease and adhesive residue, but they can also damage storage cases.
They may soften plastic, dissolve adhesives, discolor surfaces, or degrade foam.
For this reason, avoid using solvents unless you know they are compatible with the material.
If a solvent is necessary, follow the product instructions and provide appropriate ventilation.
Do not mix different cleaning chemicals.
A mild cleaner that requires more effort is often preferable to an aggressive product that permanently damages the case.
Clean Cases Contaminated With Concrete Dust
Construction tool cases can accumulate cement and concrete dust.
Remove loose dust before introducing moisture.
Use a brush or vacuum where appropriate.
If the case material allows wet cleaning, use a controlled amount of water or mild cleaner.
Do not allow cement residue to remain in the case for long periods.
Fine mineral dust can become abrasive and may eventually spread onto tools.
After cleaning, dry the case completely before storing metal equipment inside.
Remove Sawdust and Wood Debris
Woodworking cases often accumulate sawdust.
Fine sawdust can enter hinges, latches, foam openings, and other small spaces.
Use a dry cleaning method first.
A soft brush or vacuum can remove much of the material without spreading it.
If the case also contains resin residue, deal with the sticky contamination separately using a material-compatible cleaning method.
Do not saturate sawdust-covered foam or fabric unnecessarily.
Clean Cases Used for Power Tools
Power tool cases can contain dust from drilling, cutting, sanding, or grinding.
Before cleaning, remove the battery and accessories from the case.
Clean the storage compartments without introducing unnecessary moisture to electrical equipment.
Inspect molded compartments for cracks or deformation.
If the case contains battery storage areas, keep them clean and dry.
Do not place batteries back into the case until both the battery and storage compartment are dry and suitable for storage.
Check for Moisture Before Closing the Case
One of the most important steps after cleaning is allowing the case to dry completely.
Do not close a damp case simply because the outside feels dry.
Moisture can remain inside foam, fabric, seams, hinges, and recessed areas.
Leave the case open in a clean, dry, well-ventilated area until all surfaces are completely dry.
This is particularly important before storing steel tools because trapped moisture can contribute to corrosion.
Avoid Direct Heat During Drying
It may be tempting to accelerate drying with a heater, heat gun, or other strong heat source.
This can damage plastic, foam, rubber, adhesives, and other materials.
Whenever possible, allow the case to air-dry naturally.
If additional airflow is necessary, use normal room ventilation or a suitable fan positioned safely.
Avoid excessive temperatures unless the manufacturer specifically provides a heat-based drying procedure.
Inspect the Interior After Cleaning
Once the case is clean and dry, inspect the interior carefully.
Look for:
- Cracked plastic
- Torn fabric
- Damaged foam
- Loose lining
- Rust
- Broken compartments
- Missing fasteners
- Damaged hinges
- Weak latches
- Water stains
- Deteriorated adhesives
Cleaning is a good opportunity to identify problems that could eventually affect tool protection.
A case with a broken compartment may allow a heavy tool to move during transportation and damage other equipment.
Replace Damaged Foam When Necessary
Foam eventually wears out.
Repeated tool removal can compress the material, while oil and chemicals can cause deterioration.
If the foam no longer holds tools securely, replacement may be more practical than attempting to clean it indefinitely.
Do not rely on deteriorated foam to protect precision equipment during transportation.
When replacing an insert, choose material appropriate for the intended tools and case.
Keep Tools Clean Before Returning Them
A clean storage case cannot remain clean if dirty tools are immediately returned to it.
Before putting tools back, inspect them individually.
Remove grease, dust, moisture, resin, and other contamination.
Make sure metal tools are dry.
Check batteries and electrical equipment according to their maintenance requirements.
This creates a clean storage cycle rather than simply moving dirt from one location to another.
Organize Tools After Cleaning
Cleaning is an excellent opportunity to reorganize the case.
Return each tool to its intended compartment.
Keep heavy tools from resting on delicate accessories.
Separate sharp tools from items that could be damaged.
Store bits and small accessories in dedicated sections when possible.
Good organization reduces movement during transportation and makes it easier to notice when something is missing.
Avoid Overloading the Case
A storage case should not be treated as a container that can hold an unlimited number of tools.
Overloading can place stress on hinges, latches, handles, compartments, and foam inserts.
It can also cause tools to press against one another.
If the case becomes difficult to close because of its contents, reorganize it rather than forcing the lid.
The case should close naturally and provide adequate protection for the equipment inside.
Keep the Case Away From Excessive Moisture
Storage conditions affect both the case and the tools inside it.
Avoid leaving tool cases on wet floors, outdoors, or in locations where condensation is common.
A dry, reasonably stable environment is preferable.
If a workshop is particularly humid, additional environmental controls may be useful.
The objective is not simply to keep the case clean but to maintain an environment that does not encourage corrosion or material deterioration.
Establish a Regular Cleaning Schedule
The ideal cleaning frequency depends on how the case is used.
A toolbox used every day in an automotive workshop may require frequent cleaning.
A household tool case used occasionally may need only periodic inspection.
A practical routine is to perform a quick cleanup whenever tools are returned after a particularly dirty job.
Then perform a more thorough case cleaning periodically.
This prevents contamination from accumulating to the point where restoration becomes difficult.
Common Cleaning Mistakes
Several mistakes can damage a tool storage case during cleaning.
One is using excessive water.
Another is applying strong solvents without checking material compatibility.
Soaking foam or fabric is another common problem.
Other mistakes include closing the case while it is still damp, using excessive heat for drying, forcing damaged latches, and ignoring cracked handles.
The best cleaning method is controlled and gradual.
When the Case Should Be Replaced
Cleaning and minor repairs cannot restore every damaged case.
Replacement may be appropriate when the case has:
- A cracked structural shell
- A severely damaged handle
- Broken latches
- Deformed hinges
- Deteriorated protective inserts
- Significant corrosion
- Compartments that no longer hold tools securely
A case exists to protect the tools inside.
If its structural integrity has been compromised, continuing to use it may expose expensive equipment to unnecessary damage.
A Practical Tool Case Cleaning Routine
A simple maintenance process can keep a storage case in good condition.
First: Empty the case completely.
Second: Remove loose dust and debris.
Third: Identify the materials used inside the case.
Fourth: Clean hard surfaces with an appropriate mild cleaner.
Fifth: Clean foam, fabric, and rubber areas using methods compatible with those materials.
Sixth: Inspect hinges, latches, handles, and compartments.
Seventh: Allow everything to dry completely.
Finally: Clean and inspect the tools before returning them to organized storage.
This process does not need to take long when performed regularly.
Final Thoughts
A clean tool storage case is an important part of good tool maintenance. The case protects equipment, but it can only do that effectively when its own interior remains clean, dry, and structurally sound.
Start by removing loose dirt before applying moisture or cleaning products. Use mild methods whenever possible and choose products according to the materials involved. Foam, fabric, plastic, rubber, metal, and painted surfaces may all require different treatment.
Most importantly, never rush the drying process. A damp case can create problems for metal tools even when the cleaning itself was successful.
Regularly inspect hinges, latches, handles, compartments, and protective inserts. Replace damaged components when necessary, and do not continue using a case that can no longer securely protect its contents.
With a simple cleaning routine and careful storage habits, a tool case can remain a useful protective system rather than becoming another source of dirt, moisture, and premature tool wear.
