
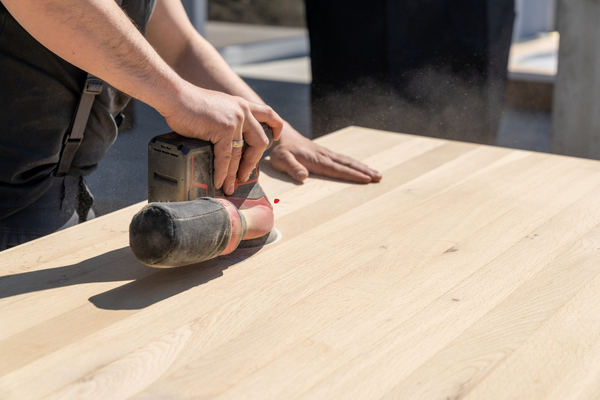
A cordless sander can save a great deal of time when preparing wood, removing old finishes, smoothing surfaces, or completing renovation projects. Because sanding creates large quantities of fine dust, however, the tool is exposed to one of the most persistent forms of workshop contamination.
Dust can collect around the sanding pad, ventilation openings, battery compartment, switches, housing seams, and dust-collection system. Over time, contamination can become compacted, airflow can be restricted, and components that were easy to inspect when the tool was clean can become hidden beneath layers of residue.
Keeping a cordless sander in good condition does not require complicated servicing. Most of the maintenance that a homeowner can reasonably perform consists of cleaning the external surfaces, keeping the dust-collection system in good condition, checking the sanding pad and accessories, inspecting the battery interface, and storing the tool in a clean and dry environment.
The most important rule is to control the dust at the source whenever possible. Cleaning the tool after every sanding session is useful, but reducing the amount of dust surrounding the machine in the first place makes a much bigger difference over time.
This guide explains how to clean, inspect, and store a cordless sander while identifying problems that should be left to qualified service personnel.
Why Sanders Need Frequent Maintenance
Sanding creates extremely fine particles.
Unlike larger wood chips produced by some cutting tools, fine sanding dust can remain airborne and settle into small spaces throughout a workshop.
A cordless sander can therefore accumulate dust around:
- Ventilation openings
- Trigger and controls
- Battery compartment
- Sanding pad
- Dust-collection ports
- Housing seams
- Grip surfaces
If the tool is used frequently, this contamination can build up rapidly.
Some dust also mixes with existing lubricant or residue and becomes more difficult to remove.
A clean tool is easier to inspect and less likely to develop hidden contamination problems.
Remove the Battery Before Cleaning
Before cleaning or inspecting a cordless sander, remove the battery according to the manufacturer’s procedure.
This is the first step of the maintenance routine.
Removing the battery:
- Prevents unintended startup
- Allows access to the battery compartment
- Makes the tool easier to handle
- Separates the power source during cleaning
Do not clean around the trigger, sanding pad, or electrical interface with the battery installed simply because you do not intend to press the switch.
Make battery removal part of the routine.
Allow the Sander to Cool
A sander can become warm during extended operation.
The motor and other internal components may retain heat after the tool is switched off.
Allow it to cool appropriately before beginning maintenance.
Do not pour water over a warm power tool in an attempt to cool it faster.
If the tool has become unusually hot, particularly if it also produced a burning smell or lost power, treat that as a potential fault rather than ordinary operating temperature.
Remove Loose Dust First
Start with dry cleaning.
Use a soft brush, cloth, or suitable vacuum to remove loose dust from the exterior.
Focus on:
- Ventilation openings
- Battery compartment
- Dust-collection port
- Trigger area
- Sanding-pad area
- Housing seams
- Grip
Removing loose dust before applying any damp cleaning method prevents particles from becoming a paste.
It also exposes damage that may otherwise remain hidden.
Use the Dust-Collection System Properly
A sander’s dust collection can significantly reduce contamination around the tool when the system is designed for that purpose.
Depending on the model, this may involve:
- A collection bag
- A collection box
- A vacuum connection
- A perforated sanding system
- Other manufacturer-approved equipment
Use compatible components.
A poorly fitted collection system may allow substantial dust to escape.
A clogged filter or full collection container can also reduce effectiveness.
Maintain the dust-collection components according to the manufacturer’s instructions.
Empty the Collection Container Regularly
Do not wait until the dust-collection container is completely packed.
A full container can reduce collection performance depending on the design.
After sanding, empty it according to the manufacturer’s instructions.
Inspect the container for:
- Tears
- Cracks
- Blockages
- Damaged fittings
- Excessive dust buildup
A damaged collection component may reduce its effectiveness and increase contamination around the tool.
Inspect the Filter
Some sanding systems use filters as part of their dust-management design.
A filter that becomes heavily loaded with fine particles may no longer perform as intended.
Follow the manufacturer’s instructions regarding:
- Cleaning
- Replacement
- Washing, if specifically permitted
- Inspection
Do not assume that every filter can be washed with water.
Some are designed to be replaced rather than cleaned.
Using the wrong cleaning method can damage the filter.
Never Block the Ventilation Openings
The tool needs appropriate airflow to manage heat.
Do not hold the sander in a way that covers important ventilation openings.
Do not place it on a dusty surface in a position that blocks the vents.
Do not wrap the operating tool in plastic or cloth to keep dust away.
Dust prevention must never interfere with cooling.
Use appropriate extraction and collection instead.
Clean the Sanding Pad
The sanding pad is a working component and can accumulate:
- Sanding residue
- Adhesive
- Wood dust
- Old abrasive material
- Resin
Inspect the pad after use.
Look for:
- Excessive wear
- Cracks
- Deformation
- Damaged attachment material
- Contamination
A worn pad can affect how evenly the abrasive contacts the workpiece.
Do not assume that a machine is performing poorly only because the motor has a problem.
The sanding pad and abrasive material should always be considered during troubleshooting.
Check Hook-and-Loop Sanding Pads
Some cordless sanders use hook-and-loop attachment systems.
These can collect fine dust between the hook material and abrasive backing.
Excessive contamination can make the connection less secure.
Clean loose debris carefully.
Avoid aggressively scraping the pad in a way that damages the attachment surface.
If the pad has lost substantial holding ability or is physically damaged, replacement may be appropriate.
Inspect the Abrasive Sheet
The abrasive itself is a consumable component.
A worn abrasive can make the sander work harder than necessary.
Look for:
- Clogged abrasive surface
- Excessive wear
- Torn backing
- Poor adhesion
- Uneven wear
If the abrasive is no longer cutting effectively, replace it.
Do not compensate for a worn abrasive by pressing harder.
Additional pressure can increase motor load, generate more heat, and reduce the quality of the finish.
Choose the Correct Sandpaper
The abrasive grade should be appropriate for the material and the task.
Using an unsuitable abrasive can increase workload or produce an undesirable surface.
Before sanding, consider:
- Material type
- Starting surface condition
- Desired finish
- Abrasive grade
- Sander specifications
Following the manufacturer’s recommendations can improve both performance and tool longevity.
Avoid Excessive Pressure
A cordless sander generally works best when it can move across the surface without unnecessary force.
Pressing excessively can:
- Increase motor load
- Generate more heat
- Reduce sanding efficiency
- Wear the abrasive faster
- Increase vibration
- Produce an uneven finish
Let the abrasive do the work.
When the tool appears to be struggling, inspect the abrasive and material rather than simply applying more pressure.
Clean Around the Trigger
The trigger or power switch can collect fine dust.
Use a soft brush or controlled vacuuming to remove visible material.
Avoid spraying cleaner directly into the switch.
Do not insert sharp tools into narrow gaps.
The control should move normally and operate consistently.
If it becomes sticky, intermittent, or difficult to operate, stop and investigate before returning the sander to demanding work.
Keep the Grip Clean
Rubberized and textured grips can accumulate dust and oil.
A clean grip is easier to hold and inspect.
Use a compatible cleaning method.
A lightly damp cloth may be suitable for some materials, but avoid excessive moisture and strong solvents unless the manufacturer confirms compatibility.
The objective is to remove residue without degrading the grip material.
Clean the Battery Compartment
Remove the battery and inspect the compartment.
Look for:
- Fine dust
- Dirt
- Moisture
- Corrosion
- Foreign objects
- Damaged contacts
Fine sanding dust can accumulate in surprisingly small spaces.
Remove loose particles using a controlled dry-cleaning method.
Avoid applying liquid or lubricant directly to the electrical contacts unless the manufacturer specifies an appropriate product.
Inspect the Battery Contacts
The battery connection should remain clean and undamaged.
Look for:
- Corrosion
- Burn marks
- Bent contacts
- Heavy dust
- Physical damage
Do not aggressively scrape contacts.
Do not use a random household chemical because it makes the metal look cleaner.
If an electrical contact is damaged or severely corroded, follow the manufacturer’s service instructions.
Inspect the Battery Separately
The battery needs its own inspection.
Check for:
- Cracks
- Swelling
- Deformation
- Leakage
- Burn marks
- Damaged terminals
Do not use or charge a visibly damaged battery simply to test it.
Follow the battery manufacturer’s safety instructions for abnormal conditions.
Clean the Housing
Once loose dust has been removed, wipe the external housing with a suitable cloth.
For ordinary contamination, a mildly damp cloth may be appropriate when the manufacturer permits it.
Do not soak the tool.
Do not spray cleaner into ventilation openings, switches, seams, or the battery compartment.
After cleaning, allow the tool to dry completely before storing it.
Avoid Strong Solvents
A cordless sander may contain several different materials:
- Plastic
- Rubber
- Paint
- Labels
- Metal
- Coatings
A solvent that works well on one surface may damage another.
Before using a chemical cleaner, verify that it is compatible with the materials involved.
For ordinary sanding dust, strong chemical products are usually unnecessary.
A brush, cloth, and suitable vacuum often provide better control.
Clean the Dust Port
The dust-collection port can accumulate compacted dust and residue.
Inspect the opening.
Remove loose contamination carefully.
If a hose or adapter connects to the port, inspect the connection for cracks or blockages.
A restricted dust path can reduce collection effectiveness and increase contamination around the tool.
Do not force debris deeper into the port.
Inspect the Base and Moving Components
Depending on the type of sander, the base may contain moving or vibrating components.
Inspect accessible areas for:
- Dust buildup
- Cracks
- Deformation
- Loose components
- Excessive wear
Do not dismantle the mechanism simply to remove a small amount of dust.
Internal service should follow the manufacturer’s procedure.
Listen for Changes in Sound
A cordless sander typically develops a familiar operating sound.
Pay attention when that sound changes.
Warning signs can include:
- Grinding
- Rattling
- Squealing
- Intermittent operation
- Sudden changes in pitch
A worn abrasive can increase workload without producing a mechanical failure.
But unusual noise from the machine itself may indicate a mechanical problem.
If the sound is clearly abnormal, stop and investigate.
Watch for Excessive Vibration
Some vibration is inherent to sanding tools.
The important thing is a noticeable change from normal behavior.
Excessive vibration can result from:
- Damaged sanding pad
- Poorly attached abrasive
- Unbalanced components
- Mechanical wear
- Physical damage
Do not try to solve unusual vibration simply by pressing the tool harder against the workpiece.
Inspect the abrasive, pad, and machine.
Monitor Heat
Some warmth is expected during extended sanding.
Excessive heat is different.
Watch for:
- Rapidly increasing temperature
- Burning smell
- Smoke
- Sudden loss of power
- Repeated thermal shutdown
If these symptoms appear, stop using the tool.
Do not cool it with water.
Allow it to cool according to the manufacturer’s instructions and investigate the cause.
Dust Can Contribute to Heat Problems
Heavy contamination around ventilation openings can interfere with airflow on some tool designs.
This is especially relevant for sanders because their working environment is naturally dusty.
Use dust extraction.
Clean the tool after use.
Keep vents reasonably clear.
If overheating continues despite appropriate cleaning and workload, there may be another problem requiring service.
Do Not Use the Sander Without the Correct Abrasive
The abrasive is part of the sanding system.
Using an incorrectly sized or poorly attached sheet can produce uneven contact and unnecessary vibration.
Follow the manufacturer’s recommended abrasive dimensions and attachment method.
Do not modify abrasive sheets in ways that block ventilation or interfere with the tool’s intended operation.
Avoid Sanding Without Dust Control When Practical
Not every sanding job requires a sophisticated extraction system.
But whenever the work produces significant dust, appropriate collection can reduce contamination.
This protects:
- Tool
- Workshop
- Workpiece
- User
Dust control also makes post-project cleaning considerably easier.
The less airborne dust surrounding the machine, the less dust it has an opportunity to collect.
Store the Sander Clean
Once the project is finished, do not immediately place a dusty sander into its case.
Remove loose contamination first.
Clean the dust-collection system.
Inspect the pad.
Check the battery compartment.
Make sure the tool is dry.
Then place it in the appropriate storage location.
This simple sequence prevents dust from remaining trapped around the equipment for weeks or months.
Keep the Storage Case Clean
A case full of sanding dust will immediately contaminate a freshly cleaned tool.
Vacuum or brush loose particles from:
- Corners
- Tool compartments
- Foam inserts
- Accessory sections
- Lid surfaces
Allow any damp areas to dry completely.
If the case has a filter or dust-management feature, maintain it according to the manufacturer’s instructions.
Protect Sanding Accessories
Spare sanding discs and sheets can also collect dust and moisture.
Store them in an organized, dry container.
Keep abrasive materials away from:
- Water
- Oil
- Solvents
- Excessive heat
- Unnecessary deformation
Abrasives that become contaminated or damaged may not perform correctly.
Separate Used and New Abrasives
Keeping new sanding sheets away from worn or contaminated ones can reduce confusion.
Create a simple arrangement for:
- New abrasives
- Partially used abrasives
- Worn abrasives
This makes it easier to select the correct material before the next project.
It also prevents you from storing contaminated abrasive material together with clean stock.
Protect the Sander From Humidity
A humid garage can create additional problems for power tools.
Exposed metal parts may corrode.
Electrical contacts can become contaminated.
Condensation may occur when temperatures change.
Store the sander in a dry area away from:
- Damp floors
- Leaking walls
- Standing water
- Direct rain
- Wet cleaning equipment
A suitable enclosed case can provide additional protection when the equipment is clean and dry.
Use Desiccant as Supplemental Protection
For smaller enclosed cases, a suitable desiccant can help reduce moisture.
However, it is not a substitute for storing the sander in a reasonably dry environment.
Do not place a wet tool into a closed case and expect silica gel to solve the problem.
Dry the equipment first.
Then use desiccant as an additional protective measure when appropriate.
Avoid Storing the Battery in Extreme Conditions
Follow the battery manufacturer’s storage instructions.
Protect the battery from:
- Excessive heat
- Extreme cold
- Moisture
- Direct sunlight
- Physical damage
Do not leave it in a vehicle for long periods during extreme weather.
The battery and sander may have different storage requirements, so treat them separately.
A Five-Minute Post-Sanding Routine
After finishing a project:
1. Remove the battery.
2. Allow the tool to cool.
3. Empty the dust collection.
4. Brush or vacuum loose dust.
5. Clean the ventilation openings.
6. Inspect the sanding pad.
7. Check the battery compartment.
8. Inspect the tool for cracks or damage.
9. Clean the storage case.
10. Store the tool and battery according to their manufacturer’s instructions.
This routine takes little time and can prevent large amounts of accumulated contamination.
A More Thorough Periodic Inspection
For a sander that is used regularly, perform a deeper inspection periodically.
Clean the exterior thoroughly.
Inspect the pad.
Check the dust-collection system.
Inspect vents.
Check the trigger.
Inspect the battery compartment.
Look for corrosion.
Check the case.
Observe whether operating noise, heat, or vibration has changed.
This deeper inspection is especially valuable if the sander is used frequently in a workshop.
When the Sander Needs Professional Service
External cleaning cannot repair every problem.
Consider manufacturer-supported or qualified service when the tool develops:
- Persistent overheating
- Burning smell
- Smoke
- Electrical problems
- Severe vibration
- Abnormal mechanical noise
- Intermittent operation
- Significant loss of performance
- Major physical damage
Do not continue using a tool with serious symptoms simply because it still turns on.
Do Not Open the Housing Unnecessarily
Fine dust may make you want to open the tool and clean the inside.
Avoid doing this casually.
Internal components can include:
- Motor
- Electronic controls
- Wiring
- Bearings
- Gears
- Switch mechanisms
Disassembly can introduce additional problems and may interfere with manufacturer service arrangements.
If internal cleaning is needed, use the manufacturer’s procedure or appropriate professional service.
When to Replace the Sander
Replacement may be more practical when:
- The housing is severely damaged
- The motor or transmission has failed
- Repair costs approach replacement cost
- Replacement parts are unavailable
- Reliable operation cannot be restored
For a quality professional tool, repair may make more sense.
For a low-cost consumer tool with substantial damage, replacement can be simpler.
Consider the equipment’s value, age, repairability, and intended future use.
Common Maintenance Mistakes
Pressing too hard while sanding
This increases workload and heat.
Continuing with clogged abrasive
A worn abrasive makes the machine work harder.
Ignoring the dust-collection system
Poor collection increases contamination.
Blowing maximum-pressure air into the vents
This can force dust deeper into the housing.
Spraying cleaner into switches or vents
Liquid may reach internal components.
Storing a dusty tool immediately
Contamination remains trapped in the case.
Storing wet equipment in a closed case
Moisture can become trapped.
Using strong solvents on rubberized grips
They may damage the material.
Ignoring unusual vibration
A damaged pad or mechanical issue may be involved.
Continuing after a burning smell
This can worsen an existing problem.
Final Thoughts
A cordless sander spends much of its working life surrounded by fine dust, which makes regular cleaning and sensible storage especially important.
The best time to maintain the tool is immediately after the sanding project ends. Remove the battery, allow the machine to cool appropriately, empty the dust-collection system, and remove loose dust before putting the tool away.
Pay particular attention to ventilation openings, the sanding pad, dust port, battery compartment, trigger, and housing.
The sanding accessory itself deserves attention too. A clogged, worn, damaged, or incorrectly attached abrasive can make the machine work harder and can sometimes create symptoms that appear to be caused by the motor.
Avoid excessive pressure during use. Let the abrasive perform the cutting action rather than forcing the machine against the workpiece.
Dust collection is an important part of maintenance. A clean extraction system reduces the amount of airborne material reaching the sander and makes the end-of-project cleanup easier.
Storage conditions also matter. Keep the tool dry, protect it from humidity and condensation, and store batteries according to their specific manufacturer instructions.
Do not flood the sander with water, spray random chemicals into openings, or use aggressive compressed air simply to make the housing look clean.
If the tool develops unusual vibration, persistent overheating, burning smell, smoke, electrical problems, or abnormal mechanical noise, stop treating it as a cleaning issue and follow the appropriate service procedure.
A well-maintained sander does not need to look perfect.
It needs to remain clean enough to inspect, mechanically sound, properly ventilated, correctly equipped, and stored in conditions that do not encourage unnecessary deterioration.
Those habits can extend the useful life of the tool while also making your sanding work cleaner, more predictable, and easier to prepare for the next project.
Related Guides
- How to Clean a Cordless Drill After Working in Dust
- How to Keep Dust From Building Up Inside Power Tools
- How to Store Cordless Power Tools Between Projects
- Why Power Tools Overheat and What You Should Check First
- How to Protect Power Tools From Humidity in a Garage
FAQ
How often should I clean a cordless sander?
Clean it after dusty sanding projects and whenever visible contamination accumulates. A sander used frequently in a workshop should receive more regular inspection than one used only occasionally.
Should I remove the battery before cleaning a sander?
Yes. Remove the battery according to the manufacturer’s procedure before cleaning or inspecting the tool.
Can I wash a cordless sander with water?
Do not assume that a cordless sander can be washed or rinsed. Water can reach electrical and mechanical components. Use controlled cleaning methods and follow the manufacturer’s instructions.
How do I keep sanding dust out of the sander?
Use the tool’s compatible dust-collection system when available, keep the work area under control, clean the sander after use, and avoid directing high-pressure air into the ventilation openings.
Why does my sander get hot?
Some heat is normal during operation. Excessive heat can result from excessive pressure, worn abrasive, restricted airflow, heavy dust contamination, mechanical problems, or other conditions. Persistent overheating deserves investigation.
Can a clogged sanding sheet cause overheating?
A heavily worn or clogged abrasive can increase the effort required from the tool. Replacing the abrasive and using appropriate pressure can reduce unnecessary workload.
Should I lubricate my cordless sander?
Do not automatically lubricate the entire tool. Follow the manufacturer’s maintenance recommendations for any components that actually require lubrication. Excess oil can attract sanding dust.
How should I store a cordless sander?
Clean the tool, remove the battery according to manufacturer instructions, make sure the equipment is dry, protect it from dust and humidity, and store it in a suitable case or cabinet.
Can silica gel help protect a cordless sander?
A suitable desiccant can provide supplemental moisture control inside an enclosed case. It does not replace proper drying or environmental humidity control.
What should I do if my sander starts vibrating excessively?
Stop using it and inspect the abrasive, sanding pad, attachment system, and tool for visible damage. If the vibration continues or appears to originate from the machine itself, consult the manufacturer’s service guidance.
What does a burning smell from a sander mean?
A burning smell can indicate overheating, excessive workload, electrical problems, mechanical friction, or another fault. Stop using the tool and follow the manufacturer’s troubleshooting or service instructions.
Should I open my sander to clean internal dust?
Do not open the housing simply for routine cleaning unless the manufacturer provides an appropriate procedure. Significant internal contamination or abnormal operation may require qualified service.
When should I replace a cordless sander?
Consider replacement when the tool has serious structural damage, major mechanical or electrical failure, unavailable repair parts, or repair costs that are no longer reasonable compared with replacement.
