
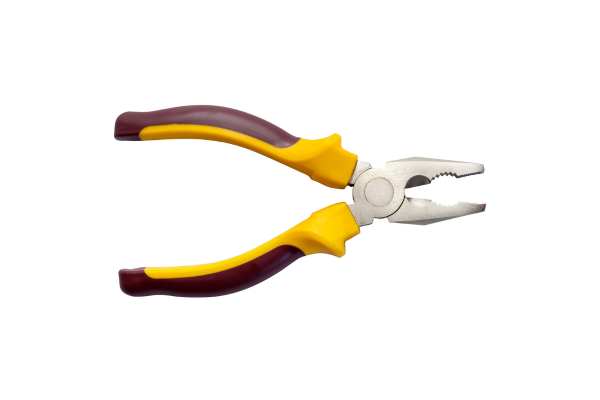
A hand tool with a loose joint can be frustrating to use. Pliers may develop noticeable movement between the two handles, an adjustable mechanism may feel less precise than it once did, or a folding tool may no longer hold its components as firmly as before.
It is easy to assume that a loose joint simply needs to be tightened. Sometimes that is true. However, excessive movement can have several causes, including normal wear, loose hardware, contamination, corrosion, deformation, or material loss.
Tightening a component without understanding the reason for the movement can sometimes make the situation worse. A joint may have been designed to move freely, or the looseness may be caused by wear that cannot be corrected simply by applying more force to a fastener.
The safest approach is to inspect the tool first, identify where the movement is occurring, clean the mechanism if necessary, and determine whether the problem is adjustment-related or a sign of genuine wear.
This guide explains why hand-tool joints become loose, what you can check at home, which problems may be maintenance-related, and when replacement or professional evaluation makes more sense.
What Does a “Loose Joint” Actually Mean?
Not every moving joint is supposed to be rigid.
Pliers, hinges, adjustable tools, folding tools, and other mechanisms are designed to move. Some amount of clearance may be necessary for that movement.
The important question is whether the amount of movement remains consistent with the tool’s intended design.
A joint can become problematic when you notice:
- Excessive side-to-side movement
- Unusual clicking
- Visible gaps
- Poor alignment
- Movement between components that previously remained stable
- Difficulty controlling the working surfaces
- A mechanism that feels noticeably different from before
The change in behavior is often more informative than the absolute amount of movement.
An old pair of pliers may always have had a small amount of play.
That does not necessarily mean it is defective.
If the same pliers suddenly develop significantly more movement, however, the change deserves investigation.
Why Hand-Tool Joints Become Loose
There are several common causes.
Loose hardware
A pivot screw, nut, rivet, or other fastening component may have changed position or become less secure.
Wear
Repeated movement can gradually wear mating surfaces.
Corrosion
Rust can remove material or alter the surfaces that make up the joint.
Contamination
Dirt can interfere with seating and make a joint behave differently.
Deformation
Excessive force can bend or distort components.
Material loss
Severe corrosion or long-term wear can remove enough material to create excessive clearance.
Previous repairs
A poorly executed repair can create instability or unusual movement.
The correct solution depends on the actual cause.
Start With a Visual Inspection
Before trying to tighten anything, inspect the tool carefully.
Look at the joint from several angles.
Check for:
- Rust
- Dirt
- Cracks
- Loose hardware
- Bent components
- Uneven gaps
- Damaged threads
- Missing fasteners
- Previous repairs
Then move the mechanism gently.
Avoid forcing it.
You are trying to understand where the movement originates.
For example, if the two handles of a pair of pliers move sideways relative to each other, the pivot may be worn.
If a screw visibly turns or shifts, loose hardware may be the more likely explanation.
If the joint catches at a particular point, deformation or contamination may be involved.
Check Whether the Movement Is Intended
Some tool designs deliberately incorporate movement.
A common example is the end hook of a tape measure, which can move slightly as part of its design.
An adjustable wrench also has a moving jaw by definition.
A folding tool must have clearance around its pivots.
Before deciding that a component is loose, determine whether the movement is normal for that tool.
Manufacturer documentation can be especially useful here.
If the manufacturer’s instructions or diagrams show that a component is designed to move, do not attempt to immobilize it.
Maintenance should restore intended function, not eliminate every form of movement.
Check for Loose Fasteners
If the joint uses a screw, bolt, nut, or other adjustable fastener, inspect it.
Look for visible changes such as:
- A gap that was not present before
- A fastener that sits unusually high
- Evidence of rotation
- Missing washers
- Damaged threads
If the manufacturer provides an adjustment procedure, follow it.
Do not simply tighten a fastener as much as possible.
Over-tightening can restrict normal movement, damage threads, deform components, or create excessive friction.
The correct amount of adjustment depends on the tool’s design.
Riveted Joints Are Different
Many traditional hand tools use rivets rather than adjustable screws.
A riveted joint cannot necessarily be tightened in the same manner as a bolt or screw.
If a riveted plier pivot has developed significant play, the problem may involve wear in the rivet or surrounding material.
Do not strike the rivet repeatedly with a hammer in an attempt to tighten it unless you are following a repair method specifically appropriate to that tool.
Improperly peening a pivot can deform the mechanism and make movement worse.
For quality tools, professional repair may be preferable.
For inexpensive tools with substantial wear, replacement may be the more practical option.
Clean the Joint Before Diagnosing It
Dirt and grease can make a joint appear loose or behave unpredictably.
Before deciding that the mechanism is worn, clean accessible contamination.
Remove:
- Dust
- Metal particles
- Hardened grease
- Paint residue
- Adhesive
- Soil
Use an appropriate cleaning method for the tool’s materials and finish.
A soft brush can be useful around pivots.
For heavier contamination, a compatible cleaner or degreaser may be appropriate.
Avoid flooding enclosed mechanisms unnecessarily.
After cleaning, dry the tool and reassess the movement.
Sometimes a dirty mechanism feels abnormal simply because contamination is interfering with normal contact.
How Lubrication Can Hide the Real Problem
Lubrication can temporarily make a worn joint feel smoother.
That does not mean the joint has been repaired.
Suppose a pivot has excessive clearance because its surfaces have worn.
Adding oil may reduce friction, making the movement seem quieter or smoother.
The underlying looseness remains.
That is why lubrication should generally come after inspection and cleaning.
If the tool is already clean and the manufacturer recommends lubrication, apply an appropriate amount.
Then evaluate the movement again.
Do not use lubricant as a way to conceal excessive mechanical play.
Check for Side-to-Side Movement
Side-to-side movement is particularly useful when inspecting pliers and similar tools.
Hold the tool securely and observe the relationship between the two halves.
A small amount of movement may be normal depending on the design.
Significant lateral movement can indicate:
- Pivot wear
- Loose hardware
- Material loss
- Deformation
Do not intentionally overload the tool to test this.
Normal hand pressure and careful observation are generally sufficient for a basic inspection.
If the movement is substantial enough to affect jaw alignment or control, the tool deserves further attention.
Inspect the Working Surfaces
A loose joint is not an isolated issue.
It can affect the working surfaces of the tool.
With pliers, excessive pivot movement can change how the jaws meet.
With cutting pliers, this can affect the alignment of the cutting edges.
With adjustable mechanisms, excessive movement can affect the position of the working jaw.
With folding tools, looseness can affect how components align.
After identifying a loose joint, therefore, inspect the tool’s working surfaces as well.
Ask whether the movement is actually changing the way the tool performs.
Loose Pliers: What to Check
Pliers are one of the clearest examples.
Inspect the pivot.
Check for rust and contamination.
Look for loose or damaged hardware.
Open and close the pliers gently.
Then examine the jaws when they meet.
The important questions are:
Do the jaws align properly?
Is the pivot excessively loose?
Does the tool move laterally?
Has the problem changed recently?
Are the handles or jaws damaged?
If cleaning restores normal movement and the jaws remain properly aligned, the problem may have been contamination.
If the pivot remains excessively loose, wear or damage may be involved.
Loose Adjustable-Wrench Mechanisms
Adjustable wrenches can develop looseness around the moving jaw.
Inspect the adjustment screw and thread.
Check whether the moving jaw remains controlled when you change its position.
Excessive play may result from:
- Worn threads
- Damaged adjustment components
- Corrosion
- Deformation
- Accumulated debris
Cleaning can remove contamination.
Lubrication can help appropriate mechanisms move smoothly.
Neither will restore severely worn threads.
If the moving jaw does not remain adequately controlled, the wrench may no longer be suitable for reliable work.
Loose Hinges
A hinge can develop movement as its pivot wears.
Start by checking whether the hinge contains an adjustable fastener or is permanently riveted.
Clean the hinge.
Inspect for corrosion.
Check whether the movement is evenly distributed or concentrated in one direction.
Excessive movement may indicate wear in the hinge pin or surrounding material.
Do not simply tighten a hinge until it becomes stiff.
A hinge needs enough clearance to move through its intended range.
The objective is controlled movement, not zero movement.
Loose Folding Tools
Folding tools can become loose as pivot components wear.
This is particularly noticeable when a blade, driver, file, or other component no longer remains stable in its intended position.
Check:
- Pivot hardware
- Locking mechanism
- Washers or spacers
- Corrosion
- Contamination
The lock is particularly important.
A folding tool with a compromised locking mechanism should not be treated as a simple lubrication problem.
If the tool does not hold its component securely in the intended position, stop using that function until the problem has been addressed.
Loose Handles Are a Different Problem
A loose handle should not be confused with a loose joint.
On a hammer, for example, movement between the head and handle can be a significant concern.
On pliers, a loose grip covering may be mostly cosmetic, while movement of the structural handle can be much more serious.
Determine whether the movement affects:
The working mechanism
or
The structural connection.
Structural looseness deserves greater caution.
Do not assume that adhesive or tape is an appropriate permanent repair.
Follow the tool manufacturer’s repair guidance or replace the tool when necessary.
How Corrosion Can Create Looseness
Corrosion can affect a joint in several ways.
It can remove material.
It can roughen surfaces.
It can cause components to become misshapen.
It can weaken fasteners or attachment points.
As corrosion progresses, the original fit between components may change.
This is why a tool that develops both rust and looseness deserves careful inspection.
Removing the visible rust does not automatically restore the original dimensions.
If significant metal has been lost, the joint may remain loose even after the surface looks clean.
Deep Pitting Is a Warning Sign
Surface rust and deep pitting are different.
A small area of orange discoloration can often be treated without affecting the structure of the tool.
Deep pits indicate that corrosion has already removed material.
If those pits occur around a pivot or other mechanically important surface, they may contribute to excessive clearance.
Do not grind deeply into the joint simply to remove all visible pitting.
You may remove more sound material and make the fit worse.
Check for Deformation
Tools can become loose because a component was bent.
This can happen when a tool is overloaded or used for an unintended purpose.
For example, excessive force can distort a wrench, plier handle, or adjustable mechanism.
Look for unusual angles or surfaces that no longer align as expected.
A bent component should not automatically be straightened by force.
Cold-bending a hardened tool can create additional damage and may affect its future reliability.
Watch for Damage From Previous Repairs
Used tools sometimes have repairs that are not immediately obvious.
Look for:
- Non-original screws
- Welds
- Grinding marks
- Drilled holes
- Replacement components
- Unusual fasteners
- Excessive filing
A previous repair does not automatically make the tool unsafe.
But it provides important context.
If the tool is loose because someone previously modified the pivot, determine whether the repair method is appropriate before continuing to use it.
When Tightening Is Appropriate
Tightening can be a reasonable solution when:
- The tool uses an adjustable fastener
- The fastener is genuinely loose
- The manufacturer permits adjustment
- The joint remains properly aligned
- The correct adjustment can be made without excessive force
Make small adjustments rather than turning a fastener dramatically.
After each adjustment, test normal movement.
The mechanism should remain functional.
If tightening makes the joint difficult to operate, you have gone too far or the underlying problem may be different.
Why Over-Tightening Is a Mistake
It is tempting to believe that the tighter a joint becomes, the better.
That is not true.
Over-tightening can:
- Restrict movement
- Increase friction
- Damage threads
- Deform components
- Increase wear
- Cause premature failure
A moving joint requires controlled clearance.
The goal is not to eliminate all movement.
The goal is to restore the intended relationship between the components.
When You Should Not Tighten Anything
Do not improvise tightening when:
- The joint is riveted
- The fastener is damaged
- The mechanism is specialized
- You cannot determine the original adjustment
- The tool has structural damage
- The joint contains a safety-critical locking mechanism
- You are unsure how the mechanism is intended to work
In these situations, manufacturer documentation or professional service can be safer than experimentation.
Can Lubrication Reduce Joint Wear?
Appropriate lubrication can reduce friction in mechanisms designed to receive lubricant.
However, lubrication should not be viewed as a way to prevent every form of wear.
A clean, correctly adjusted mechanism can still wear over time through normal use.
The purpose of lubrication is to support the surfaces where the product is appropriate.
Use the specific lubricant recommended by the manufacturer when available.
Apply only the necessary amount.
Wipe away excess.
An oily joint covered in dust is not necessarily better maintained than a clean joint with the correct amount of lubricant.
Check the Tool After Cleaning and Adjustment
Once you have cleaned or adjusted the joint, inspect the tool again.
Look at:
- Alignment
- Movement
- Working surfaces
- Fasteners
- Corrosion
- Handles
Then operate the mechanism normally.
Do not immediately subject it to maximum force just to see whether it survives.
The first objective is simply to confirm that the tool behaves as intended during ordinary operation.
If abnormal movement remains, stop and reassess.
When the Joint Is Probably Worn Out
A joint may be beyond practical maintenance when:
- Clearance remains excessive after cleaning
- The pivot surfaces are visibly worn
- Threads are damaged
- Components are deeply pitted
- The tool no longer aligns correctly
- Hardware cannot maintain proper adjustment
- The mechanism repeatedly loosens
- Structural material has been lost
At this point, continuing to tighten or lubricate the mechanism can create false confidence.
Consider professional repair when the tool is valuable or specialized.
For inexpensive tools, replacement may be more practical.
When Replacement Makes More Sense
Replacement can be appropriate when:
- The tool is inexpensive and widely available
- Replacement parts are unavailable
- Structural wear is severe
- The working surfaces are compromised
- The joint affects safe operation
- Repair would require extensive modification
- The repair result would remain uncertain
The fact that a tool can technically be repaired does not necessarily mean repair is worthwhile.
Reliability should be part of the decision.
A Simple Five-Minute Loose-Joint Check
When a tool develops unusual movement, use this basic process.
Step 1: Inspect
Look for cracks, rust, deformation, and loose hardware.
Step 2: Clean
Remove visible dirt and contaminated grease.
Step 3: Dry
Make sure moisture is not interfering with the inspection.
Step 4: Test
Move the mechanism gently through its normal range.
Step 5: Check alignment
Inspect the working surfaces.
Step 6: Adjust only when appropriate
Follow the manufacturer’s procedure if an adjustable fastener is provided.
Step 7: Reassess
Determine whether the problem has actually improved.
Step 8: Decide
Continue using, repair appropriately, or replace the tool based on its actual condition.
A Practical Example: Loose Combination Pliers
Imagine a pair of combination pliers that recently developed noticeable side-to-side movement.
Start by cleaning the pivot.
Remove old grease and dirt.
Dry the mechanism.
Inspect the pivot hardware.
Move the handles gently.
If the movement is still substantial, examine the jaws.
Do they remain aligned?
If the jaws no longer meet properly and the pivot shows visible wear, lubrication will not restore the original condition.
The tool may need replacement or professional repair.
This example illustrates why diagnosis is more important than immediately reaching for oil.
A Practical Example: Loose Adjustable Wrench
Suppose an adjustable wrench develops noticeable movement around its moving jaw.
First inspect the adjustment mechanism.
Clean the screw and exposed threads.
Check for corrosion.
Move the jaw carefully.
If the thread remains rough, clean and lubricate it according to the tool’s maintenance guidance.
If the jaw remains excessively loose despite proper cleaning, inspect for worn threads or damaged components.
A clean but worn adjustment mechanism may still be unreliable.
A Practical Example: Loose Folding Tool
A folding tool that no longer holds its blade or accessory firmly requires more than lubrication.
Check the locking system.
If the lock does not engage properly, stop using that function.
Clean the pivot if contamination is present.
Inspect the pivot hardware.
If the lock or structural components are damaged, follow the manufacturer’s service procedure or replace the tool.
A loose folding component can create a significant control problem.
Preventing Joint Looseness
Prevention begins with proper use.
Do not overload tools beyond their intended application.
Keep mechanisms clean.
Remove contamination before adding lubricant.
Avoid excessive lubrication.
Store tools properly.
Prevent corrosion.
Inspect moving parts periodically.
These habits reduce contamination and help you notice wear before excessive looseness develops.
Avoid Using Tools Beyond Their Design
Many joint problems begin with misuse.
Examples include:
Using pliers as a hammer.
Using an adjustable wrench as a striking tool.
Using a screwdriver as a pry bar.
Using a folding knife or tool for tasks it was not designed for.
Using excessive force on a mechanism that is intended for controlled adjustment.
These actions can distort components and accelerate wear.
The simplest way to maintain a tool is often to use the right tool for the job.
Keep Joints Clean in Dusty Environments
Dusty workshops can accelerate contamination.
Fine particles mix with lubricant and form abrasive residue.
Tools used around:
- Wood dust
- Sand
- Metal particles
- Drywall dust
- Soil
may need more frequent cleaning.
This does not mean they need to be lubricated more frequently.
It means the contamination should be removed before it interferes with movement.
Humidity Can Make Joint Problems Worse
A humid environment can contribute to both corrosion and contamination.
Rust can affect pivots and threads.
Moisture can also remain trapped in dirty joints.
For tools stored in humid garages, combine joint maintenance with environmental moisture control.
Keep tools dry.
Inspect storage conditions.
Use suitable corrosion protection where appropriate.
Do not rely on oil alone to solve a humidity problem.
How to Store Tools With Moving Joints
Store pliers, folding tools, adjustable wrenches, and similar equipment in a way that prevents unnecessary impacts.
Avoid placing heavy tools on top of delicate mechanisms.
Keep tools clean before storage.
Do not store them wet.
Maintain enough organization that you can easily inspect the joints.
A well-organized toolbox helps you identify changes in movement before the tool becomes difficult to use.
Common Mistakes
Tightening before inspecting
You may hide the real cause.
Adding oil to dirty mechanisms
This can trap contamination.
Removing metal to eliminate every trace of rust
You can make the joint looser.
Forcing stuck components
This may cause deformation.
Eliminating all normal movement
Some clearance is necessary for mechanisms to work.
Ignoring working-surface alignment
A loose pivot can affect the actual performance of the tool.
Continuing to use a damaged mechanism
Cleaning cannot restore structural integrity.
Assuming a famous tool cannot wear out
Even high-quality tools experience wear.
Final Thoughts
A loose joint does not automatically mean that a hand tool is worn out.
Sometimes the cause is simple: loose hardware, dirt, old grease, or another contamination problem. In other cases, looseness indicates something more significant, such as pivot wear, damaged threads, corrosion, deformation, or material loss.
The safest approach is to inspect before adjusting.
Start by determining whether the movement is actually abnormal for the tool’s design. Clean the mechanism and remove contamination before adding lubricant. If the tool uses an adjustable fastener, follow the manufacturer’s maintenance procedure rather than tightening it as far as possible.
After cleaning and adjustment, check the working surfaces and overall alignment.
If excessive movement remains, investigate wear or structural damage.
Most importantly, do not try to solve every loose-joint problem with more oil or more force. Neither can restore metal that has already been lost or repair a component that has been damaged.
A reliable tool should move as intended while maintaining the control and alignment necessary for its job.
When that condition can no longer be achieved through appropriate maintenance, replacement or professional repair is often the correct decision.
Related Guides
- How to Maintain Pliers and Keep Their Joints Moving Smoothly
- How to Maintain an Adjustable Wrench
- How to Tell Whether a Dirty Tool Needs Cleaning, Lubrication, or Replacement
- When Should You Replace a Hand Tool Instead of Repairing It?
- How to Protect Tools From Rust Without Making Them Oily
FAQ
Why do my pliers develop side-to-side movement?
Possible causes include normal design clearance, a loose pivot, wear, corrosion, or material loss. Clean and inspect the joint before deciding whether adjustment or replacement is necessary.
Should I tighten a loose plier pivot?
Only when the tool uses an adjustable pivot and the manufacturer provides an appropriate adjustment procedure. Riveted pivots should not automatically be hammered tighter.
Can oil fix a loose joint?
Oil can reduce friction in an appropriate mechanism, but it cannot repair excessive clearance caused by wear, corrosion, or material loss.
Why is my adjustable wrench loose even after cleaning?
The adjustment screw or threads may be worn, damaged, or corroded. Cleaning can remove contamination, but it cannot restore metal that has been lost.
Is some movement in a tool joint normal?
Yes. Many moving mechanisms require controlled clearance. The important consideration is whether the movement is consistent with the tool’s intended design and whether it affects reliable operation.
Can rust cause a tool joint to become loose?
Yes. Corrosion can remove material or change the shape of mating surfaces, increasing clearance between components.
Should I use a wire brush on a loose tool joint?
A wire brush may be unnecessarily aggressive for many finished tools. Start with a soft nylon brush or another suitable cleaning method and consider the tool’s finish before using abrasives.
How do I know whether a loose joint is worn out?
If excessive movement remains after appropriate cleaning and adjustment, and you can see worn surfaces, damaged threads, deep pitting, or material loss, the mechanism may be beyond simple maintenance.
Can I repair a riveted tool joint myself?
Some traditional tools can be professionally repaired, but blindly striking or modifying a riveted pivot can damage the tool. Follow the manufacturer’s repair guidance or seek appropriate professional service.
When should I replace a tool with a loose joint?
Consider replacement when the joint no longer maintains proper alignment, structural integrity is compromised, working surfaces are affected, repair parts are unavailable, or you cannot confidently restore reliable operation.
